Install Field Replaceable Units (FRUs)
Remove and Install an Interface Processor, Filler, VIP, or RSP
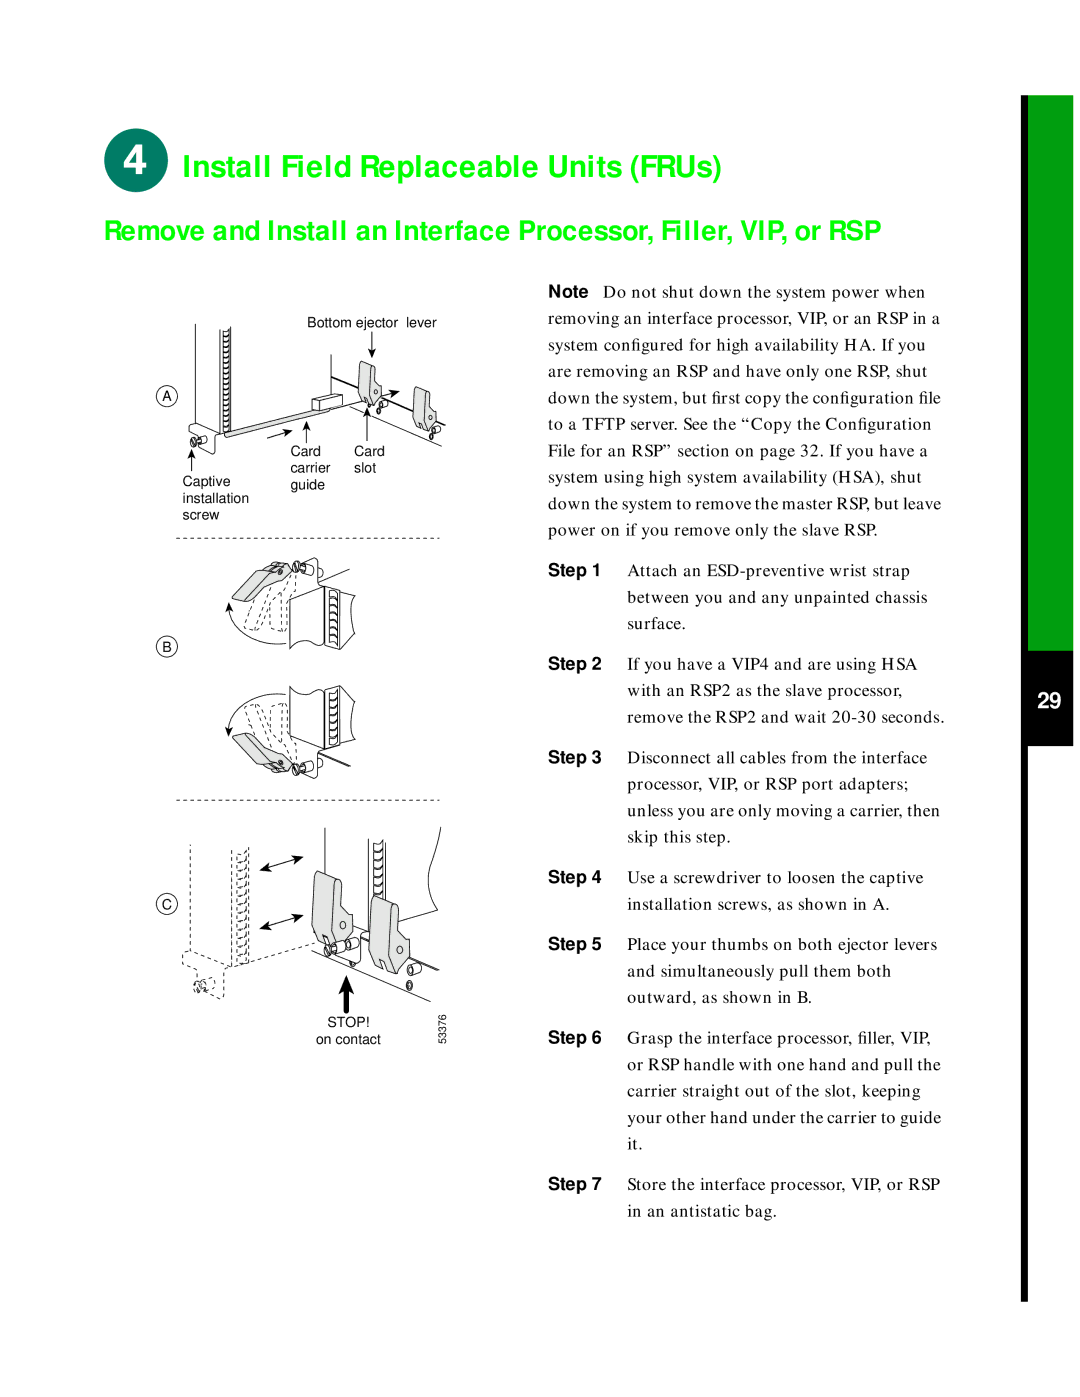
Bottom ejector lever
A
Card Card
carrier slot
Captive guide installation
screw
B
C
on contact | 53376 |
STOP! |
|
Note Do not shut down the system power when removing an interface processor, VIP, or an RSP in a system configured for high availability HA. If you are removing an RSP and have only one RSP, shut down the system, but first copy the configuration file to a TFTP server. See the “Copy the Configuration File for an RSP” section on page 32. If you have a system using high system availability (HSA), shut down the system to remove the master RSP, but leave power on if you remove only the slave RSP.
Step 1 Attach an
Step 2 If you have a VIP4 and are using HSA with an RSP2 as the slave processor, remove the RSP2 and wait
Step 3 Disconnect all cables from the interface processor, VIP, or RSP port adapters; unless you are only moving a carrier, then skip this step.
Step 4 Use a screwdriver to loosen the captive installation screws, as shown in A.
Step 5 Place your thumbs on both ejector levers and simultaneously pull them both outward, as shown in B.
Step 6 Grasp the interface processor, filler, VIP, or RSP handle with one hand and pull the carrier straight out of the slot, keeping your other hand under the carrier to guide it.
29
Step 7 Store the interface processor, VIP, or RSP in an antistatic bag.