Step 6 To install the Cisco ASR 1004 Router in an equipment rack, see
Note If you install cable management brackets, make certain that the chassis is mounted in the equipment rack first.
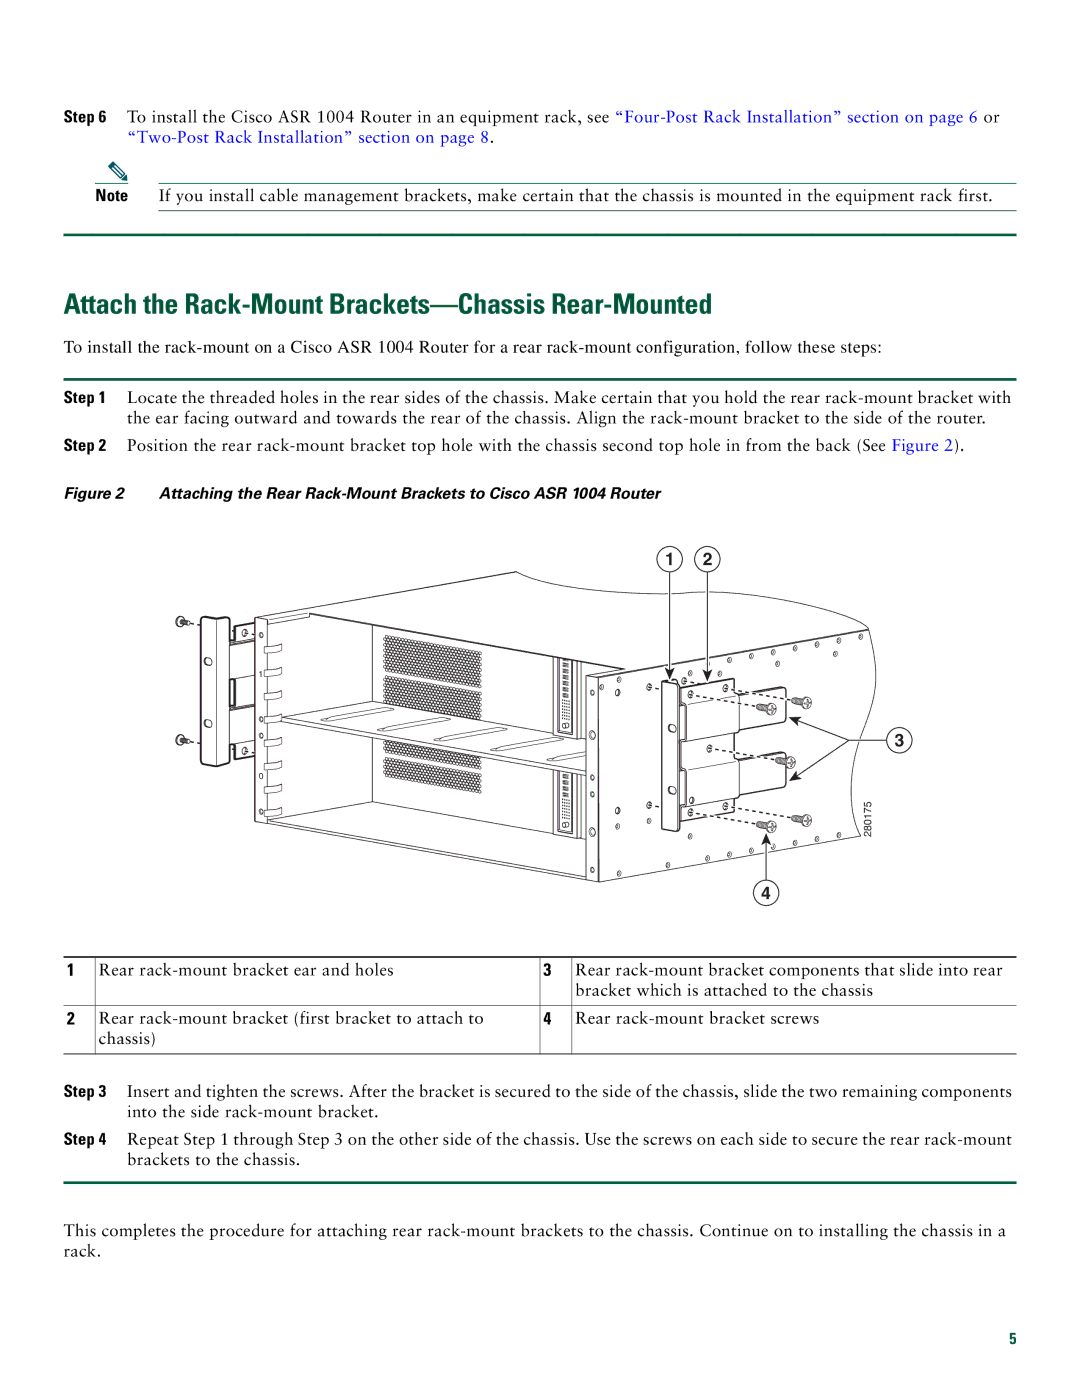
Attach the Rack-Mount Brackets—Chassis Rear-Mounted
To install the
Step 1 Locate the threaded holes in the rear sides of the chassis. Make certain that you hold the rear
Step 2 Position the rear
Figure 2 Attaching the Rear Rack-Mount Brackets to Cisco ASR 1004 Router
1 2
1![]()
|
|
| 3 |
| 0 |
|
|
|
|
| 280175 |
|
|
| 4 |
1 | Rear | 3 | Rear |
|
|
| bracket which is attached to the chassis |
2 | Rear | 4 | Rear |
| chassis) |
|
|
Step 3 Insert and tighten the screws. After the bracket is secured to the side of the chassis, slide the two remaining components into the side
Step 4 Repeat Step 1 through Step 3 on the other side of the chassis. Use the screws on each side to secure the rear
This completes the procedure for attaching rear
5