Prepare for Rack-Mount Installation

Before you begin the rack-mounting tasks:

Decide whether or not you want to front- mount or rear-mount the chassis

Decide whether or not you want to attach cable-management brackets to your chassis.

Note If you install cable management brackets, make certain that you use the specified rack-mount ear holes as stated in the procedure.

Decide if a two-post or four-post rack-mount will be used

3Rack-Mount the Router

This section provides information for rack-mounting the router.

Attach the Rack-Mount Brackets—Chassis Front-Mounted

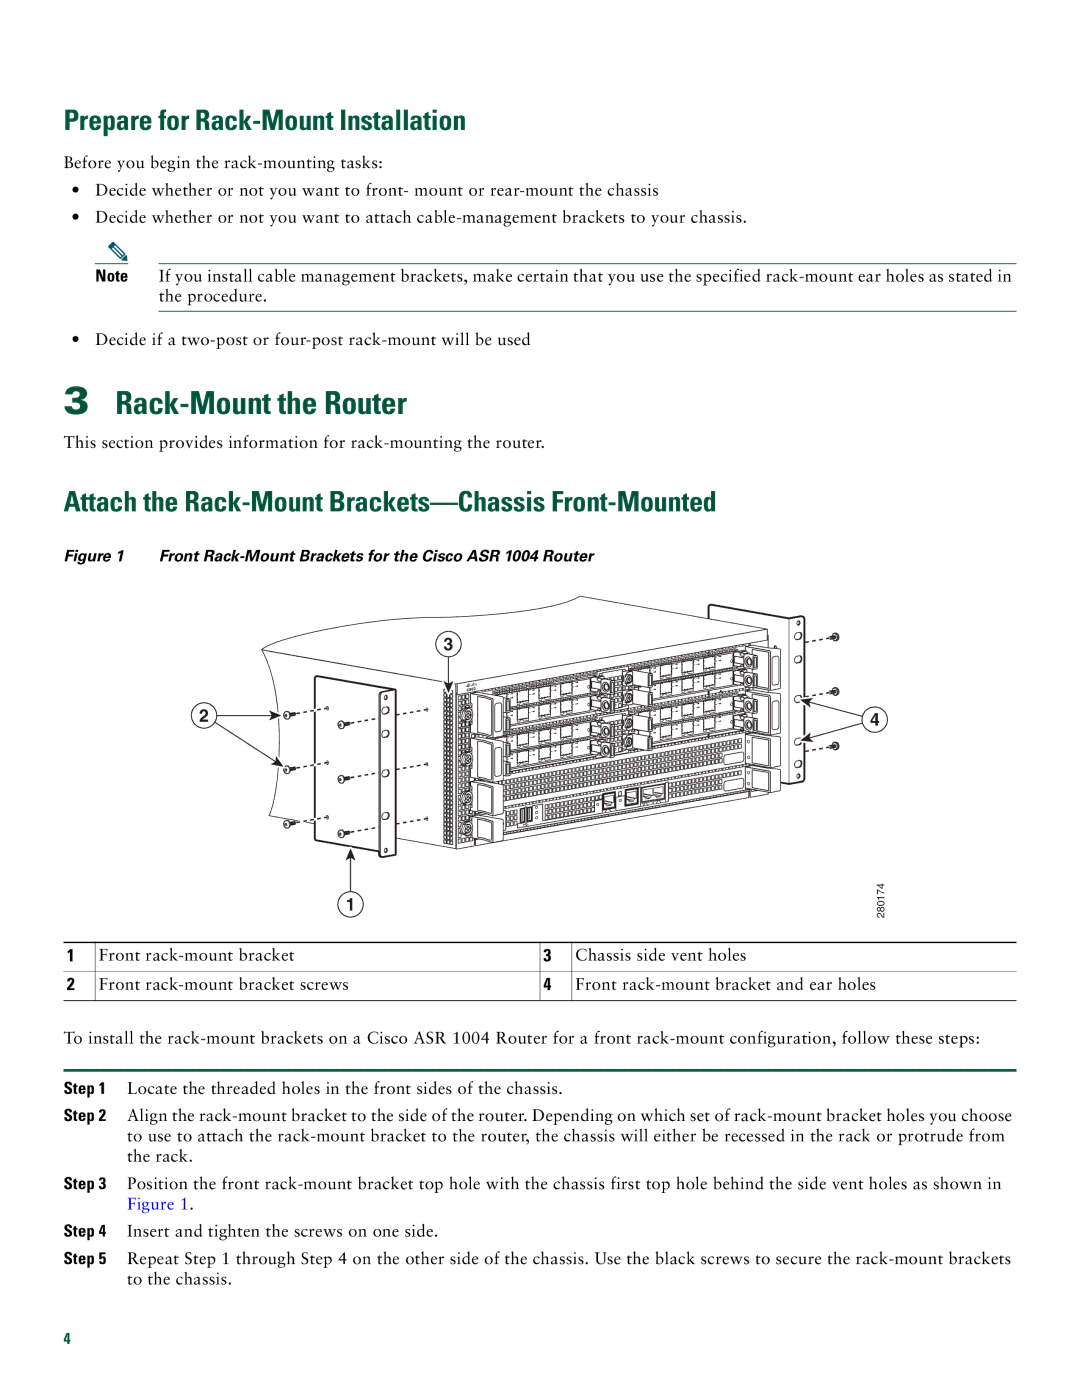
Figure 1 Front Rack-Mount Brackets for the Cisco ASR 1004 Router

3

2

1

4

280174

1

Front rack-mount bracket

3

Chassis side vent holes


2

Front rack-mount bracket screws

4

Front rack-mount bracket and ear holes


To install the rack-mount brackets on a Cisco ASR 1004 Router for a front rack-mount configuration, follow these steps:

Step 1 Locate the threaded holes in the front sides of the chassis.

Step 2 Align the rack-mount bracket to the side of the router. Depending on which set of rack-mount bracket holes you choose to use to attach the rack-mount bracket to the router, the chassis will either be recessed in the rack or protrude from the rack.

Step 3 Position the front rack-mount bracket top hole with the chassis first top hole behind the side vent holes as shown in Figure 1.

Step 4 Insert and tighten the screws on one side.

Step 5 Repeat Step 1 through Step 4 on the other side of the chassis. Use the black screws to secure the rack-mount brackets to the chassis.

4

Page 4
Image 4
Cisco Systems ASR 1004 quick start Rack-Mount the Router, Prepare for Rack-Mount Installation