Four-Post Rack Installation
This section describes the types of racks used for
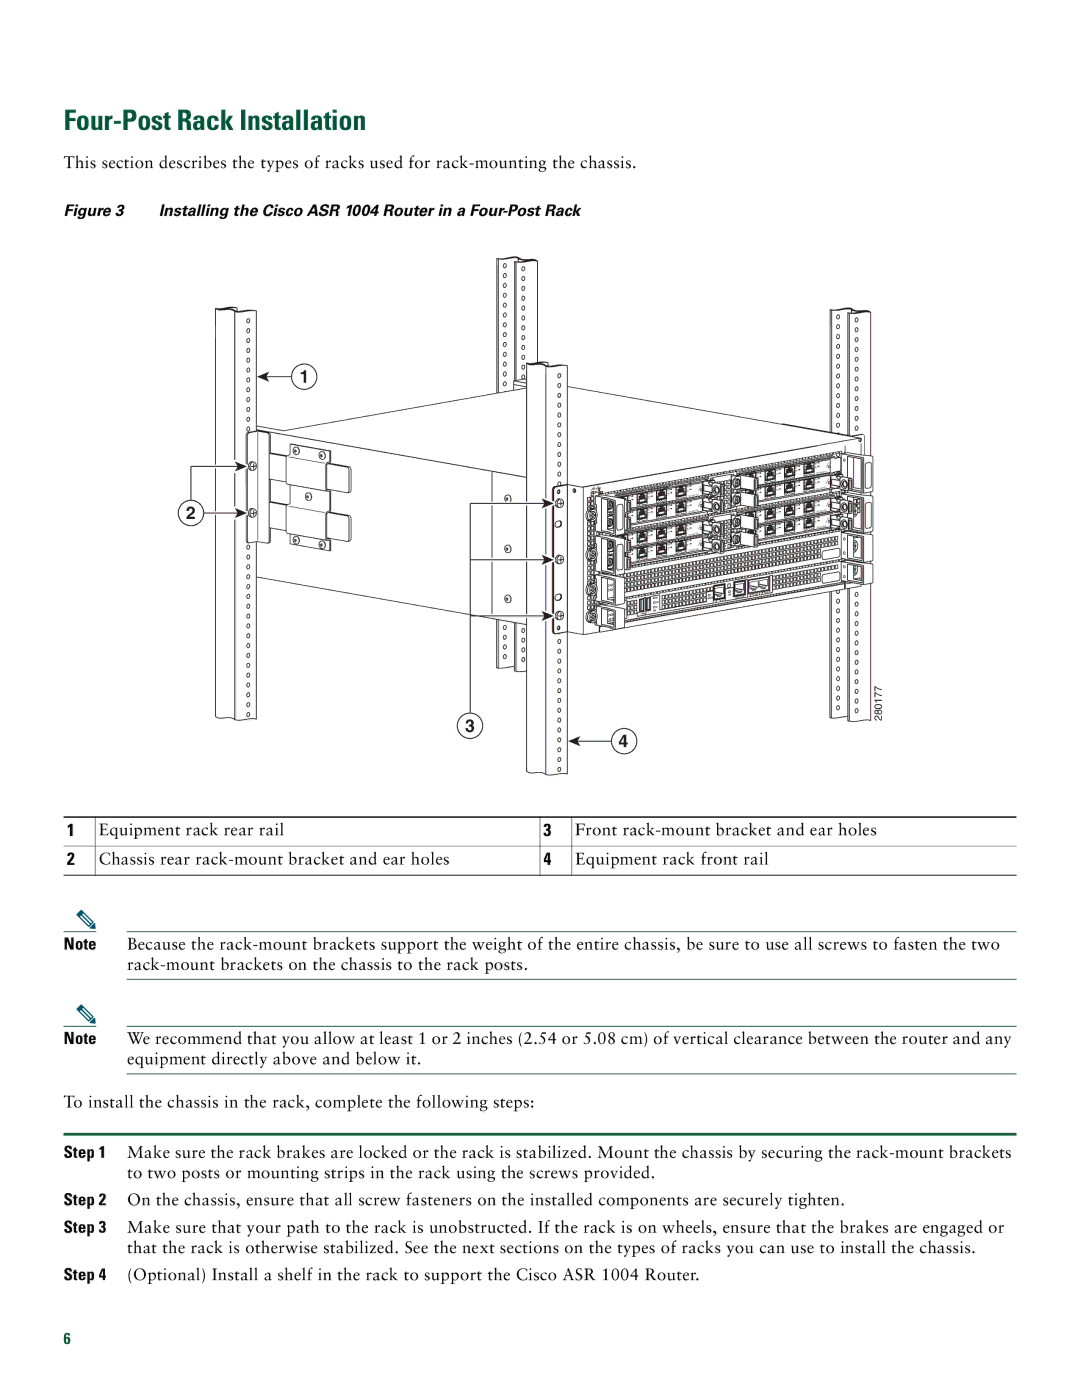
Figure 3 Installing the Cisco ASR 1004 Router in a Four-Post Rack
1
2
3
| |
| 3 |
| 2 |
| 1 |
| 0 |
| |
| 3 |
2 | |
3 | 1 |
2 | 0 |
1 |
|
0 | |
3 | 3 |
2 | 2 |
1 | 1 |
0 | 0 |
| |
| 3 |
2 | |
3 | 1 |
2 | 0 |
1 |
|
0 |
|
| |
3 |
|
2 |
|
1 |
|
0 |
|
|
|
|
|
|
|
| LINK | AUX |
|
|
|
|
|
|
| CON | |
|
|
|
| HD | CARRIE | R | BITS | MGMT ETHERNET |
|
|
|
| USB |
|
| ||
|
| CRIT |
|
|
|
|
| |
| ACTV | MAJ |
| DF |
|
|
|
|
PWR |
|
| DISK |
|
|
|
| |
STAT | STBY | MIN | 0 | 1 |
|
|
|
|
|
|
|
|
|
|
| ||
|
|
|
|
|
|
| ||
280177
4
1 | Equipment rack rear rail | 3 | Front |
|
|
|
|
2 | Chassis rear | 4 | Equipment rack front rail |
|
|
|
|
Note Because the
Note We recommend that you allow at least 1 or 2 inches (2.54 or 5.08 cm) of vertical clearance between the router and any equipment directly above and below it.
To install the chassis in the rack, complete the following steps:
Step 1 Make sure the rack brakes are locked or the rack is stabilized. Mount the chassis by securing the
Step 2 On the chassis, ensure that all screw fasteners on the installed components are securely tighten.
Step 3 Make sure that your path to the rack is unobstructed. If the rack is on wheels, ensure that the brakes are engaged or that the rack is otherwise stabilized. See the next sections on the types of racks you can use to install the chassis.
Step 4 (Optional) Install a shelf in the rack to support the Cisco ASR 1004 Router.
6