Contents
Cisco Video Surveillance 2600 IP Camera User Guide
Americas Headquarters
Cisco Video Surveillance 2600 IP Camera User Guide
Overview
Organization
Preface Cisco Video Surveillance 2600 IP Camera User Guide
N T E N T S
Iii
Using the IP Camera with Cisco VSM A-1
Features
Features, IP Camera Overview,
IP Camera Overview
Physical Details
Basic Setup Window section on
Back Focus on the IP Camera section on
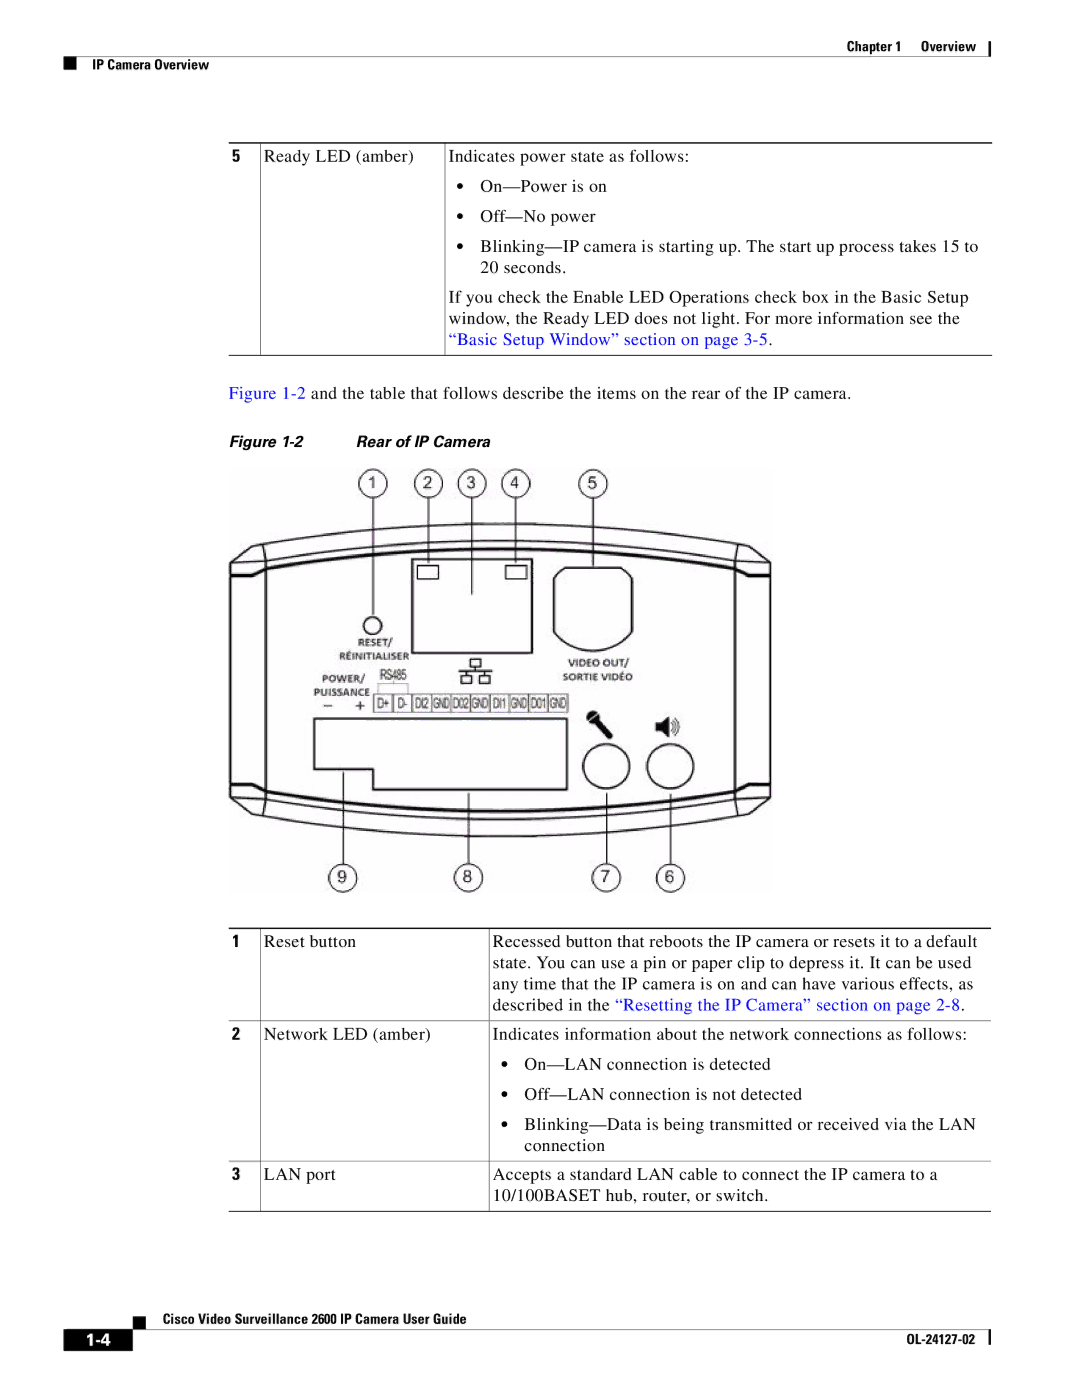
Described in the Resetting the IP Camera section on
Rear of IP Camera
Side of IP Camera
DC Auto Iris Lens Connector Pinouts
Package Contents
Installing the Cisco Video Surveillance IP Camera
Getting Started
Action Explanation
Action Explanation
Performing the Initial Setup of the IP Camera
Procedure
Protocol//ipaddress
Accessing the IP Camera Windows
Https//192.168.0.100
Http//203.70.212.52
Adjusting Back Focus on the IP Camera
Https//203.70.212.521024
Http//203.70.212.521024
Reset Type Procedure Remarks
Powering the IP Camera On or Off
Resetting the IP Camera
Initial Setup of the IP Camera
Cleaning the IP Camera
OL-24127-02
Configuring and Managing the IP Camera
Configuration Overview
Configuration Item Explanation Guidelines for Use Reference
See the Audio Window section
See the Alarm I/O Ports
Preset Positions
See the Privacy Region
See the Syslog & Log Window
Navigating the Configuration Windows
See the Video Log Window
Setup Windows
Basic Setup Window
Device Settings
Option Description
Advanced Setup Window
Network Settings
Option
Bonjour
Option Description
IP Filter Window
QoS
EAP-TLS Options
Eapol Window
EAP-FAST Options
Users Window, Maintenance Window, Firmware Window,
Administration Windows
Users Window
Administrator
User List
Maintenance Window
Firmware Window
Video Window
Audio/Video Windows
Video Window, Audio Window, Privacy Region Window,
Dual Streams MPEG-4 + Mjpeg -Configures MPEG-4 for
Settings
MPEG-4 Settings
Mjpeg Settings
Resolution Choose the resolution of the Mjpeg video stream
Video Adjustment
PAL/50 Hz
Options
Day/Night Vision
Option Description
Audio Window
Choose Simplex Talk Only , Half Duplex Talk or Listen , or
Privacy Region Window
Duplex Talk and Listen
Full Duplex Talk and Listen
Product Process Window
Security Windows
Initialization Window
Complexity Window
Users Window section on
Applications Windows
Mail & FTP Window
Primary Smtp Server
Described in the Basic Setup Window section on
Mail Setup
Secondary Smtp Server
Primary FTP
Motion Detection Window
Mail Body
Secondary FTP
Event Window
Clear button
Event Schedule
New Schedule
Trigger Event
Messages, see the Mail & FTP Window section on
Attachment
Snmp Window
Alarm Output Settings
Alarm I/O Ports Window
Alarm Input Settings
Manual Control Settings
Preset Position
Port Settings
PTZ RS-485 Window
Zoom In button
Preset Positions Window
Patrol Sequence
Zoom Out button
Focus Far button
Focus Near button
Status Windows
Information, see the Basic Setup Window section on
More information, see the Basic Setup Window section on
System Window
Audio Setting
Audio/Video Window
Network Window
Syslog & Log Window
Local Log
Sys Log Server
Message Explanation
Log List
System log messages
Syslog and Log Information
Address
Address1 Port1 Address2 Port2 , User
FTP log messages
Video Log Window
Smtp log messages
Delete button
Delete All button
OL-24127-02
Viewing Video through the Home Window Overview
Home Window Overview
Home Window
Digital zoom controls
Home Window Controls
Control Description
Audio controls
IP camera controls
Snapshot controls
Save
For related information, see the Video Window section on
PTZ RS-485 Window section on
Information, see the PTZ RS-485 Window section on
Viewing Video through Third-Party Devices or Software
Accessing the Primary MPEG-4 Stream
Accessing the Primary H.264 Stream
Accessing Secondary H.264 Stream
Accessing Dual MPEG-4 Streams
Accessing Dual Streams H.264 + Mjpeg
Accessing the Mjpeg Stream
Accessing Dual Streams MPEG-4 + Mjpeg
Troubleshooting
Troubleshooting
Using the IP Camera with Cisco VSM
For instructions, see the Video Window section on
OL-24127-02
D E
IN-1
IN-2
DSCP, for QoS Dual streaming
IN-3
Https
IN-4
Sdram
IN-5
Mjpeg
IN-6
See PTZ
IN-7
IN-8
IN-9
IN-10