Chapter 7 Controlling Lightweight Access Points
Configuring Country Codes
Note If an access point was already set to a higher legal power level or is configured manually, the power level is limited only by the particular country to which that access point is assigned.
You can configure country codes through the controller GUI or CLI.
Using the GUI to Configure Country Codes
Follow these steps to configure country codes using the GUI.
Step 1 Follow these steps to disable the 802.11a and 802.11b/g networks:
a.Click Wireless > 802.11a/n > Network.
b.Uncheck the 802.11a Network Status check box.
c.Click Apply to commit your changes.
d.Click Wireless > 802.11b/g/n > Network.
e.Uncheck the 802.11b/g Network Status check box.
f.Click Apply to commit your changes.
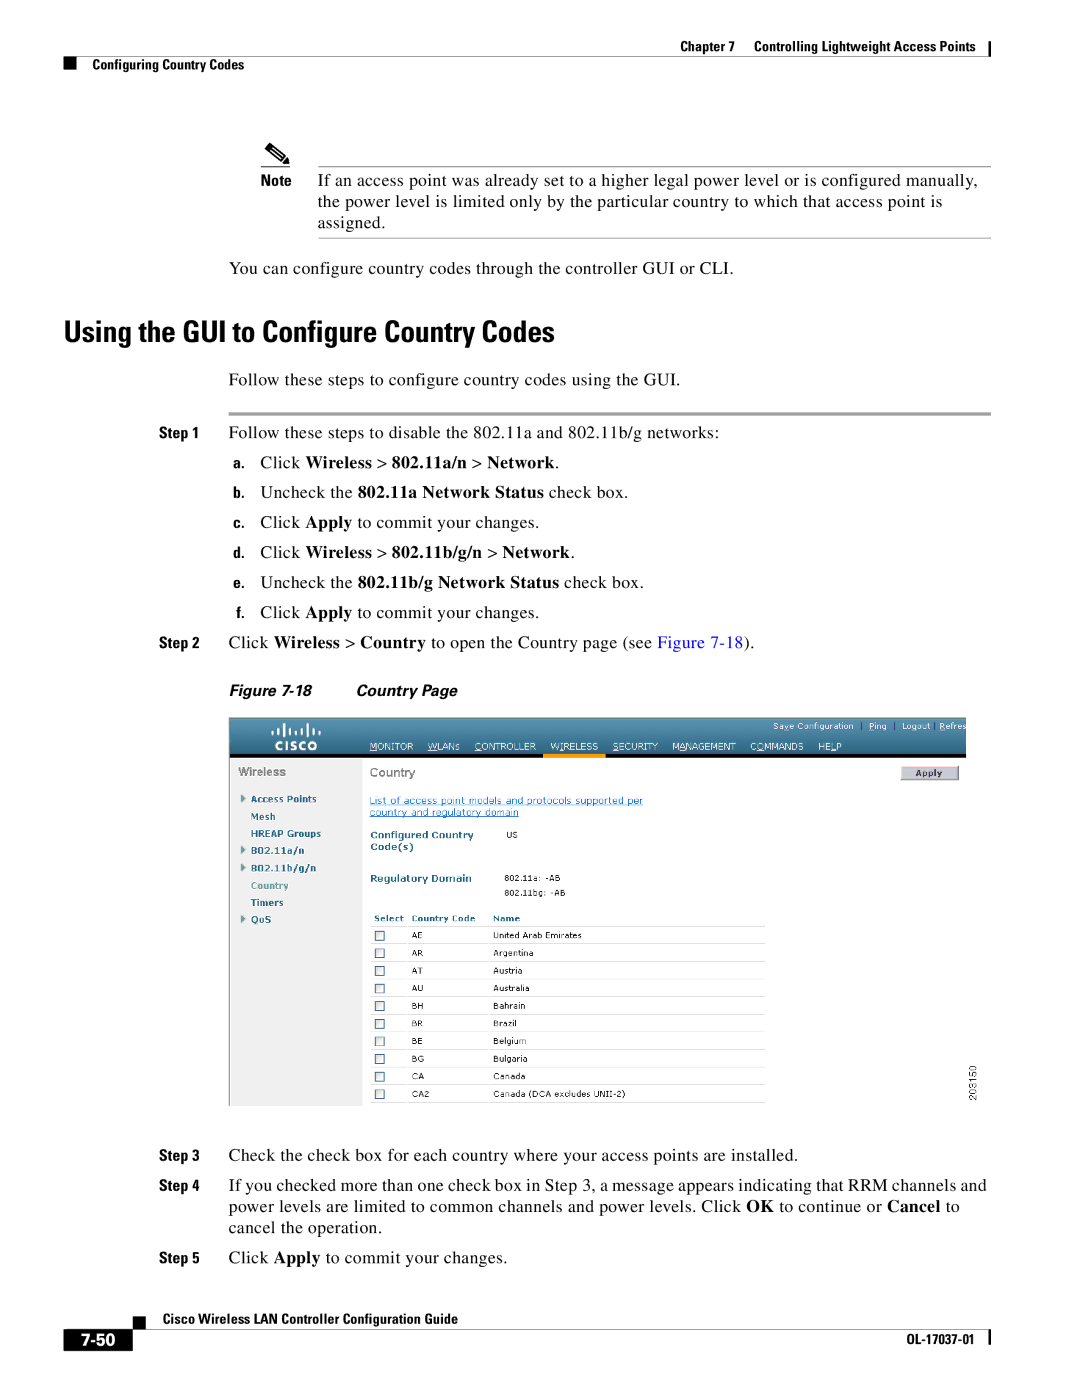
Step 2 Click Wireless > Country to open the Country page (see Figure
Figure | Country Page |
|
|
| Step 3 | Check the check box for each country where your access points are installed. | |
|
|
| Step 4 | If you checked more than one check box in Step 3, a message appears indicating that RRM channels and | |
|
|
|
| power levels are limited to common channels and power levels. Click OK to continue or Cancel to | |
|
|
|
| cancel the operation. | |
|
|
| Step 5 | Click Apply to commit your changes. | |
|
|
| Cisco Wireless LAN Controller Configuration Guide | ||
|
|
| |||
|
|
|
|
|
|
|
|
|
| ||
|
|
|
| ||