Chapter 7 Controlling Lightweight Access Points
Configuring Authentication for Access Points
Note If you choose to follow this suggested flow and enable 802.1X authentication on the switch port after the access point has joined the controller and received the configured 802.1X credentials, you do not need to enter this command.
Note This command is available only for access points that are running the 5.1 or 5.2 recovery image.
c.Connect the access point to the switch port.
2.Install the 5.1 or 5.2 image on the controller and reboot the controller.
3.Allow all access points to join the controller.
4.Configure authentication on the controller. See the “Using the GUI to Configure Authentication for Access Points” section on page
5.Configure the switch to allow authentication. See the “Configuring the Switch for Authentication” section on page
Using the GUI to Configure Authentication for Access Points
Using the controller GUI, follow these steps to configure authentication for access points that join the controller.
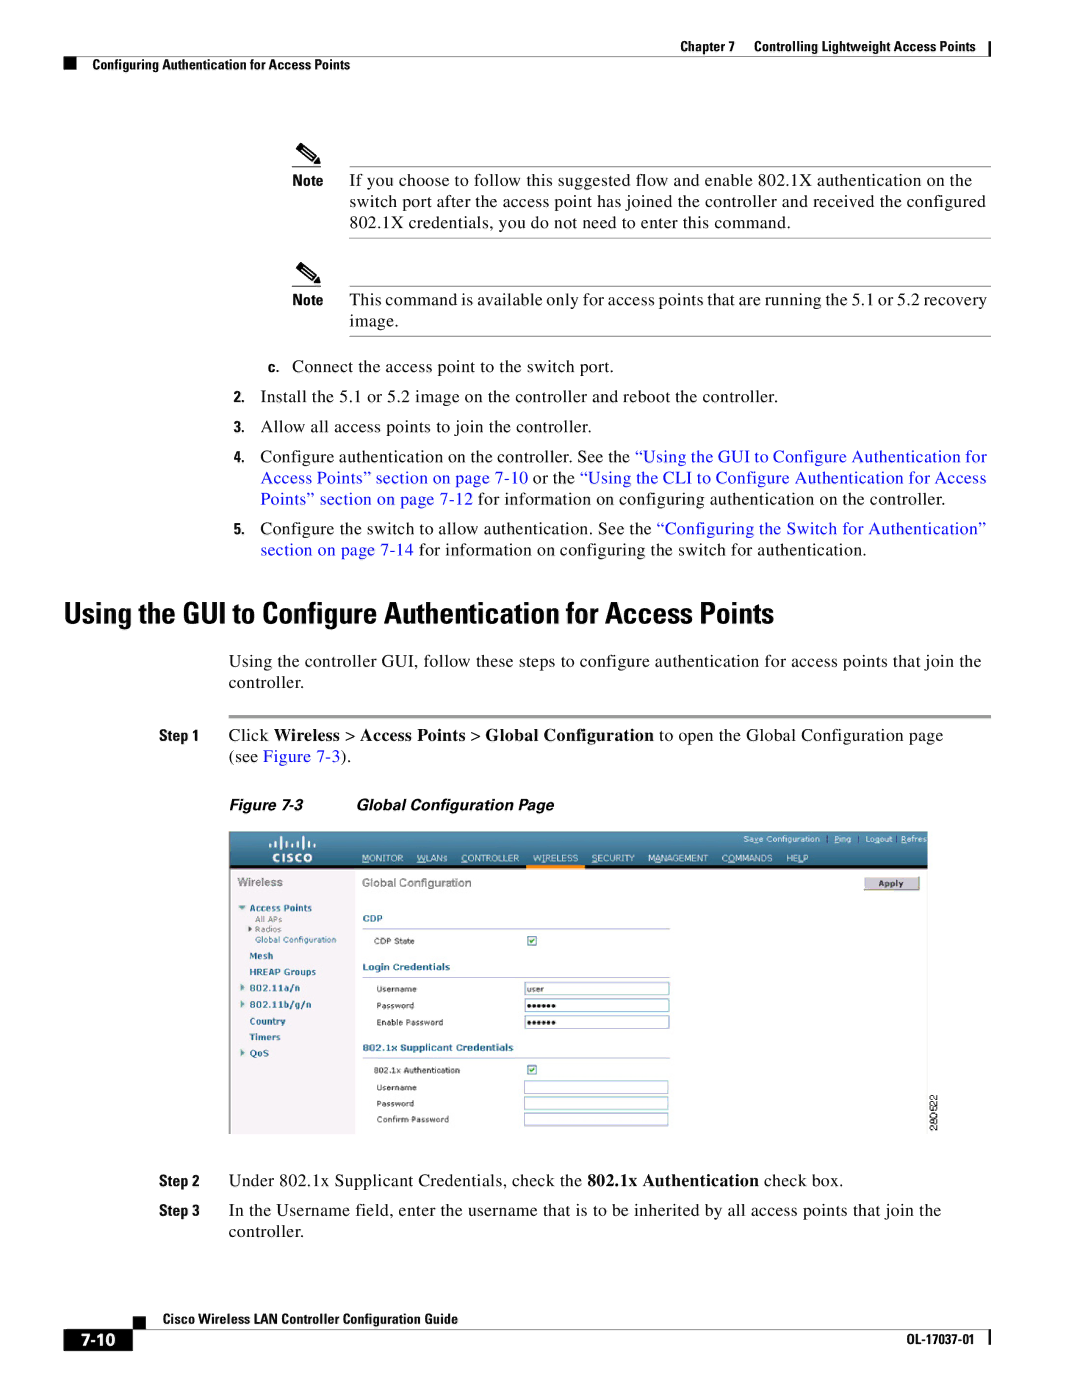
Step 1 Click Wireless > Access Points > Global Configuration to open the Global Configuration page (see Figure
Figure 7-3 Global Configuration Page
|
|
| Step 2 | Under 802.1x Supplicant Credentials, check the 802.1x Authentication check box. | |
|
|
| Step 3 | In the Username field, enter the username that is to be inherited by all access points that join the | |
|
|
|
| controller. | |
|
|
| Cisco Wireless LAN Controller Configuration Guide | ||
|
|
| |||
|
|
|
|
|
|
|
|
|
| ||
|
|
|
| ||
