Chapter 3 Paper and Ribbon
|
| 4 | Paper Setting |
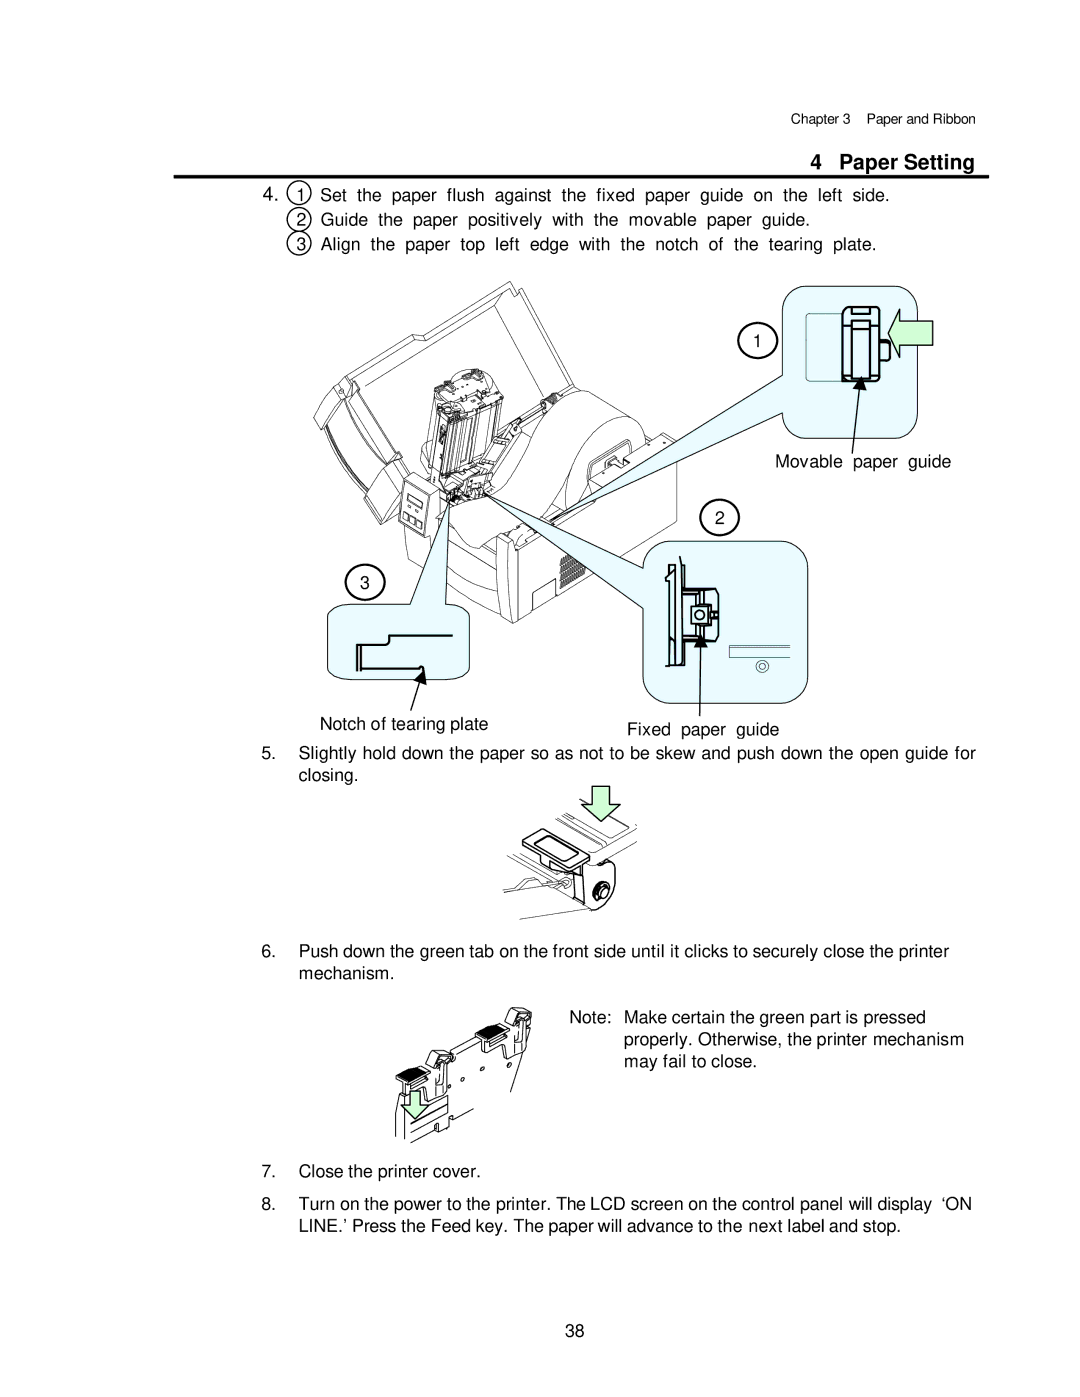
4. 1 | Set the paper flush | against the fixed paper guide on the left side. | |
2 | Guide the paper positively with the movable paper guide. |
| |
3 | Align the paper top | left edge with the notch of the tearing | plate. |
1
Notch of tearing plate | Fixed paper guide |
|
5. Slightly hold down the paper so as not to be skew and push down the open guide for closing.
6.Push down the green tab on the front side until it clicks to securely close the printer mechanism.
Note: Make certain the green part is pressed properly. Otherwise, the printer mechanism may fail to close.
7.Close the printer cover.
8.Turn on the power to the printer. The LCD screen on the control panel will display ‘ON LINE.’ Press the Feed key. The paper will advance to the next label and stop.
38
