Installing the Hardware 23
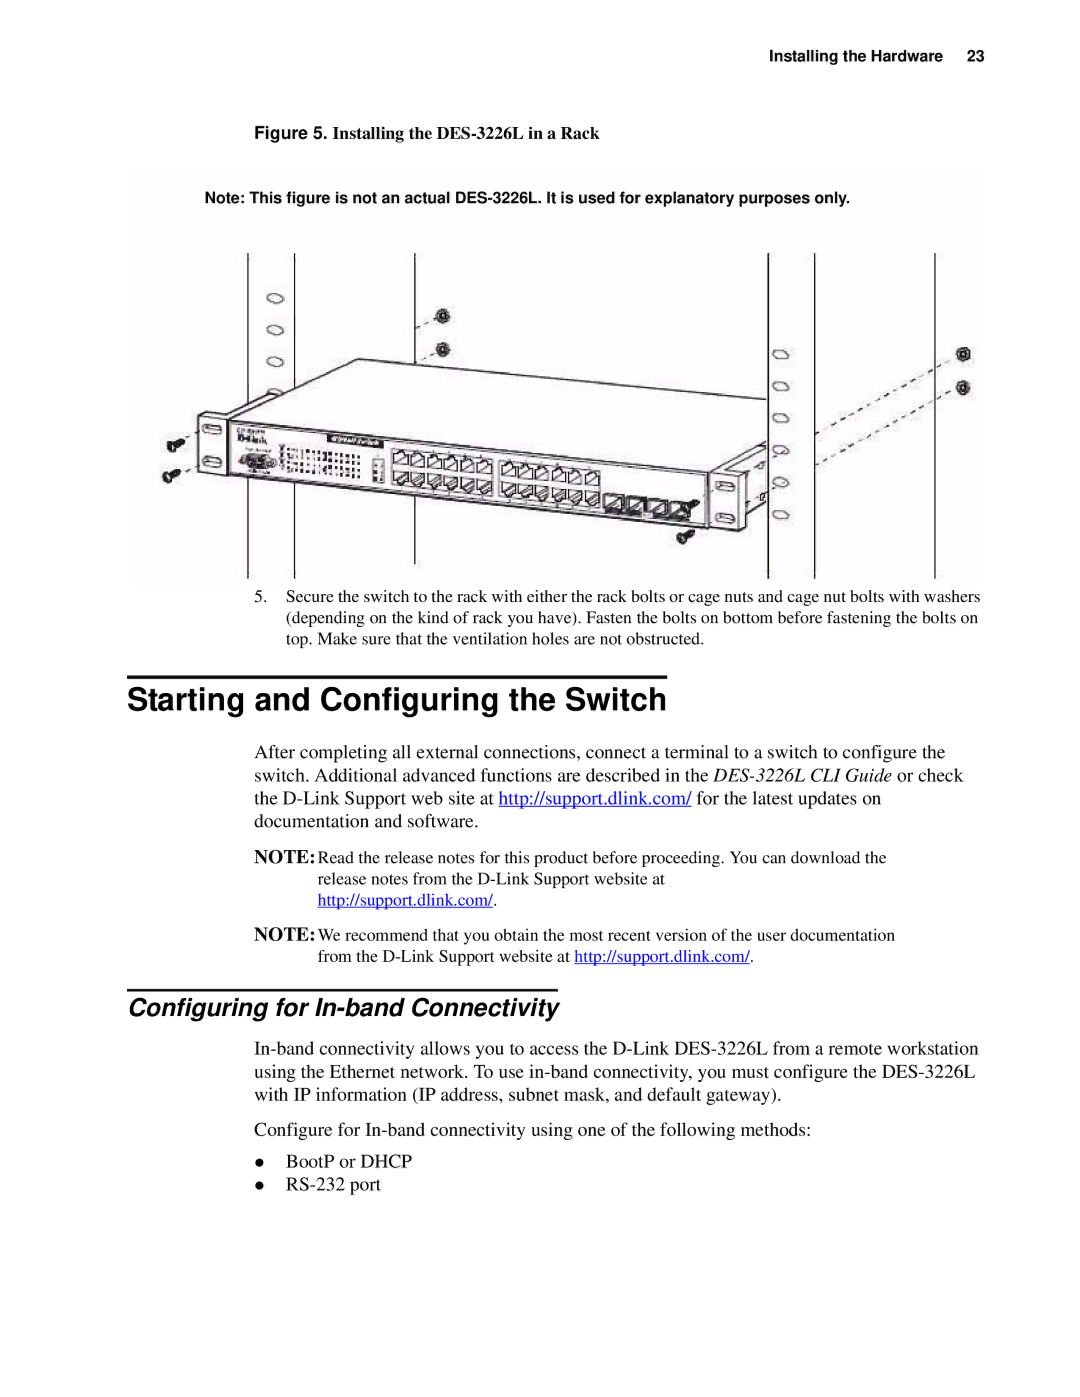
Figure 5. Installing the DES-3226L in a Rack
Note: This figure is not an actual
5.Secure the switch to the rack with either the rack bolts or cage nuts and cage nut bolts with washers (depending on the kind of rack you have). Fasten the bolts on bottom before fastening the bolts on top. Make sure that the ventilation holes are not obstructed.
Starting and Configuring the Switch
After completing all external connections, connect a terminal to a switch to configure the switch. Additional advanced functions are described in the
NOTE: Read the release notes for this product before proceeding. You can download the release notes from the
NOTE: We recommend that you obtain the most recent version of the user documentation from the
Configuring for In-band Connectivity
Configure for
zBootP or DHCP
z
