D-Link d-link manual Installing in a Rack, Attaching the Brackets

Models: d-link

1 110
Download 110 pages 19.08 Kb
Page 22
Image 22

22 Web User Guide

Installing in a Rack

The D-Link DES-3226L switch can be mounted in a standard 19” rack.

Caution:

CAUTION: Do not use rack mounting kits to suspend the switch from


under a table or desk or attach it to a wall.

Caution:

CAUTION: Disconnect all cables from the switch before continuing.


Remove all self-adhesive pads from the underside of the switch if they have been


attached.

Caution:

CAUTION: When mounting multiple switches into a rack, mount the


switches from the bottom up.

Caution:

CAUTION: Make sure that the supplied rack bolts fit the pre-threaded


holes in the rack.

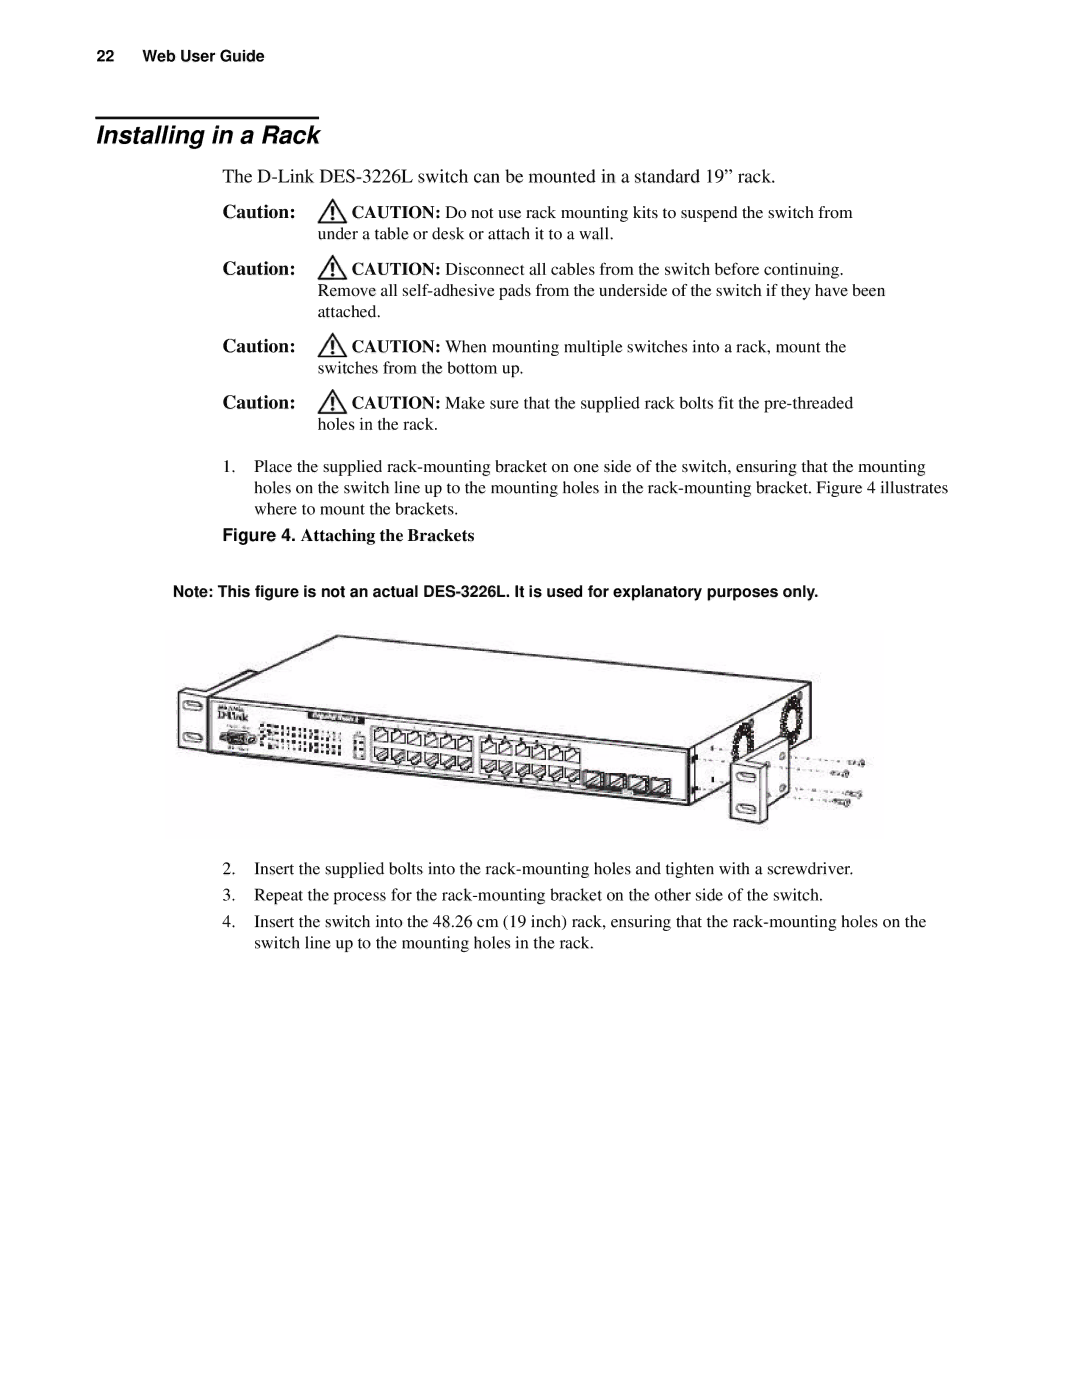
1.Place the supplied rack-mounting bracket on one side of the switch, ensuring that the mounting holes on the switch line up to the mounting holes in the rack-mounting bracket. Figure 4 illustrates where to mount the brackets.

Figure 4. Attaching the Brackets

Note: This figure is not an actual DES-3226L. It is used for explanatory purposes only.

2.Insert the supplied bolts into the rack-mounting holes and tighten with a screwdriver.

3.Repeat the process for the rack-mounting bracket on the other side of the switch.

4.Insert the switch into the 48.26 cm (19 inch) rack, ensuring that the rack-mounting holes on the switch line up to the mounting holes in the rack.

Page 22
Image 22
D-Link d-link manual Installing in a Rack, Attaching the Brackets