To replace the hard drive in the hard drive bay:
1Complete the instructions in "Before You Begin" on page 65.
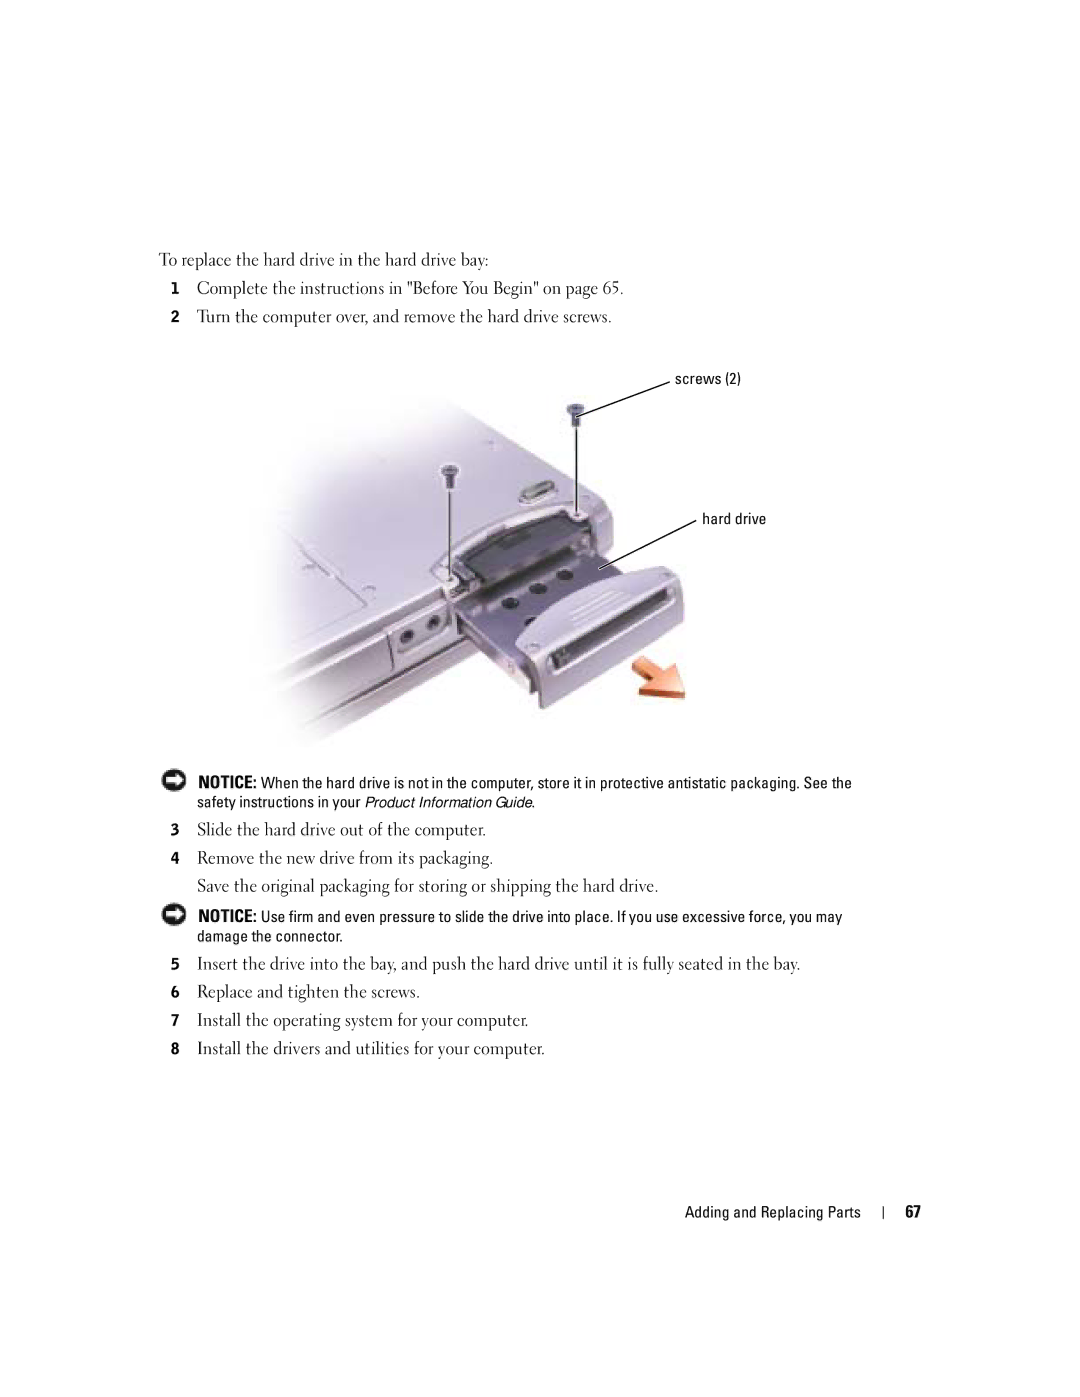
2Turn the computer over, and remove the hard drive screws.
screws (2)
 hard drive
NOTICE: When the hard drive is not in the computer, store it in protective antistatic packaging. See the safety instructions in your Product Information Guide.
3Slide the hard drive out of the computer.
4Remove the new drive from its packaging.
Save the original packaging for storing or shipping the hard drive.
NOTICE: Use firm and even pressure to slide the drive into place. If you use excessive force, you may damage the connector.
5Insert the drive into the bay, and push the hard drive until it is fully seated in the bay.
6Replace and tighten the screws.
7Install the operating system for your computer.
8Install the drivers and utilities for your computer.
Adding and Replacing Parts
67