w w w . d e l l . c o m s u p p o r t . d e l l . c o m
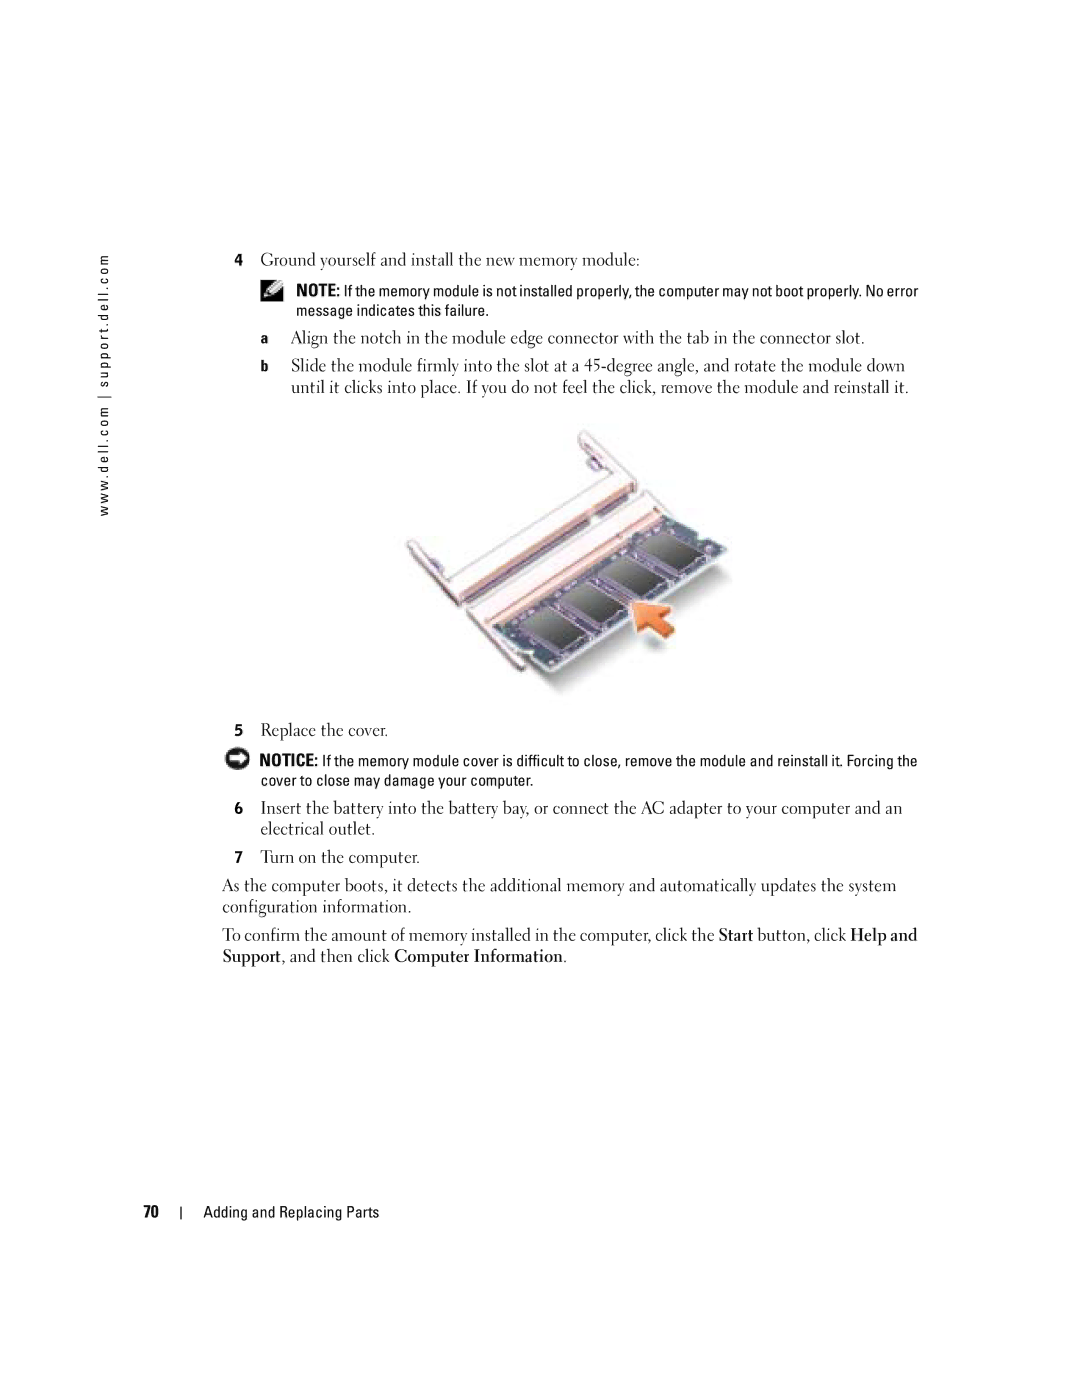
4Ground yourself and install the new memory module:
NOTE: If the memory module is not installed properly, the computer may not boot properly. No error message indicates this failure.
aAlign the notch in the module edge connector with the tab in the connector slot.
bSlide the module firmly into the slot at a
5Replace the cover.
NOTICE: If the memory module cover is difficult to close, remove the module and reinstall it. Forcing the cover to close may damage your computer.
6Insert the battery into the battery bay, or connect the AC adapter to your computer and an electrical outlet.
7Turn on the computer.
As the computer boots, it detects the additional memory and automatically updates the system configuration information.
To confirm the amount of memory installed in the computer, click the Start button, click Help and Support, and then click Computer Information.
70