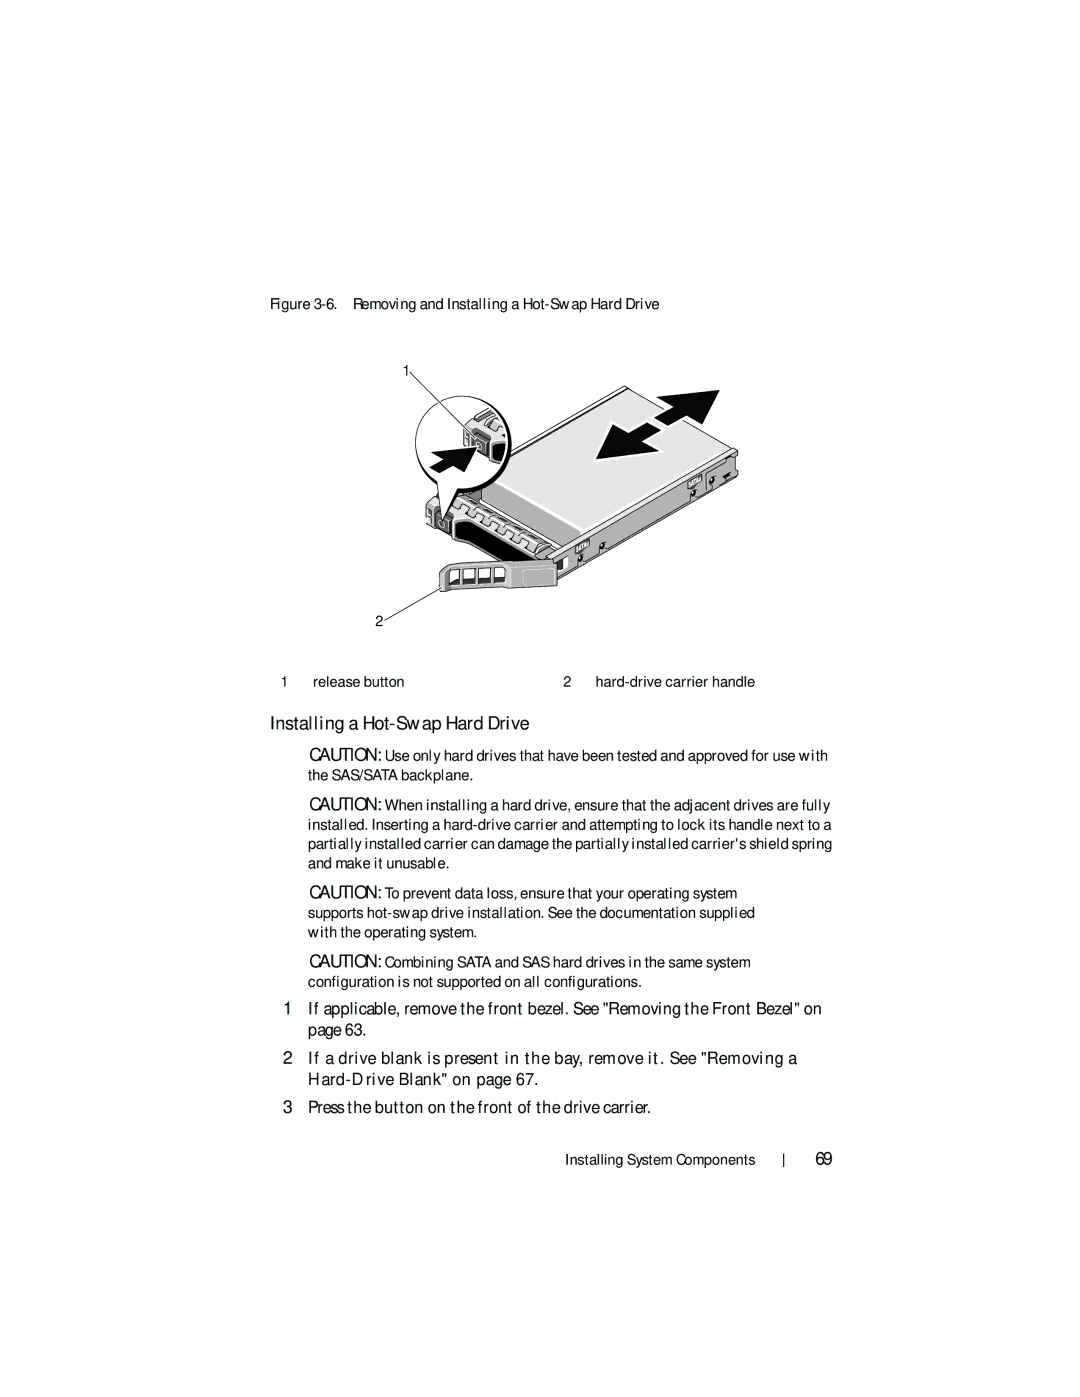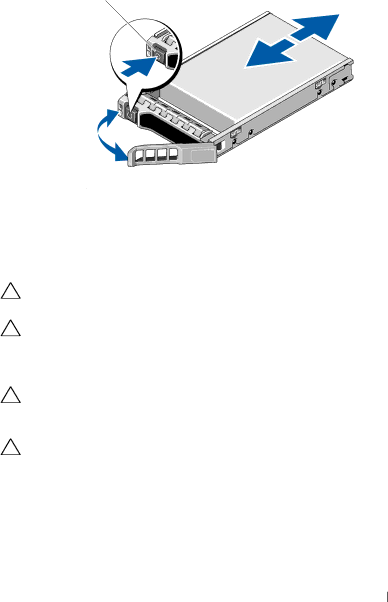
Figure 3-6. Removing and Installing a Hot-Swap Hard Drive
1
2 ![]()
1 | release button | 2 |
Installing a Hot-Swap Hard Drive
CAUTION: Use only hard drives that have been tested and approved for use with the SAS/SATA backplane.
CAUTION: When installing a hard drive, ensure that the adjacent drives are fully installed. Inserting a
CAUTION: To prevent data loss, ensure that your operating system supports
CAUTION: Combining SATA and SAS hard drives in the same system configuration is not supported on all configurations.
1If applicable, remove the front bezel. See "Removing the Front Bezel" on page 63.
2If a drive blank is present in the bay, remove it. See "Removing a
3Press the button on the front of the drive carrier.
Installing System Components
69