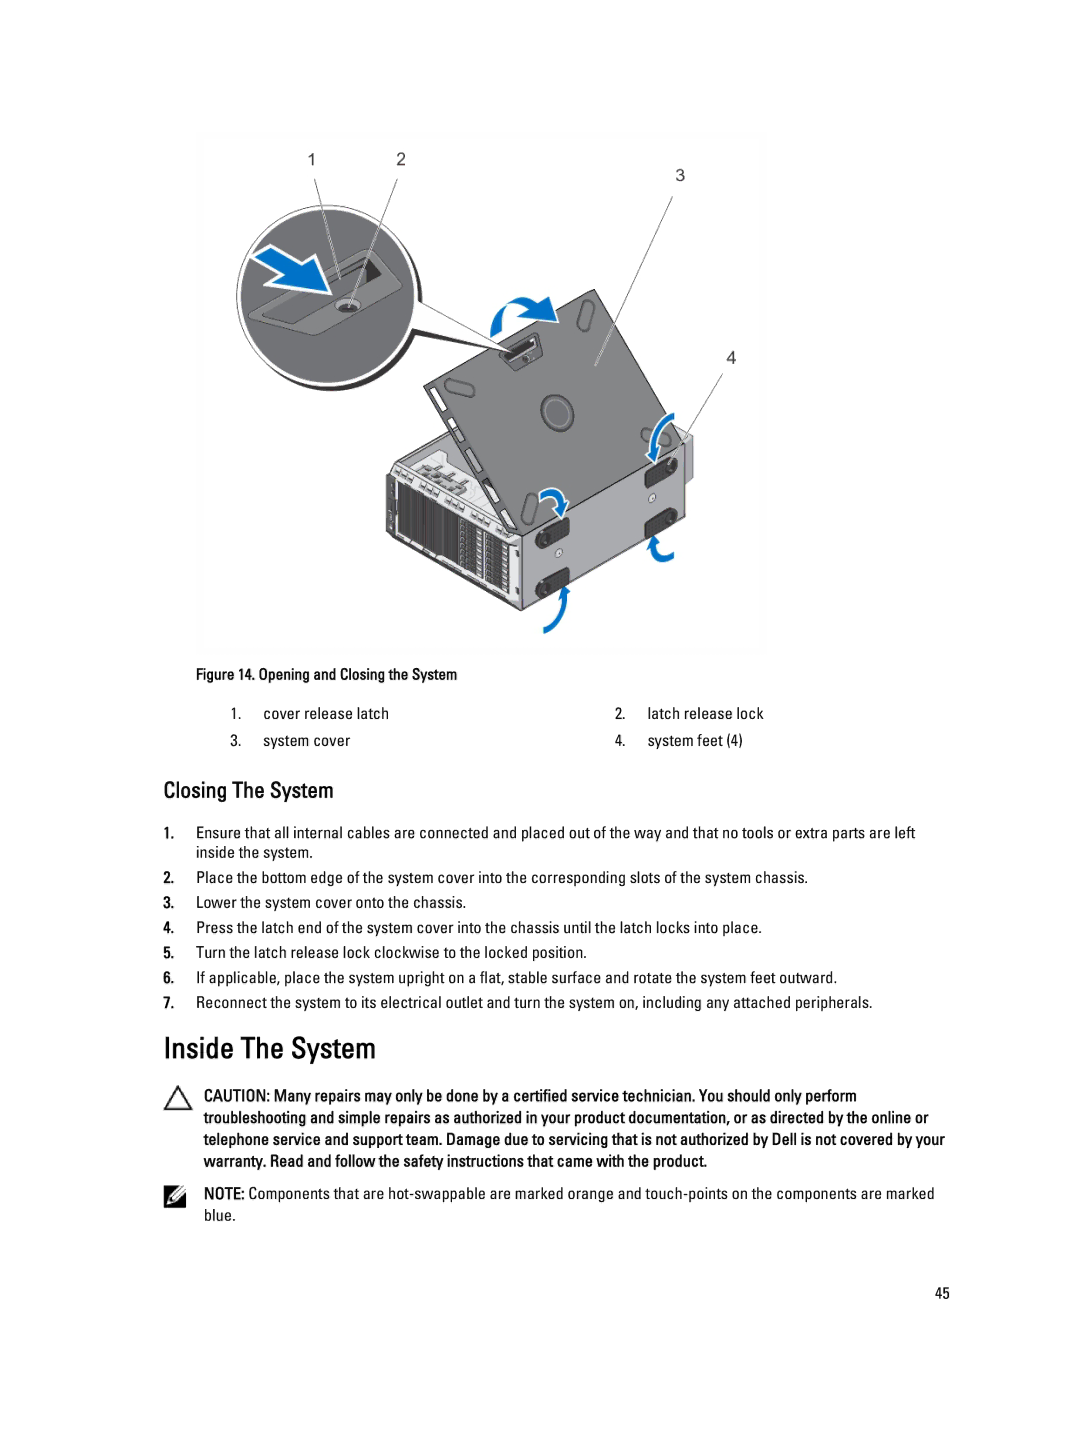
Figure 14. Opening and Closing the System |
|
| |
1. | cover release latch | 2. | latch release lock |
3. | system cover | 4. | system feet (4) |
Closing The System
1.Ensure that all internal cables are connected and placed out of the way and that no tools or extra parts are left inside the system.
2.Place the bottom edge of the system cover into the corresponding slots of the system chassis.
3.Lower the system cover onto the chassis.
4.Press the latch end of the system cover into the chassis until the latch locks into place.
5.Turn the latch release lock clockwise to the locked position.
6.If applicable, place the system upright on a flat, stable surface and rotate the system feet outward.
7.Reconnect the system to its electrical outlet and turn the system on, including any attached peripherals.
Inside The System
CAUTION: Many repairs may only be done by a certified service technician. You should only perform troubleshooting and simple repairs as authorized in your product documentation, or as directed by the online or telephone service and support team. Damage due to servicing that is not authorized by Dell is not covered by your warranty. Read and follow the safety instructions that came with the product.
NOTE: Components that are
45