CAUTION: Do not turn off or reboot your system while the hard drive is being formatted. Doing so can cause a hard drive failure.
NOTE: Use only hard drives that have been tested and approved for use with your system.
Removing The Internal Hard-Drive Bay
CAUTION: Many repairs may only be done by a certified service technician. You should only perform troubleshooting and simple repairs as authorized in your product documentation, or as directed by the online or telephone service and support team. Damage due to servicing that is not authorized by Dell is not covered by your warranty. Read and follow the safety instructions that came with the product.
1.Turn off the system, including any attached peripherals, and disconnect the system from the electrical outlet and peripherals.
2.If applicable, rotate the system feet inward and lay the system on its side on a flat, stable surface.
NOTE: For systems installed with the wheel assembly, ensure that you lay the system on a sturdy, stable surface with the wheel assembly extending off the edge of the surface.
3.Open the system.
4.Disconnect the data and power cable(s) from the hard drive(s).
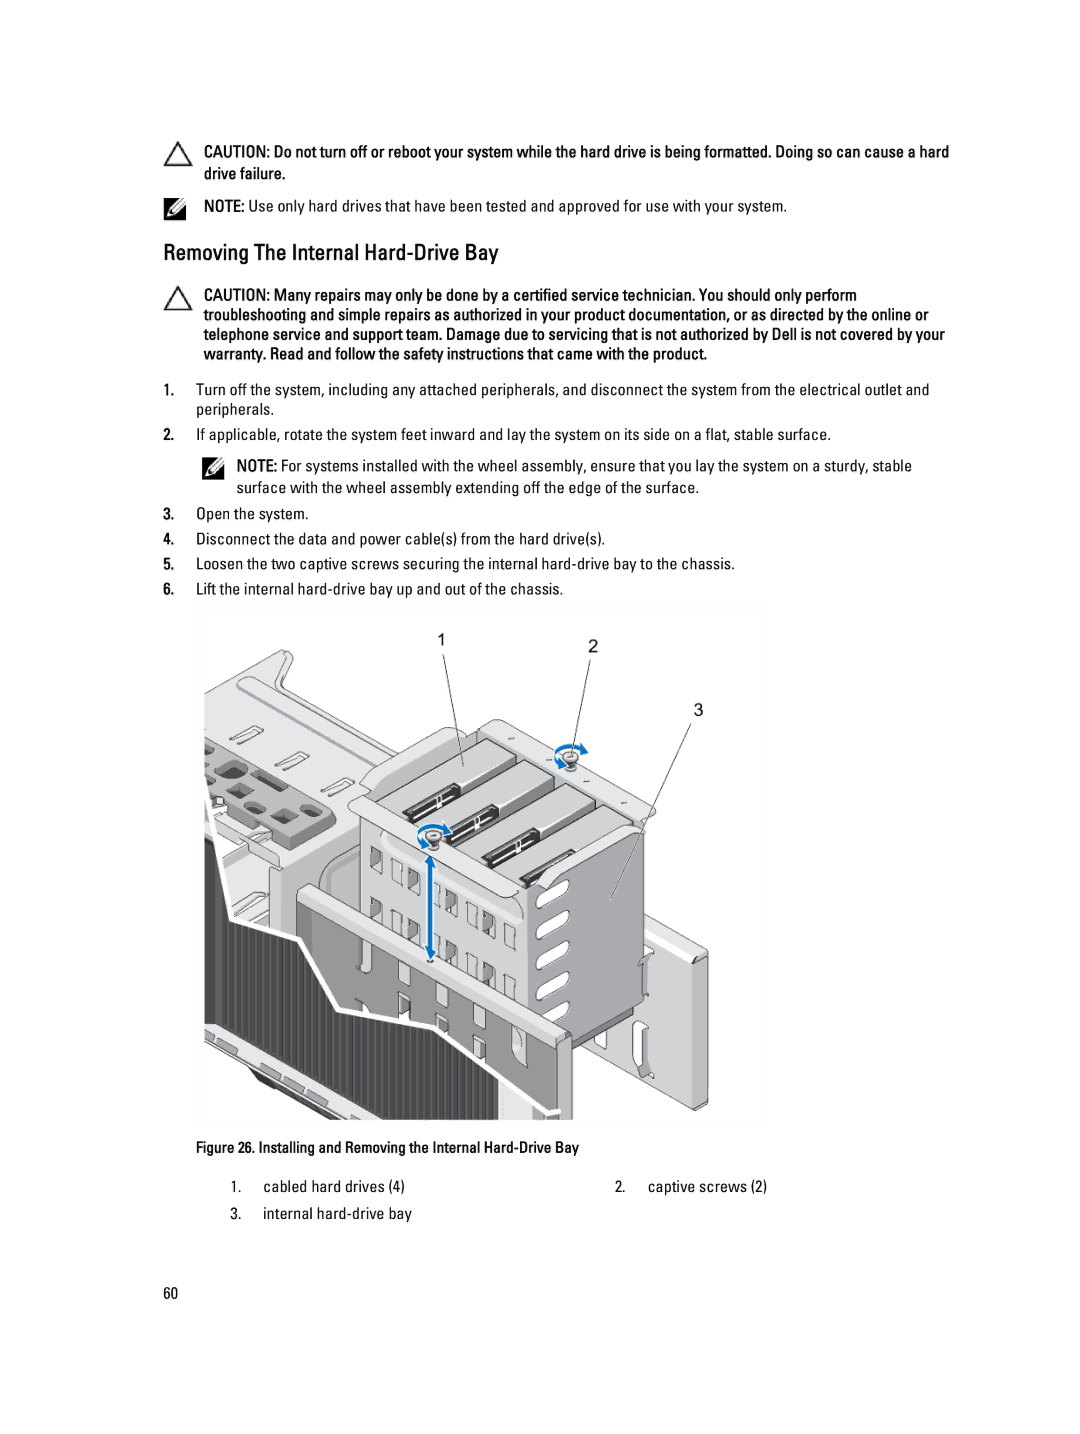
5.Loosen the two captive screws securing the internal
6.Lift the internal
Figure 26. Installing and Removing the Internal Hard-Drive Bay
1. cabled hard drives (4) | 2. captive screws (2) |
3.internal
60
