HINT
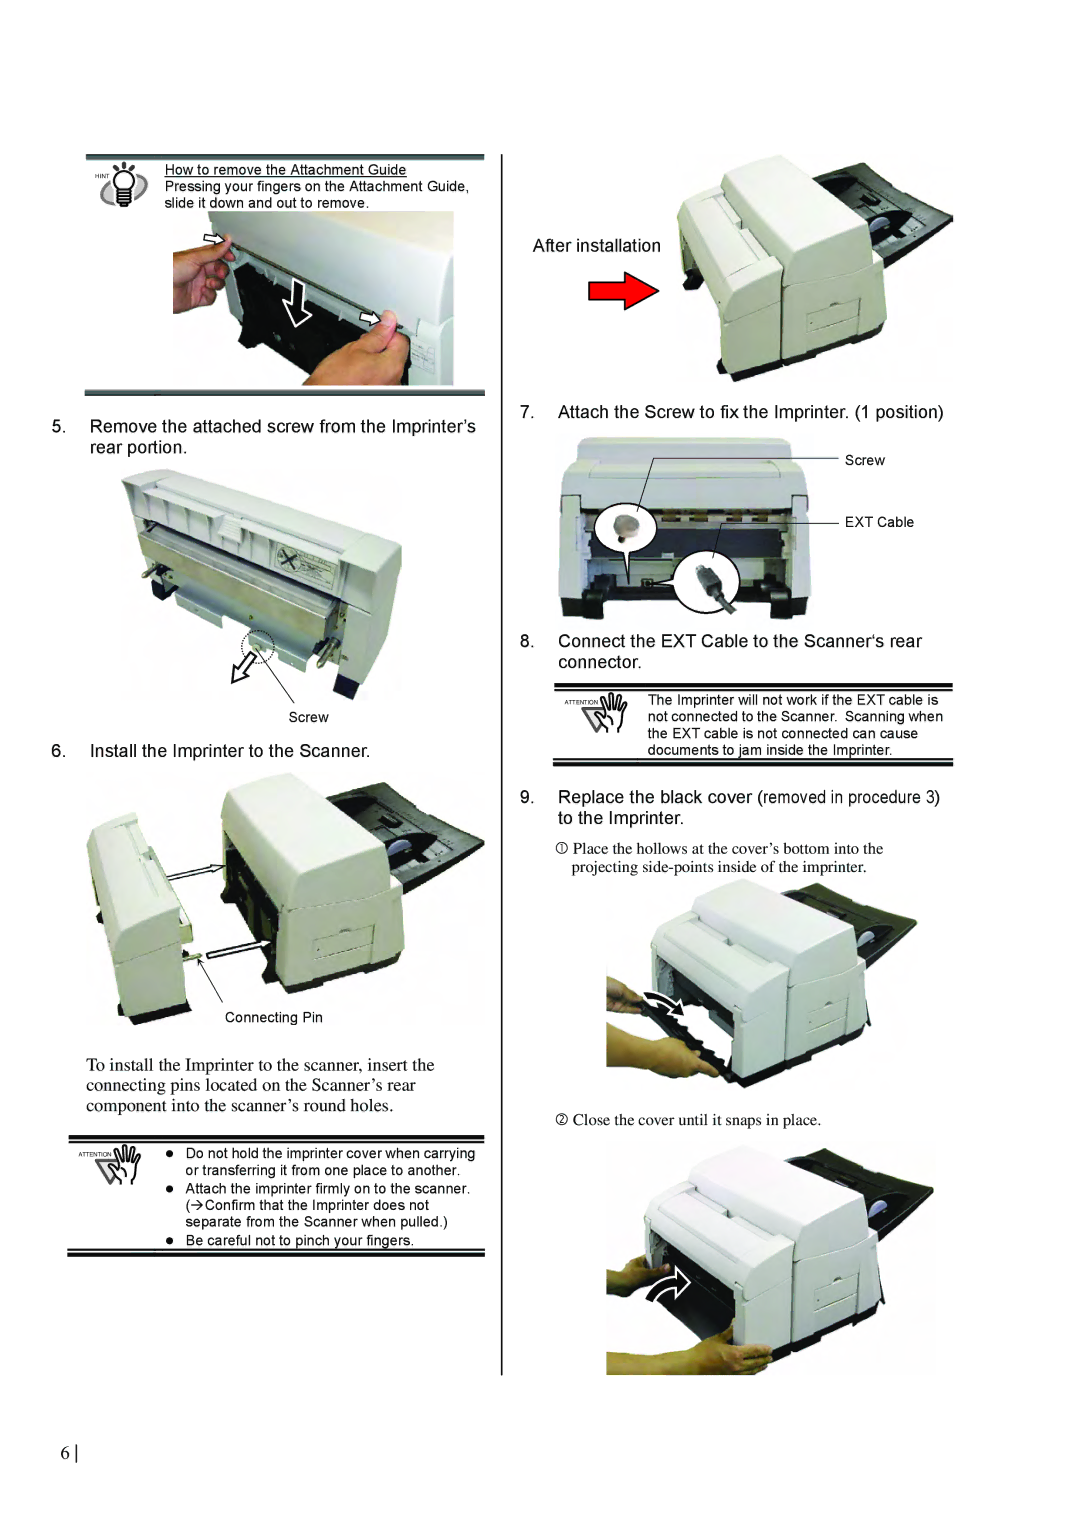
How to remove the Attachment Guide
Pressing your fingers on the Attachment Guide, slide it down and out to remove.
After installation
5.Remove the attached screw from the Imprinter’s rear portion.
Screw
6.Install the Imprinter to the Scanner.
Connecting Pin
To install the Imprinter to the scanner, insert the connecting pins located on the Scanner’s rear component into the scanner’s round holes.
ATTENTION | ● Do not hold the imprinter cover when carrying |
| or transferring it from one place to another. |
●Attach the imprinter firmly on to the scanner. (ÆConfirm that the Imprinter does not separate from the Scanner when pulled.)
●Be careful not to pinch your fingers.
7.Attach the Screw to fix the Imprinter. (1 position)
Screw
EXT Cable
8.Connect the EXT Cable to the Scanner‘s rear connector.
ATTENTION | The Imprinter will not work if the EXT cable is |
| not connected to the Scanner. Scanning when |
| the EXT cable is not connected can cause |
| documents to jam inside the Imprinter. |
9.Replace the black cover (removed in procedure 3) to the Imprinter.
cPlace the hollows at the cover’s bottom into the projecting
dClose the cover until it snaps in place.
6