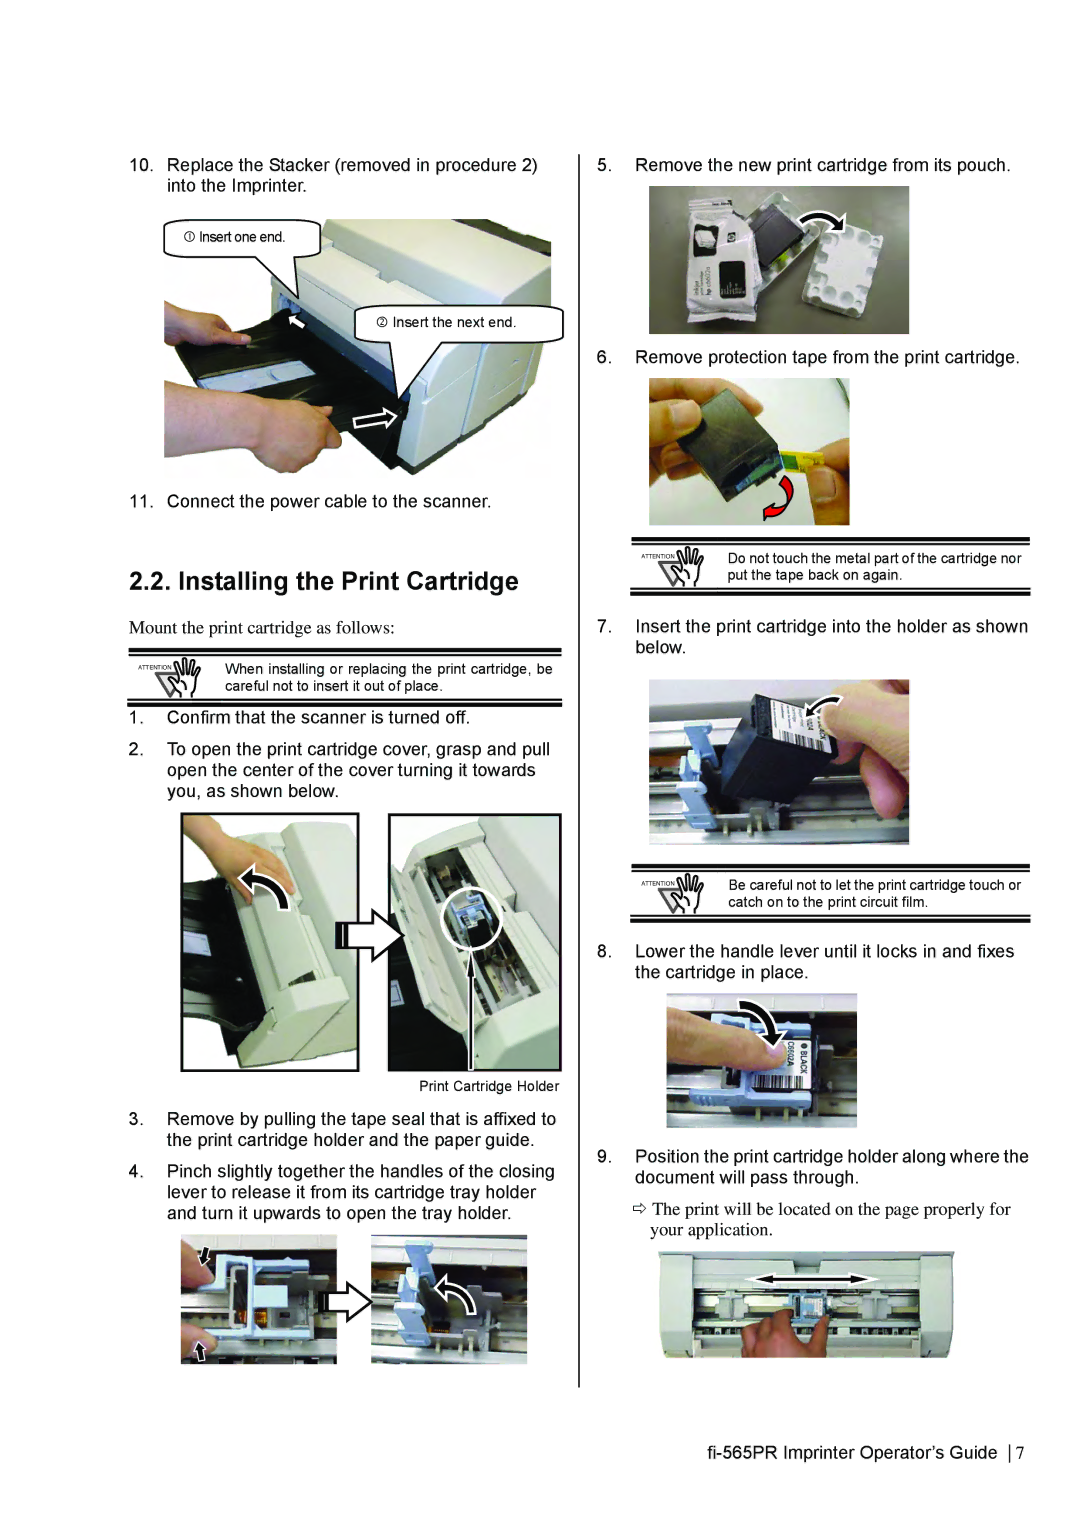
10.Replace the Stacker (removed in procedure 2) into the Imprinter.
cInsert one end.
d Insert the next end.
11. Connect the power cable to the scanner.
2.2. Installing the Print Cartridge
Mount the print cartridge as follows:
ATTENTION | When installing or replacing the print cartridge, be |
| careful not to insert it out of place. |
1.Confirm that the scanner is turned off.
2.To open the print cartridge cover, grasp and pull open the center of the cover turning it towards you, as shown below.
Print Cartridge Holder
3.Remove by pulling the tape seal that is affixed to the print cartridge holder and the paper guide.
4.Pinch slightly together the handles of the closing lever to release it from its cartridge tray holder and turn it upwards to open the tray holder.
5.Remove the new print cartridge from its pouch.
6.Remove protection tape from the print cartridge.
ATTENTION | Do not touch the metal part of the cartridge nor |
| put the tape back on again. |
7.Insert the print cartridge into the holder as shown below.
ATTENTION | Be careful not to let the print cartridge touch or |
| catch on to the print circuit film. |
8.Lower the handle lever until it locks in and fixes the cartridge in place.
9.Position the print cartridge holder along where the document will pass through.
ÖThe print will be located on the page properly for your application.