5 minute guide | 02 |
Using Full Band Phase Control
The Full Band Phase Control feature calibrates the
Standard speakers designed exclusively for audio use generally reproduce sound with the divided frequency bands output from a speaker system consisting of multiple speakers (in case of typical
This receiver analyzes the
characteristics during audio signal playback1 – the same correction is made for a pair of left and right speakers. This correction minimizes group delay between the ranges of a speaker and improves the
Furthermore, the enhanced
surround sound integration for multichannel setting.2
Full Band Phase Control OFF
Tweeter
Midrange
Woofer
Group Delay Characteristics
ms
Hz
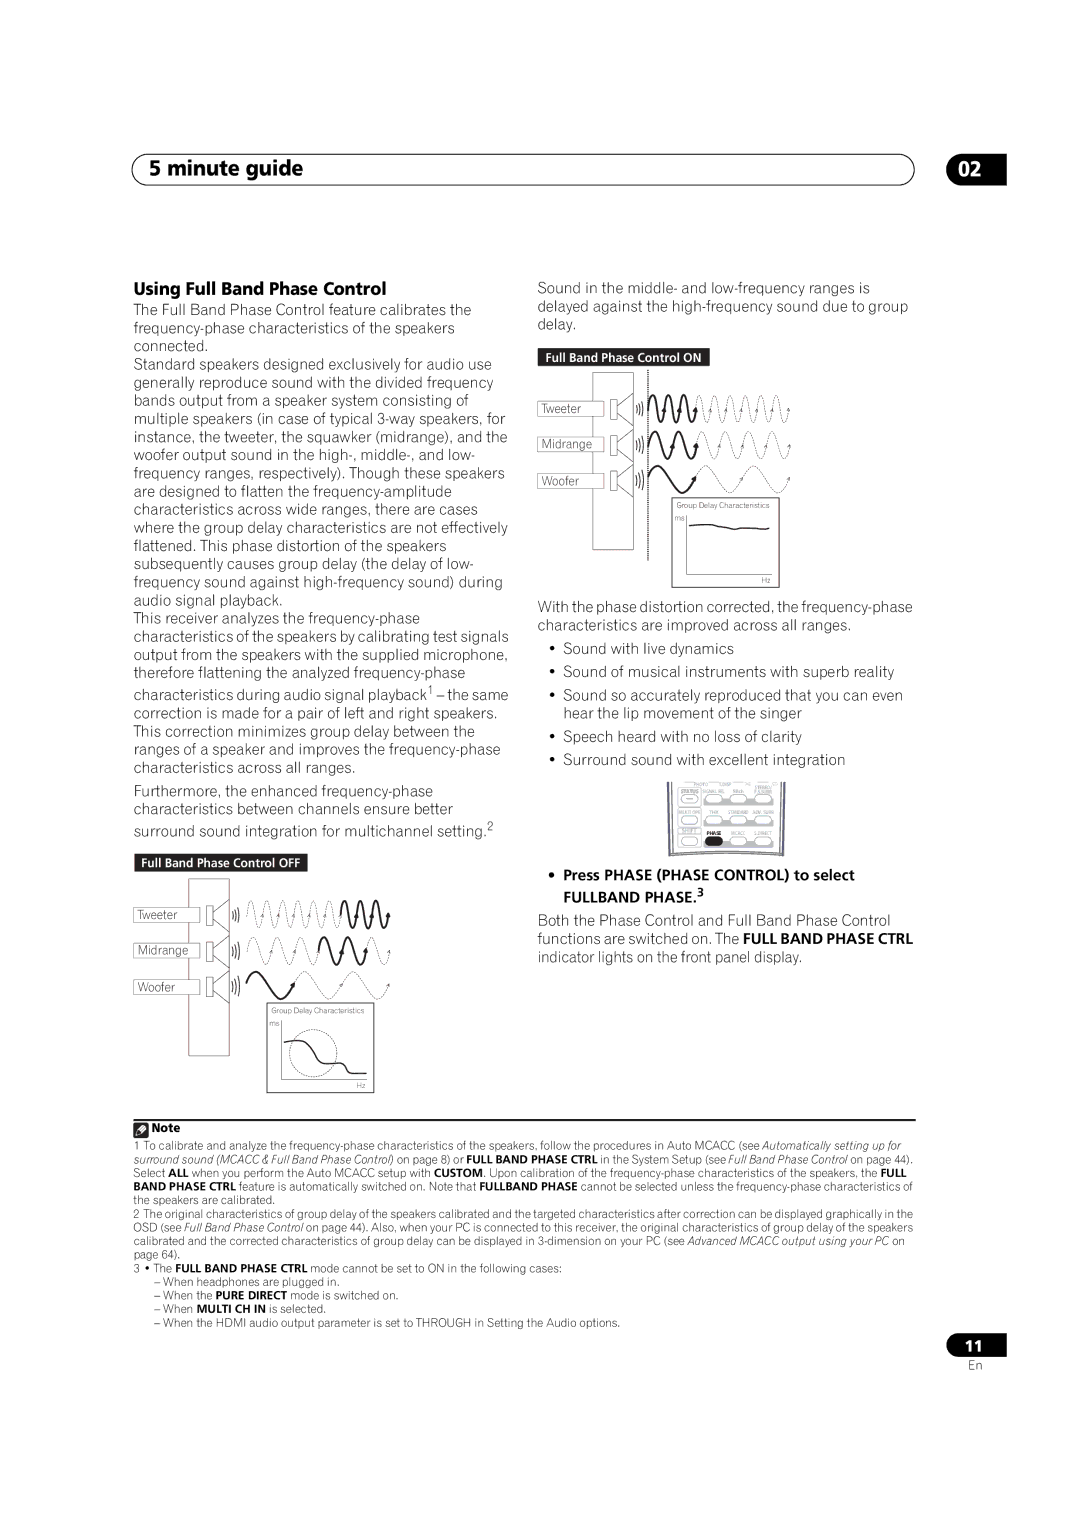
Sound in the middle- and
Full Band Phase Control ON
Tweeter
Midrange
Woofer
Group Delay Characteristics
ms
Hz
With the phase distortion corrected, the
•Sound with live dynamics
•Sound of musical instruments with superb reality
•Sound so accurately reproduced that you can even hear the lip movement of the singer
•Speech heard with no loss of clarity
•Surround sound with excellent integration
PHOTO | T.DISP | STEREO/ | |
STATUS | SIGNAL SEL SBch | F.S.SURR | |
MULTI OPE | THX | STANDARD | ADV. SURR |
SHIFT PHASE MCACC S.DIRECT
•Press PHASE (PHASE CONTROL) to select
FULLBAND PHASE.3
Both the Phase Control and Full Band Phase Control functions are switched on. The FULL BAND PHASE CTRL indicator lights on the front panel display.
![]() Note
Note
1To calibrate and analyze the
2The original characteristics of group delay of the speakers calibrated and the targeted characteristics after correction can be displayed graphically in the OSD (see Full Band Phase Control on page 44). Also, when your PC is connected to this receiver, the original characteristics of group delay of the speakers calibrated and the corrected characteristics of group delay can be displayed in
3• The FULL BAND PHASE CTRL mode cannot be set to ON in the following cases:
–When headphones are plugged in.
–When the PURE DIRECT mode is switched on.
–When MULTI CH IN is selected.
–When the HDMI audio output parameter is set to THROUGH in Setting the Audio options.
11
En