Appendix B: Client Setup for 802.1x, WPA, and
Enabling WPA Authentication and Security
The first four steps are the same as the setting for 802.1x authentication, please refer to the previous part.
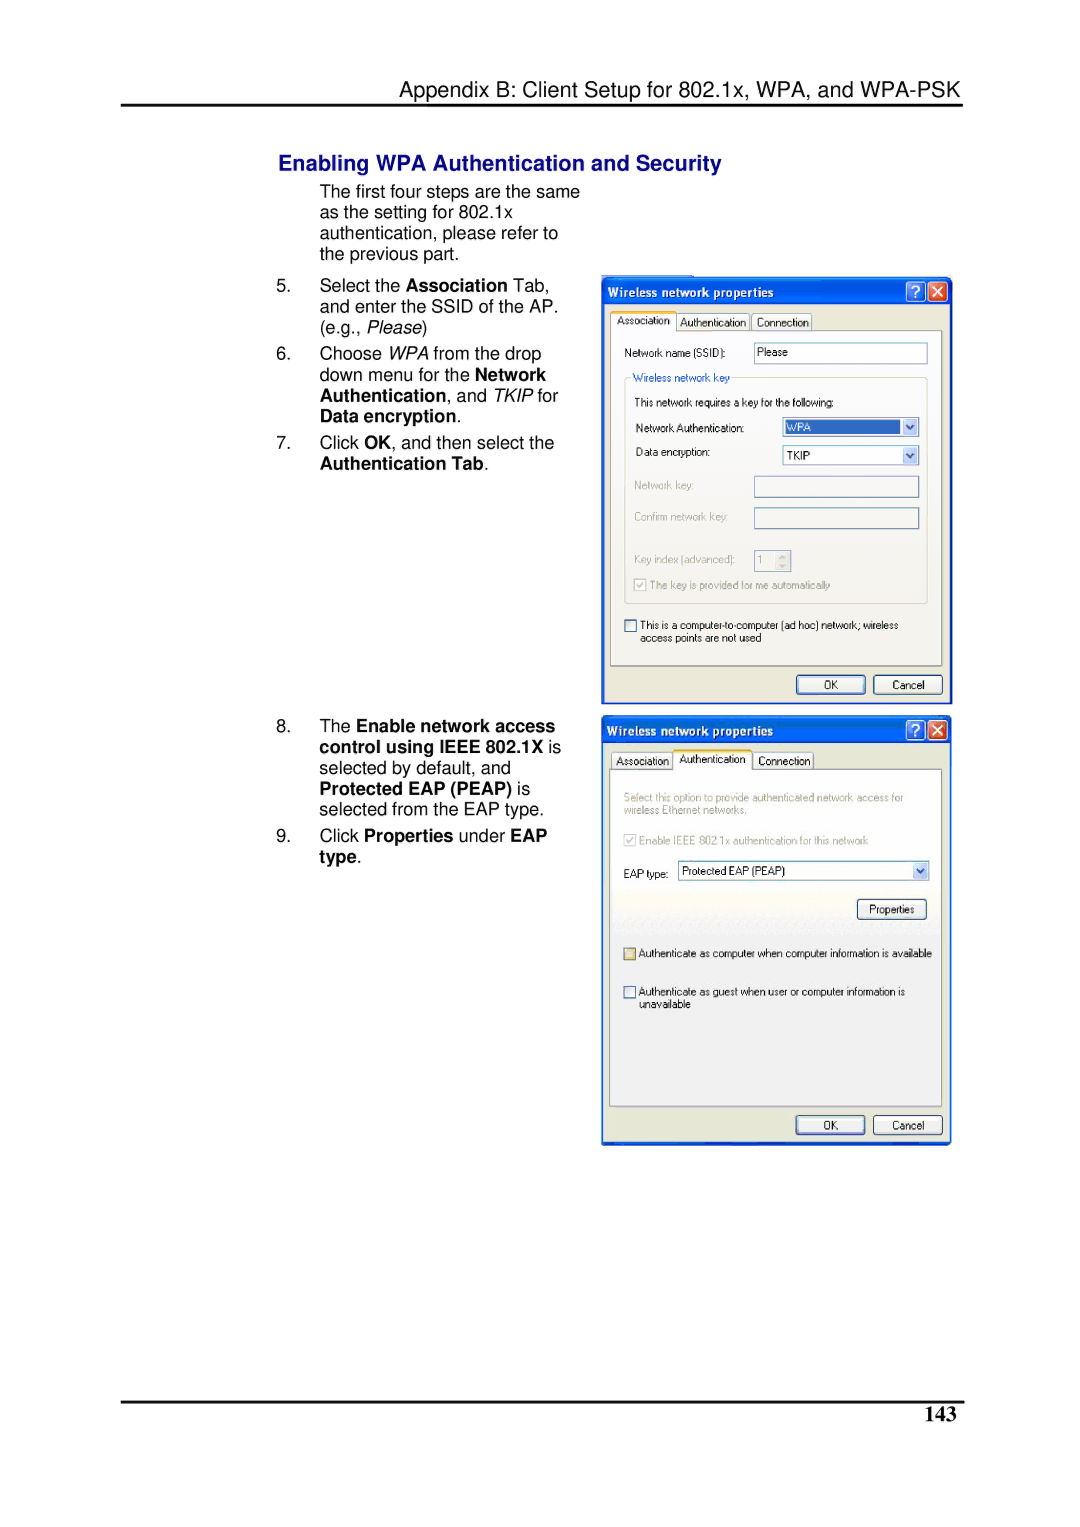
5.Select the Association Tab, and enter the SSID of the AP. (e.g., Please)
6.Choose WPA from the drop down menu for the Network Authentication, and TKIP for Data encryption.
7.Click OK, and then select the Authentication Tab.
8.The Enable network access control using IEEE 802.1X is selected by default, and Protected EAP (PEAP) is selected from the EAP type.
9.Click Properties under EAP type.
