Computer Input
Manual PC Adjustment
Some computers employ special signal formats which may not be tuned by
1 Press the MENU button to display the
2 Press the Point ▲▼ buttons to move the red frame pointer to the item that you want to adjust and then press the SELECT button to display the adjustment dialog box. Press the Point ◄► buttons to adjust the value.
Fine sync
Eliminate flicker from the image displayed. Press the Point ◄► buttons to adjust the value. (From 0 to 31.)
 Total dots
Adjust the number of total dots in one horizontal period. Press the Point ◄► buttons to adjust number to match your PC image.
![]() Horizontal
Horizontal
Press the Point ◄► buttons to adjust the horizontal picture position.
![]() Vertical
Vertical
Press the Point ◄► buttons to adjust the vertical picture position.
![]() Current mode
Current mode
Press the SELECT button to show
![]() Clamp
Clamp
Adjust clamp level. When the image has dark bars, try this adjustment.
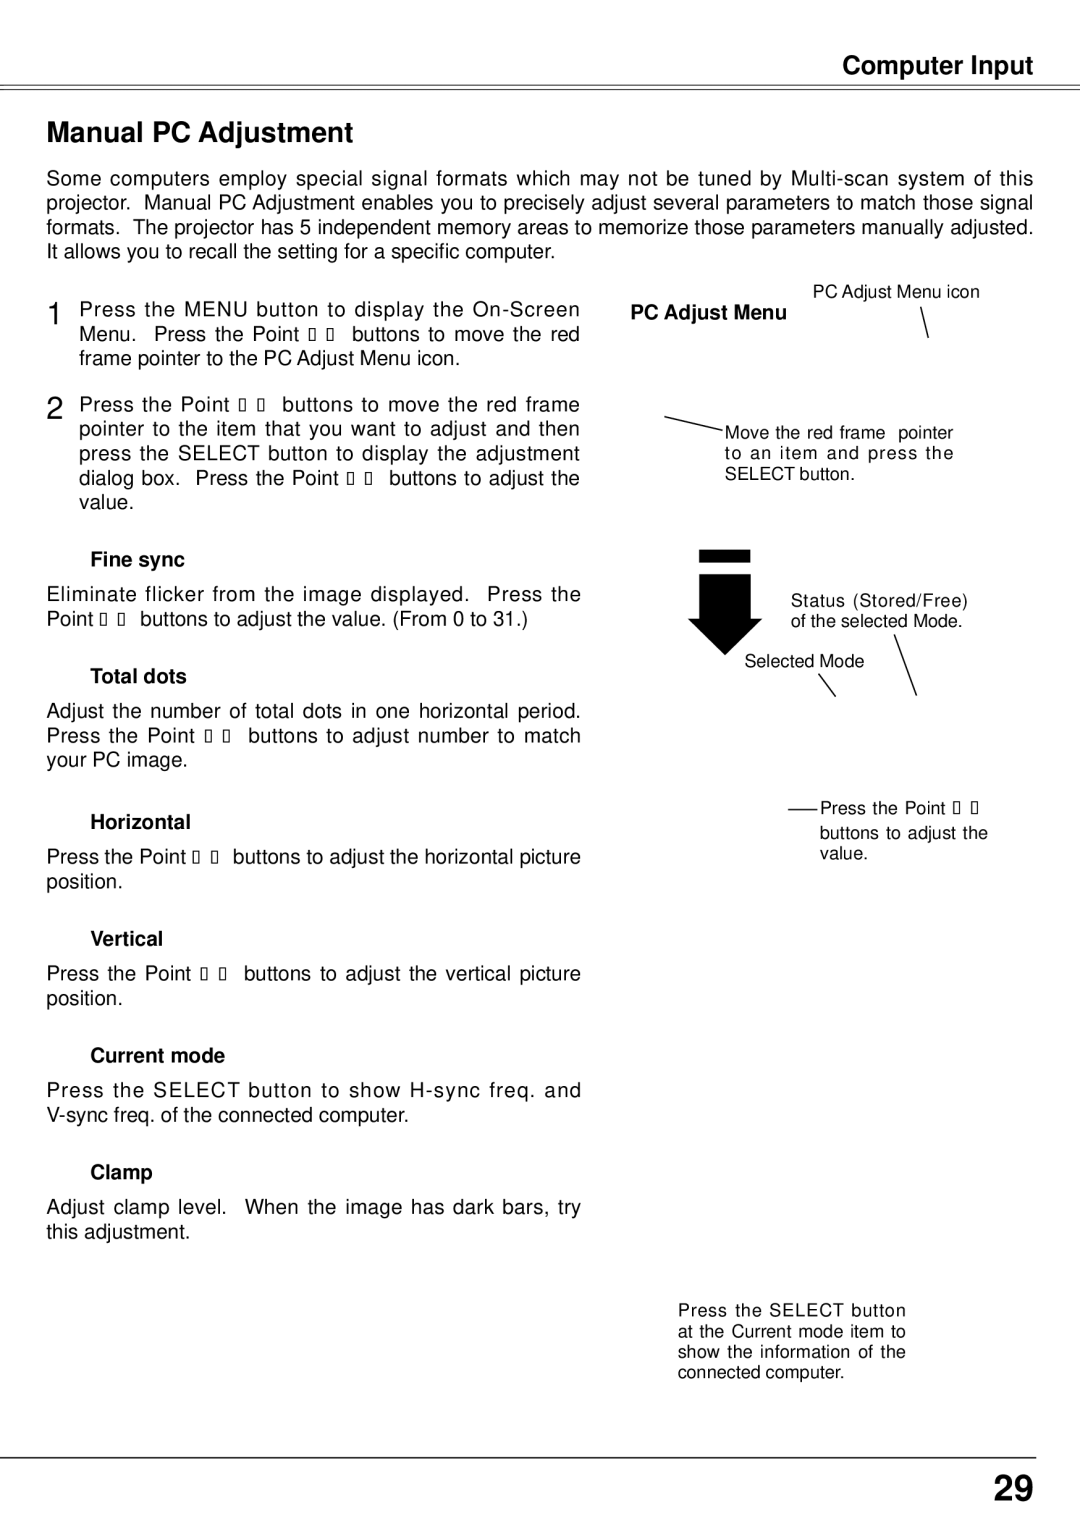
PC Adjust Menu icon
PC Adjust Menu
![]() Move the red frame pointer to an item and press the SELECT button.
Move the red frame pointer to an item and press the SELECT button.
Status (Stored/Free) of the selected Mode.
Selected Mode
![]() Press the Point ◄►
Press the Point ◄►
buttons to adjust the value.
Press the SELECT button at the Current mode item to show the information of the connected computer.
29