Network Capture
4 Click Search button to list up the available IP address assign to the projector and select desired IP address you use, or you can enter the IP address manually if you know that IP address.
5 Set the quality of the image.
Quality: Selects from High, Mid, Low
Image Magnification: If checked, the screen image size of the computer is automatically adjusted to the projector’s screen size.
6 Click OK button to close the setting window.
About Image Quality
Quality : Quality mode of the captured image shows following JPEG compression mode.;
High : JPEG low compression mode
Mid : JPEG medium compression mode
Low : JPEG high compression mode
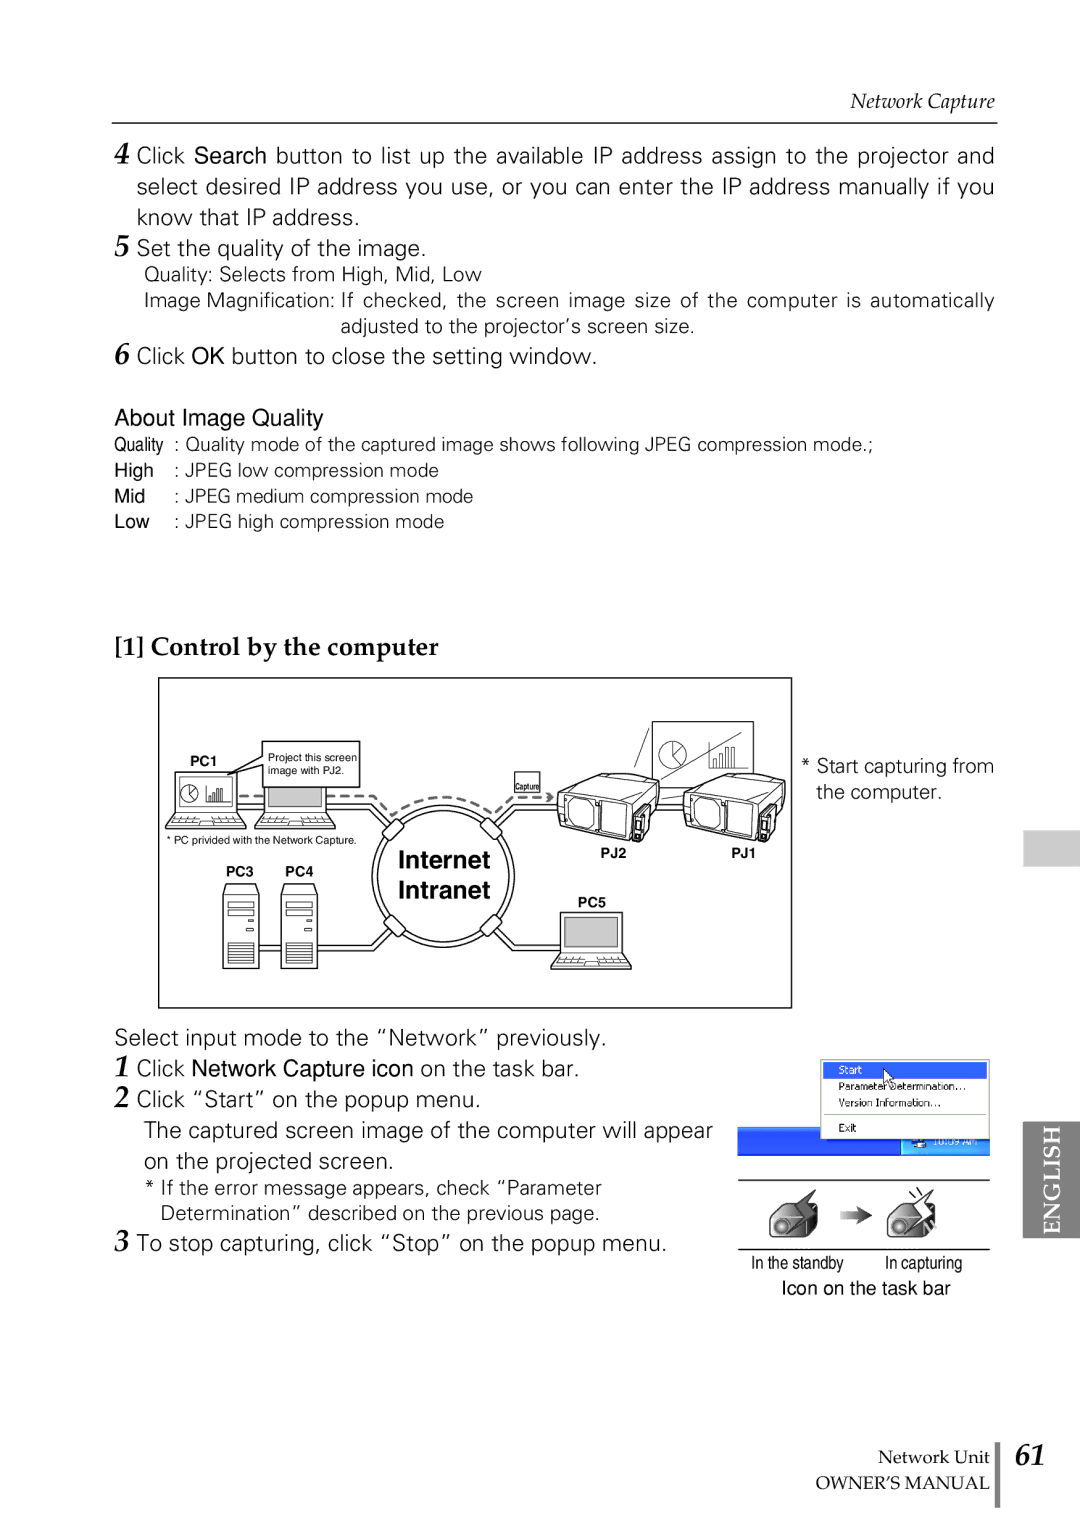
[1] Control by the computer
PC1 | Project this screen | ||||
|
|
| image with PJ2. | ||
|
|
|
|
|
|
|
|
|
|
|
|
* PC privided with the Network Capture.
PC3 PC4
Capture
Internet PJ2
Intranet
PC5
PJ1
*Start capturing from the computer.
Select input mode to the “Network” previously.
1 Click Network Capture icon on the task bar.
2 Click “Start” on the popup menu.
The captured screen image of the computer will appear on the projected screen.
* If the error message appears, check “Parameter Determination” described on the previous page.
3 To stop capturing, click “Stop” on the popup menu.
In the standby | In capturing |
Icon on the task bar
Network Unit
OWNER’S MANUAL
ENGLISH
61