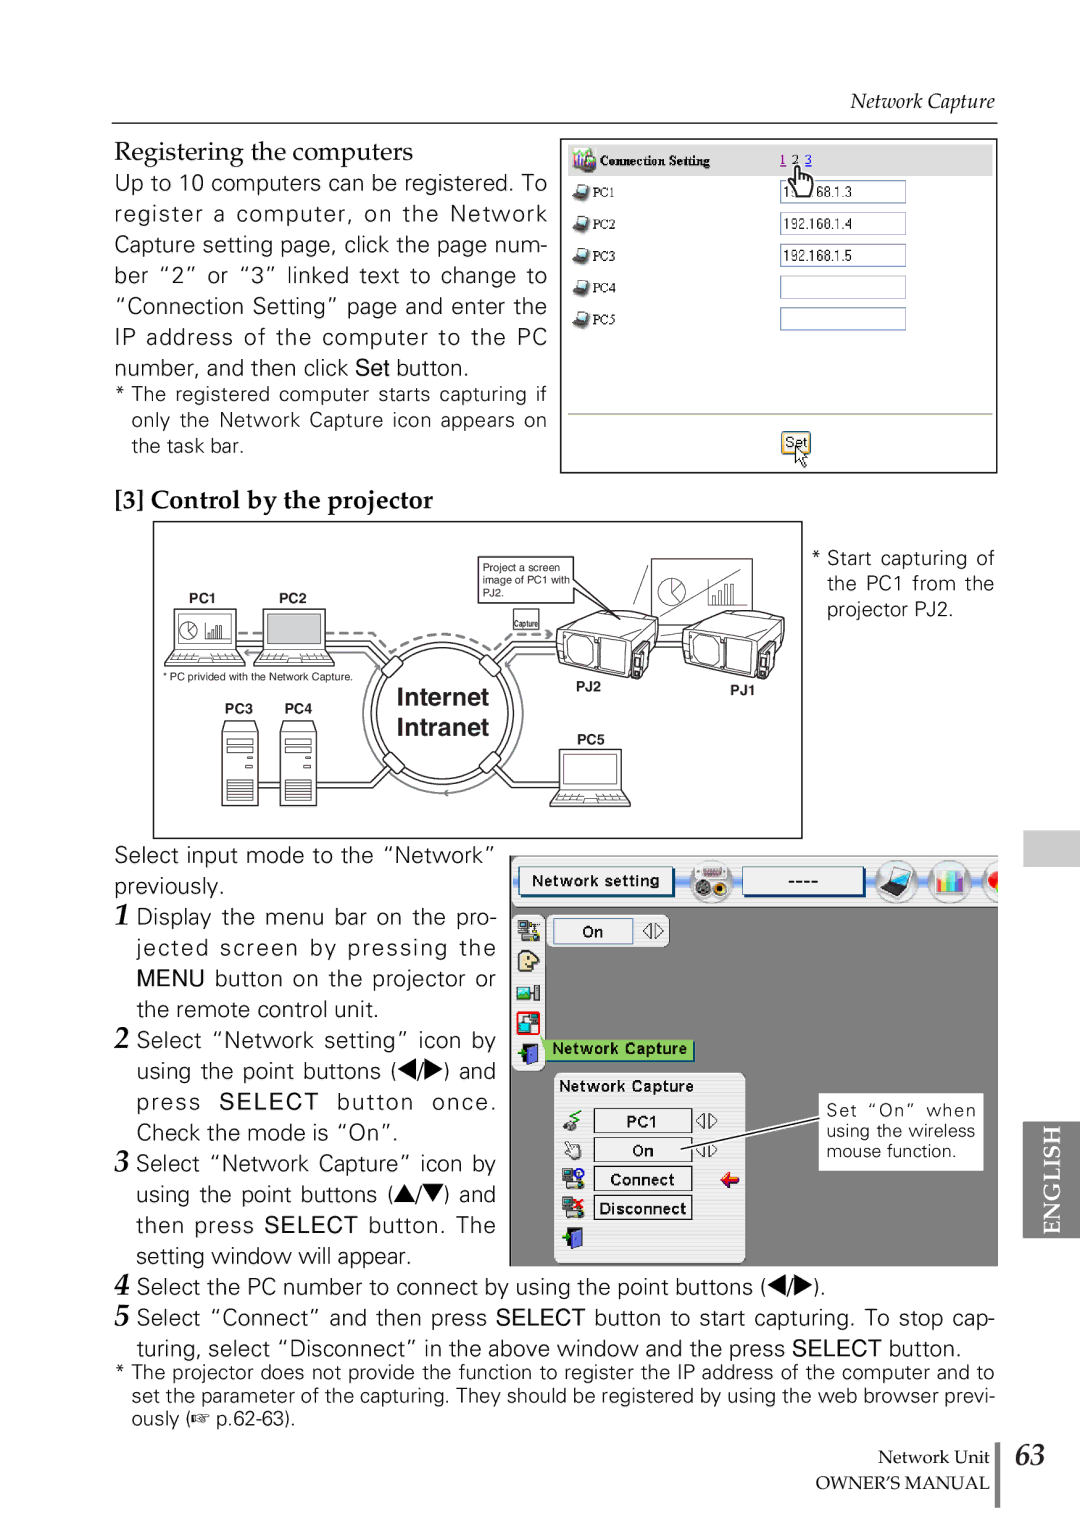
Registering the computers
Up to 10 computers can be registered. To register a computer, on the Network Capture setting page, click the page num- ber “2” or “3” linked text to change to “Connection Setting” page and enter the IP address of the computer to the PC number, and then click Set button.
*The registered computer starts capturing if only the Network Capture icon appears on the task bar.
[3] Control by the projector
PC1 PC2
* PC privided with the Network Capture.
PC3 PC4
Project a screen image of PC1 with PJ2.
Capture
Internet | PJ2 | PJ1 |
|
| |
Intranet | PC5 |
|
|
|
Select input mode to the “Network” previously.
1 Display the menu bar on the pro- jected screen by pressing the MENU button on the projector or the remote control unit.
2 Select “Network setting” icon by using the point buttons (7/8) and press SELECT button once.
Check the mode is “On”. 3 Select “Network Capture” icon by
using the point buttons (e/d) and then press SELECT button. The setting window will appear.
4 Select the PC number to connect by using the point buttons (7/8).
5 Select “Connect” and then press SELECT button to start capturing. To stop cap- turing, select “Disconnect” in the above window and the press SELECT button.
*The projector does not provide the function to register the IP address of the computer and to set the parameter of the capturing. They should be registered by using the web browser previ- ously (☞
Network Unit
OWNER’S MANUAL
ENGLISH
63