Network configuration
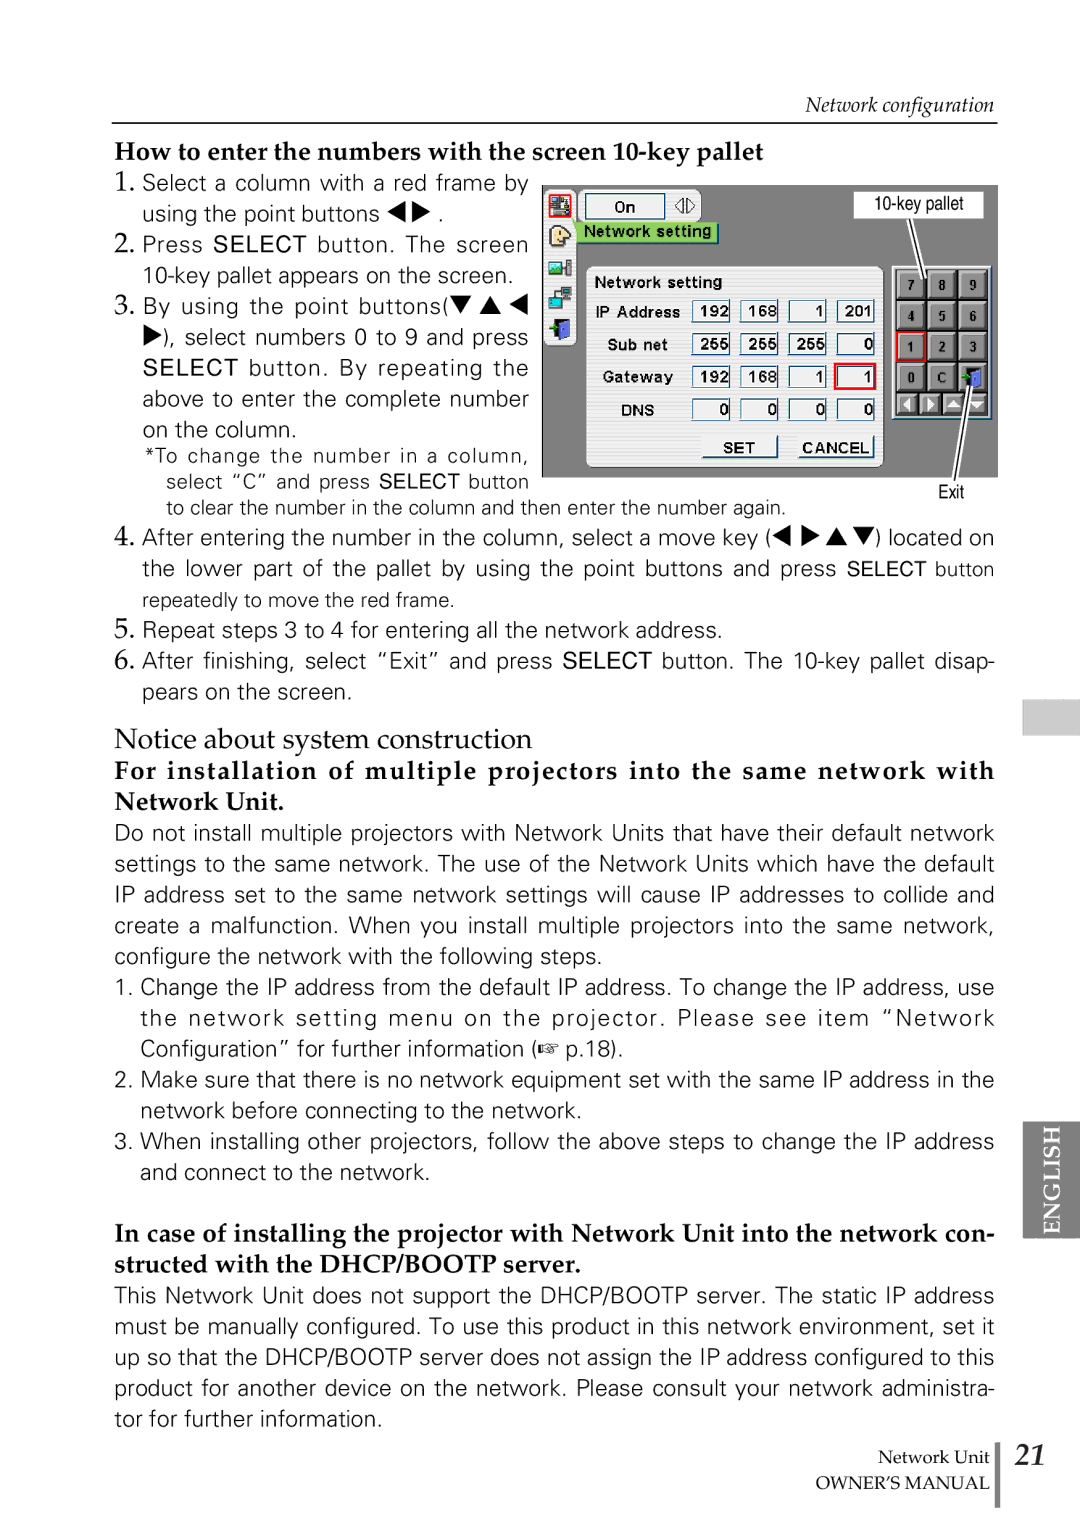
How to enter the numbers with the screen 10-key pallet
1. | Select a column with a red frame by |
|
| using the point buttons 78 . | |
2. |
| |
| ||
Press SELECT button. The screen |
| |
|
| |
3. By using the point buttons(d e 7 |
| |
| 8), select numbers 0 to 9 and press |
|
| SELECT button. By repeating the |
|
| above to enter the complete number |
|
on the column.
*To change the number in a column,
select “C” and press SELECT button | Exit | |
to clear the number in the column and then enter the number again. | ||
|
4.After entering the number in the column, select a move key (7 8ed) located on the lower part of the pallet by using the point buttons and press SELECT button repeatedly to move the red frame.
5.Repeat steps 3 to 4 for entering all the network address.
6.After finishing, select “Exit” and press SELECT button. The
Notice about system construction
For installation of multiple projectors into the same network with Network Unit.
Do not install multiple projectors with Network Units that have their default network settings to the same network. The use of the Network Units which have the default IP address set to the same network settings will cause IP addresses to collide and create a malfunction. When you install multiple projectors into the same network, configure the network with the following steps.
1.Change the IP address from the default IP address. To change the IP address, use the network setting menu on the projector. Please see item “Network Configuration” for further information (☞ p.18).
2.Make sure that there is no network equipment set with the same IP address in the network before connecting to the network.
3.When installing other projectors, follow the above steps to change the IP address and connect to the network.
In case of installing the projector with Network Unit into the network con- structed with the DHCP/BOOTP server.
This Network Unit does not support the DHCP/BOOTP server. The static IP address must be manually configured. To use this product in this network environment, set it up so that the DHCP/BOOTP server does not assign the IP address configured to this product for another device on the network. Please consult your network administra- tor for further information.
Network Unit
OWNER’S MANUAL
ENGLISH
21