Operation, cont’d
|
|
|
| 5 |
|
| LED key: |
| = off, | = on, B = blinking, | Press | ||
|
|
|
|
|
|
|
| ||||||
|
|
| Press |
|
|
|
|
| F | = flash once |
| B | |
|
|
|
|
|
|
|
|
|
| ||||
|
|
|
|
|
| C |
|
|
|
|
|
| |
|
|
|
|
|
|
|
|
|
|
|
| RGBHV | |
|
|
|
|
| INPUTS |
|
|
|
|
|
| ||
|
|
|
|
|
|
|
|
|
|
|
| ||
1 | 2 | 3 | 4 | 5 | 6 | 7 | 8 | 9 | 10 | 11 | 12 |
|
|
|
|
|
|
|
|
|
|
|
|
|
| CONTROL | I/O |
1 | 2 | 3 | 4 | 5 | 6 | 7 | 8 |
|
|
|
| ENTER PRESET VIEW | ESC RGBHV AUDIO |
|
|
| OUTPUTS |
|
|
|
|
|
|
|
|
| |
|
|
|
| C |
|
|
| C |
|
| Press | Press F | |
B |
| 3 | 4 |
|
|
| 8 |
|
|
| |||
|
|
|
|
|
|
|
|
|
| ||||
Press |
|
|
|
|
|
|
|
|
|
|
| E | A |
|
|
|
|
|
|
|
|
|
|
|
| ||
|
| D |
|
|
|
|
|
|
|
| ENTER | ESC | |
|
|
|
|
|
|
|
|
|
|
| |||
1 |
|
|
|
|
|
|
|
|
|
|
|
|
|
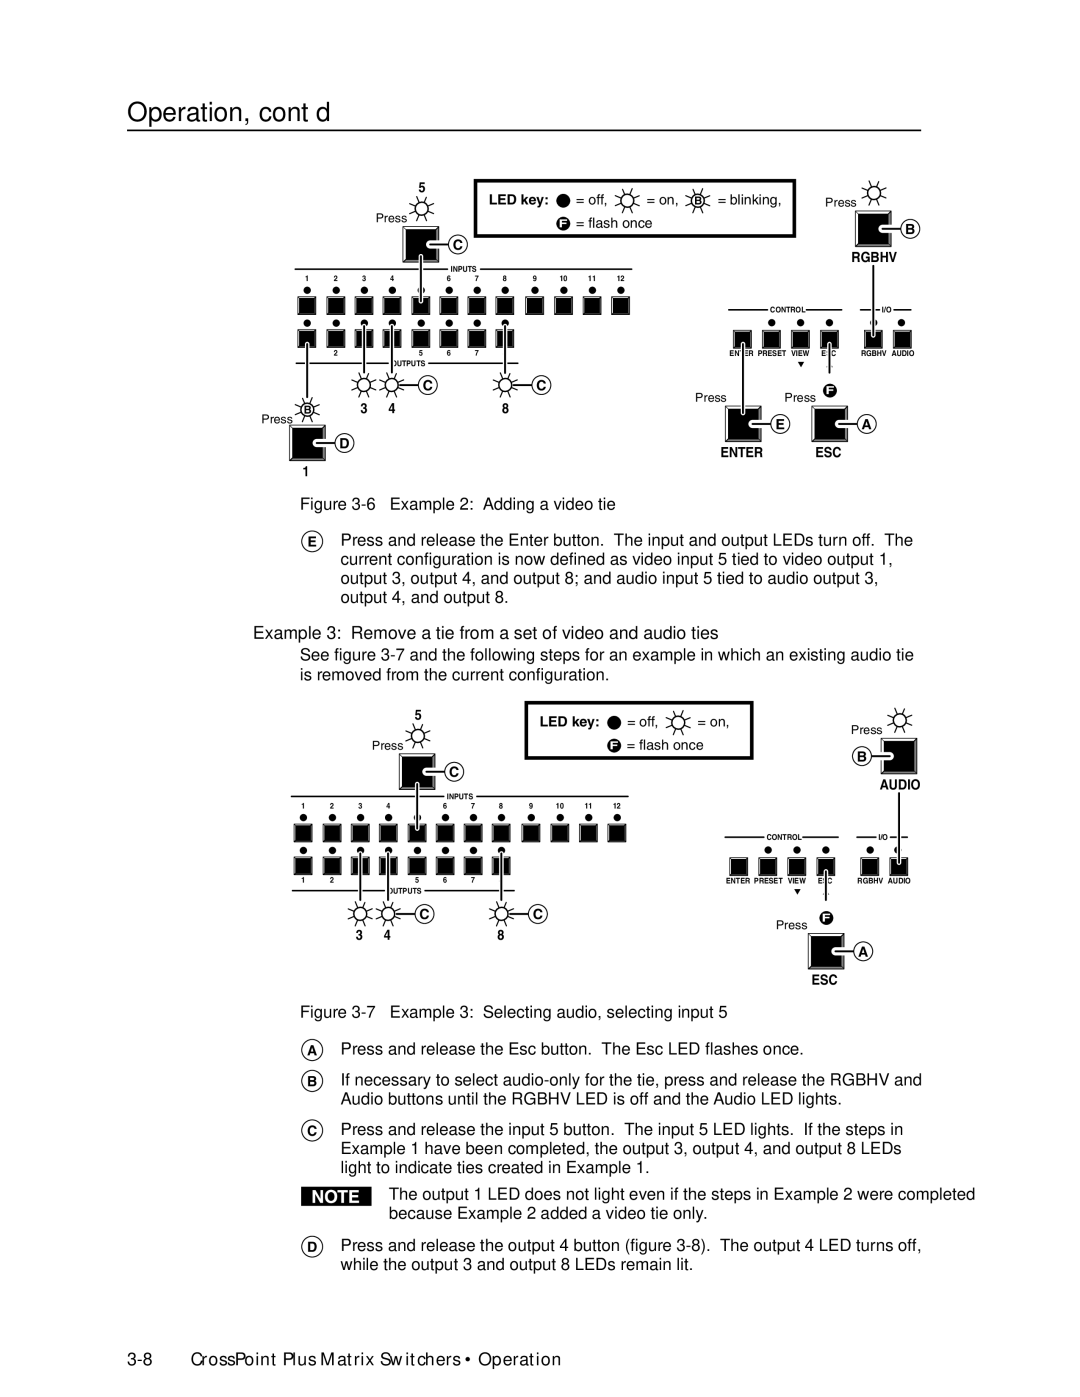
Figure 3-6 — Example 2: Adding a video tie
EPress and release the Enter button. The input and output LEDs turn off. The current configuration is now defined as video input 5 tied to video output 1, output 3, output 4, and output 8; and audio input 5 tied to audio output 3, output 4, and output 8.
Example 3: Remove a tie from a set of video and audio ties
See figure
|
|
|
| 5 |
|
|
|
| LED key: | = off, | = on, | |
|
|
|
|
|
|
|
|
| ||||
|
|
| Press |
|
|
|
|
|
|
| F = flash once | |
|
|
|
|
|
| C |
|
|
|
|
|
|
|
|
|
|
| INPUTS |
|
|
|
|
|
| |
1 | 2 | 3 | 4 | 5 | 6 | 7 | 8 | 9 | 10 | 11 | 12 |
|
Press ![]()
B
AUDIO
CONTROL ![]()
![]() I/O
I/O
1 2
3
4 | 5 | 6 | 7 | 8 |
OUTPUTS
ENTER PRESET VIEW ESC | RGBHV AUDIO |
| C | C | Press | F |
3 | 4 | 8 |
| |
|
|
ESC
A
Figure 3-7 — Example 3: Selecting audio, selecting input 5
APress and release the Esc button. The Esc LED flashes once.
BIf necessary to select
CPress and release the input 5 button. The input 5 LED lights. If the steps in Example 1 have been completed, the output 3, output 4, and output 8 LEDs light to indicate ties created in Example 1.
The output 1 LED does not light even if the steps in Example 2 were completed because Example 2 added a video tie only.
DPress and release the output 4 button (figure