5
LED key: ![]() = off,
= off, ![]() = on,
= on,
2= on for 2 seconds, then off
|
|
|
|
| INPUTS |
|
|
|
|
| AUDIO | |
1 | 2 | 3 | 4 | 5 | 6 | 7 | 8 | 9 | 10 | 11 | 12 | |
|
|
|
|
|
|
|
|
|
|
| CONTROL | I/O |
1 | 2 | 3 | 4 | 5 | 6 | 7 | 8 |
|
|
| ENTER PRESET VIEW ESC | RGBHV AUDIO |
|
|
| OUTPUTS |
|
|
|
|
|
|
|
| |
|
| 3 |
| Press |
|
| 8 |
|
|
| Press |
|
|
|
|
|
|
|
|
|
|
| |||
|
|
| D |
|
|
|
|
|
|
| ||
|
|
|
|
|
|
|
|
|
| E |
| |
|
|
| 4 |
|
|
|
|
|
|
| ENTER |
|
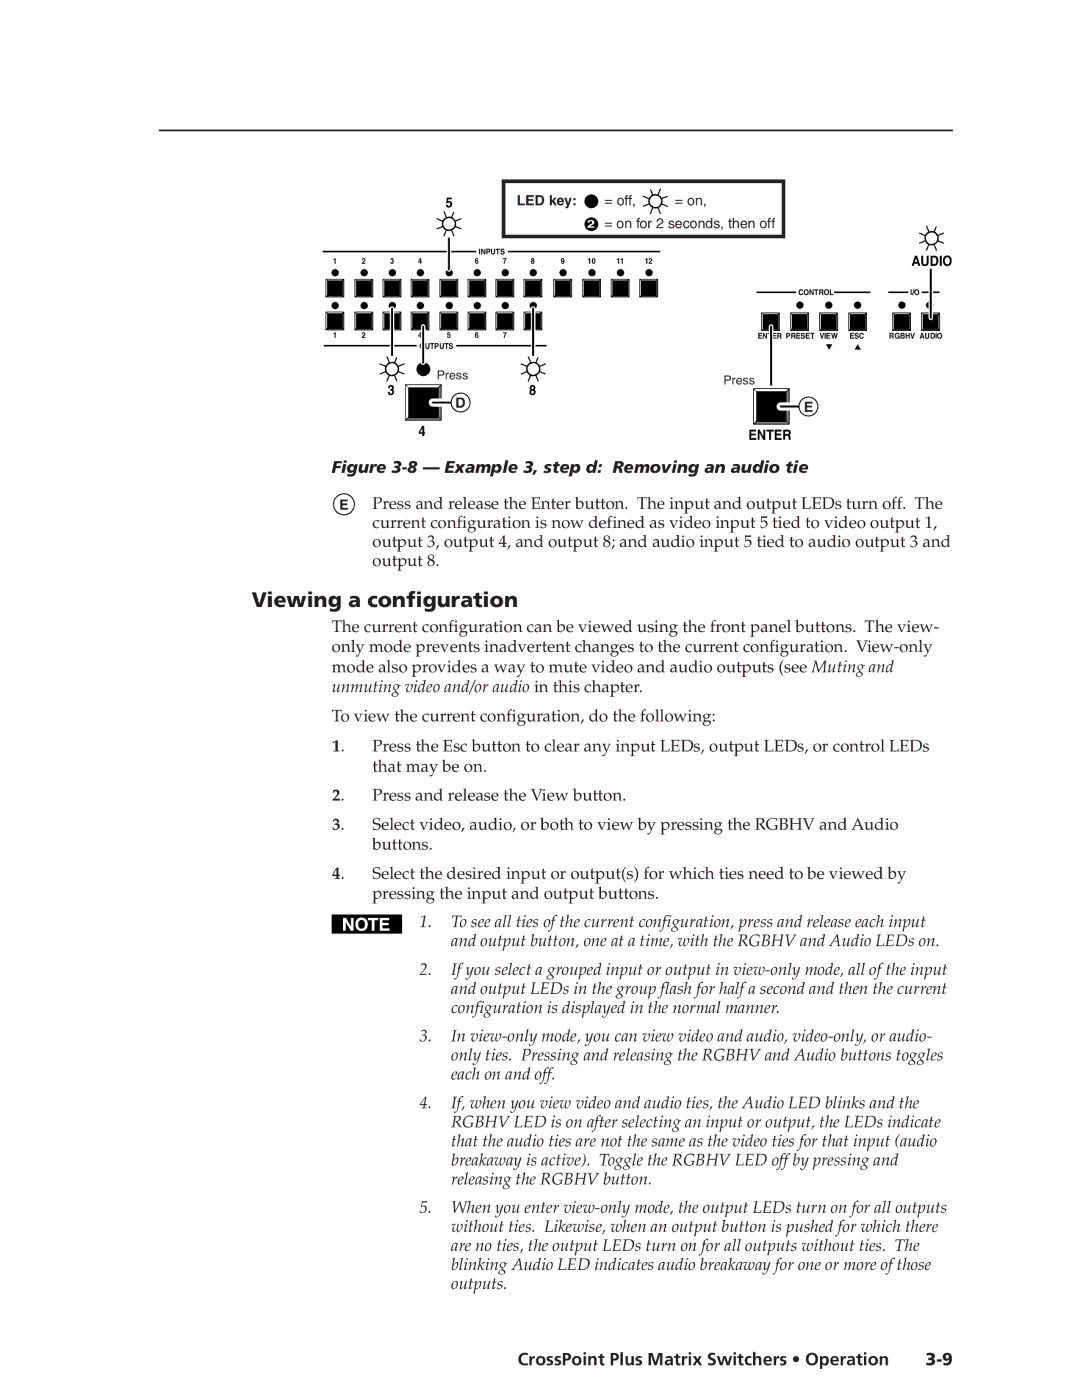
Figure 3-8 — Example 3, step d: Removing an audio tie
EPress and release the Enter button. The input and output LEDs turn off. The current configuration is now defined as video input 5 tied to video output 1, output 3, output 4, and output 8; and audio input 5 tied to audio output 3 and output 8.
Viewing a configuration
The current configuration can be viewed using the front panel buttons. The view- only mode prevents inadvertent changes to the current configuration.
To view the current configuration, do the following:
1. | Press the Esc button to clear any input LEDs, output LEDs, or control LEDs |
| that may be on. |
2. | Press and release the View button. |
3. | Select video, audio, or both to view by pressing the RGBHV and Audio |
| buttons. |
4. | Select the desired input or output(s) for which ties need to be viewed by |
| pressing the input and output buttons. |
1. To see all ties of the current configuration, press and release each input and output button, one at a time, with the RGBHV and Audio LEDs on.
2.If you select a grouped input or output in
3.In
4.If, when you view video and audio ties, the Audio LED blinks and the RGBHV LED is on after selecting an input or output, the LEDs indicate that the audio ties are not the same as the video ties for that input (audio breakaway is active). Toggle the RGBHV LED off by pressing and releasing the RGBHV button.
5.When you enter
CrossPoint Plus Matrix Switchers • Operation |
