Operation, cont’d
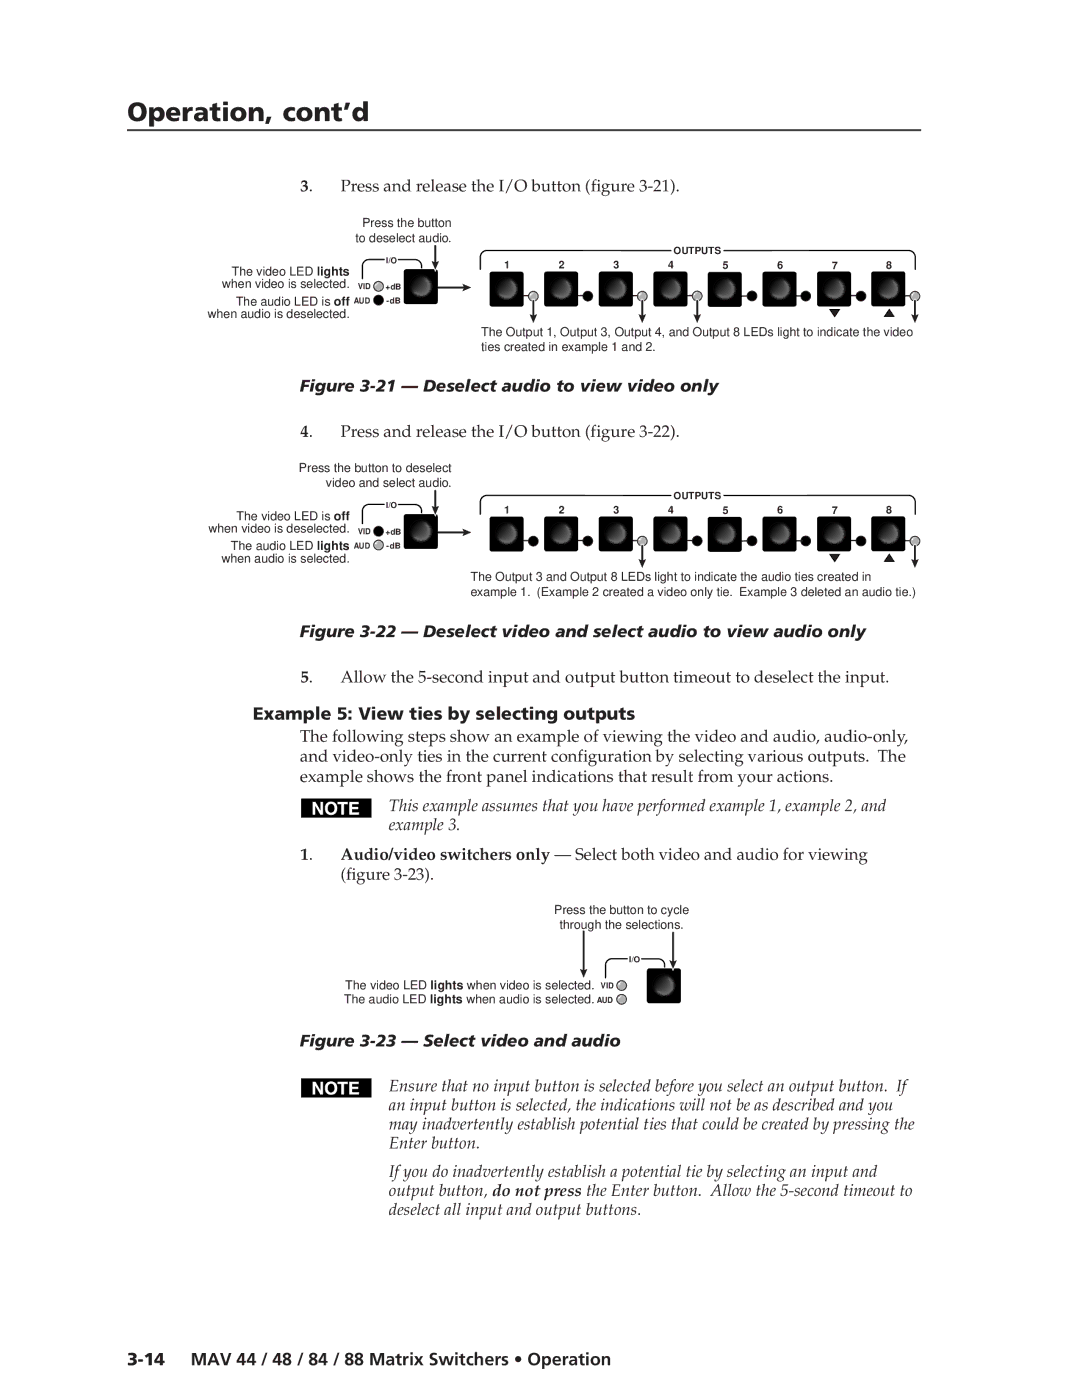
3. Press and release the I/O button (figure 3-21).
Press the button to deselect audio.
I/O
The video LED lights
when video is selected. VID ![]() +dB
+dB
The audio LED is off AUD ![]()
OUTPUTS
1 | 2 | 3 | 4 | 5 | 6 | 7 | 8 |
The Output 1, Output 3, Output 4, and Output 8 LEDs light to indicate the video ties created in example 1 and 2.
Figure 3-21 — Deselect audio to view video only
4. Press and release the I/O button (figure
Press the button to deselect video and select audio.
I/O
The video LED is off
when video is deselected. VID ![]() +dB
+dB
The audio LED lights AUD ![]()
OUTPUTS
1 | 2 | 3 | 4 | 5 | 6 | 7 | 8 |
The Output 3 and Output 8 LEDs light to indicate the audio ties created in example 1. (Example 2 created a video only tie. Example 3 deleted an audio tie.)
Figure 3-22 — Deselect video and select audio to view audio only
5. Allow the
Example 5: View ties by selecting outputs
The following steps show an example of viewing the video and audio,
This example assumes that you have performed example 1, example 2, and example 3.
1. Audio/video switchers only — Select both video and audio for viewing (figure
Press the button to cycle through the selections.
I/O
The video LED lights when video is selected. VID ![]()
The audio LED lights when audio is selected. AUD ![]()
Figure 3-23 — Select video and audio
Ensure that no input button is selected before you select an output button. If an input button is selected, the indications will not be as described and you may inadvertently establish potential ties that could be created by pressing the Enter button.
If you do inadvertently establish a potential tie by selecting an input and output button, do not press the Enter button. Allow the