Operation, cont’d
Example 1: Create a set of video and audio ties
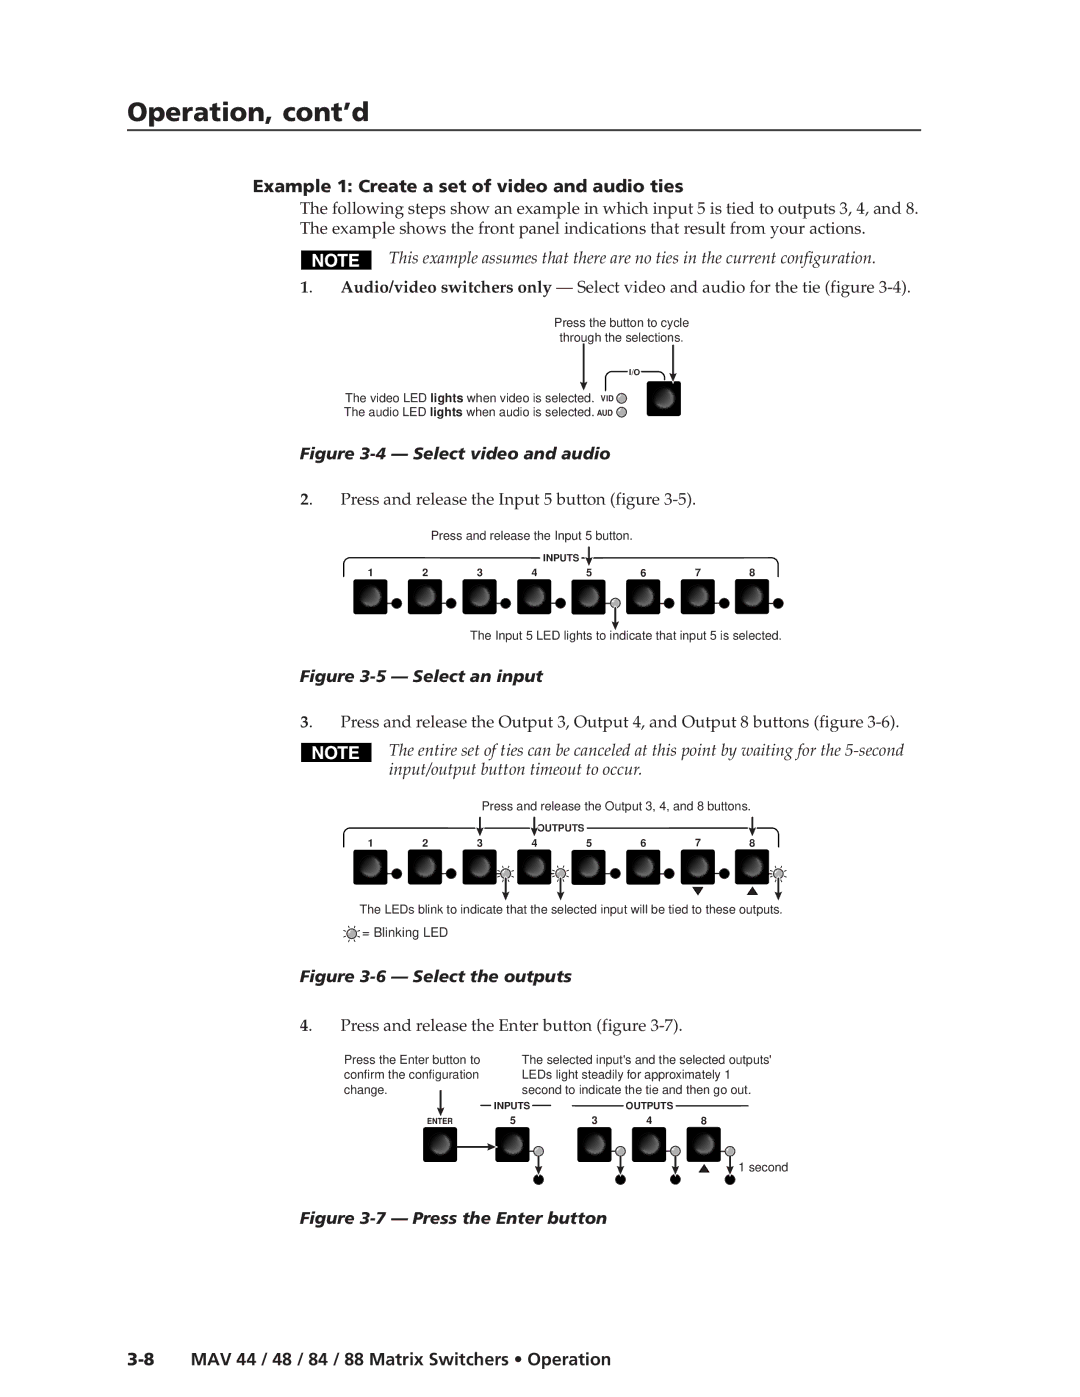
The following steps show an example in which input 5 is tied to outputs 3, 4, and 8. The example shows the front panel indications that result from your actions.
This example assumes that there are no ties in the current configuration.
1. Audio/video switchers only — Select video and audio for the tie (figure
Press the button to cycle through the selections.
I/O
The video LED lights when video is selected. VID ![]()
The audio LED lights when audio is selected. AUD ![]()
Figure 3-4 — Select video and audio
2. | Press and release the Input 5 button (figure |
Press and release the Input 5 button.
INPUTS ![]()
1 |
| 2 | 3 |
| 4 |
| 5 |
|
| 6 |
| 7 | 8 | ||
|
|
|
|
|
|
|
|
|
|
|
|
|
|
|
|
|
|
|
|
|
|
|
|
|
|
|
|
|
|
|
|
The Input 5 LED lights to indicate that input 5 is selected.
Figure 3-5 — Select an input
3. | Press and release the Output 3, Output 4, and Output 8 buttons (figure |
The entire set of ties can be canceled at this point by waiting for the
Press and release the Output 3, 4, and 8 buttons.
![]() OUTPUTS
OUTPUTS
1 |
| 2 | 3 |
|
| 4 |
|
| 5 |
| 6 |
| 7 | 8 | ||
|
|
|
|
|
|
|
|
|
|
|
|
|
|
|
|
|
|
|
|
|
|
|
|
|
|
|
|
|
|
|
|
|
|
The LEDs blink to indicate that the selected input will be tied to these outputs.
![]() = Blinking LED
= Blinking LED
Figure 3-6 — Select the outputs
4. | Press and release the Enter button (figure |
Press the Enter button to confirm the configuration change.
ENTER
The selected input's and the selected outputs' LEDs light steadily for approximately 1 second to indicate the tie and then go out.
INPUTSOUTPUTS
5 | 3 | 4 | 8 |
![]() 1 second
1 second
