GB
4
Freecom Classic SL Network Drive
4.Click "Add".
5.Click "OK" to confirm the Classic SL Network Drive registration.
-If the "Write Key" was entered in the previous step, the Classic SL Network Drive is registered as "Read / Write Mode".
-If the "Write Key" was not entered in the previous step, the Classic SL Network Drive is registered as "Read Only Mode".
6. "Found New Hardware Wizard"
-This window may or may not appear.
-If the "Found New Hardware" window appears, follow the instructions and install the new Classic SL Network Drive.
NOTE: For Windows 2000, the "Upgrade Device Driver Wizard" will appear instead.
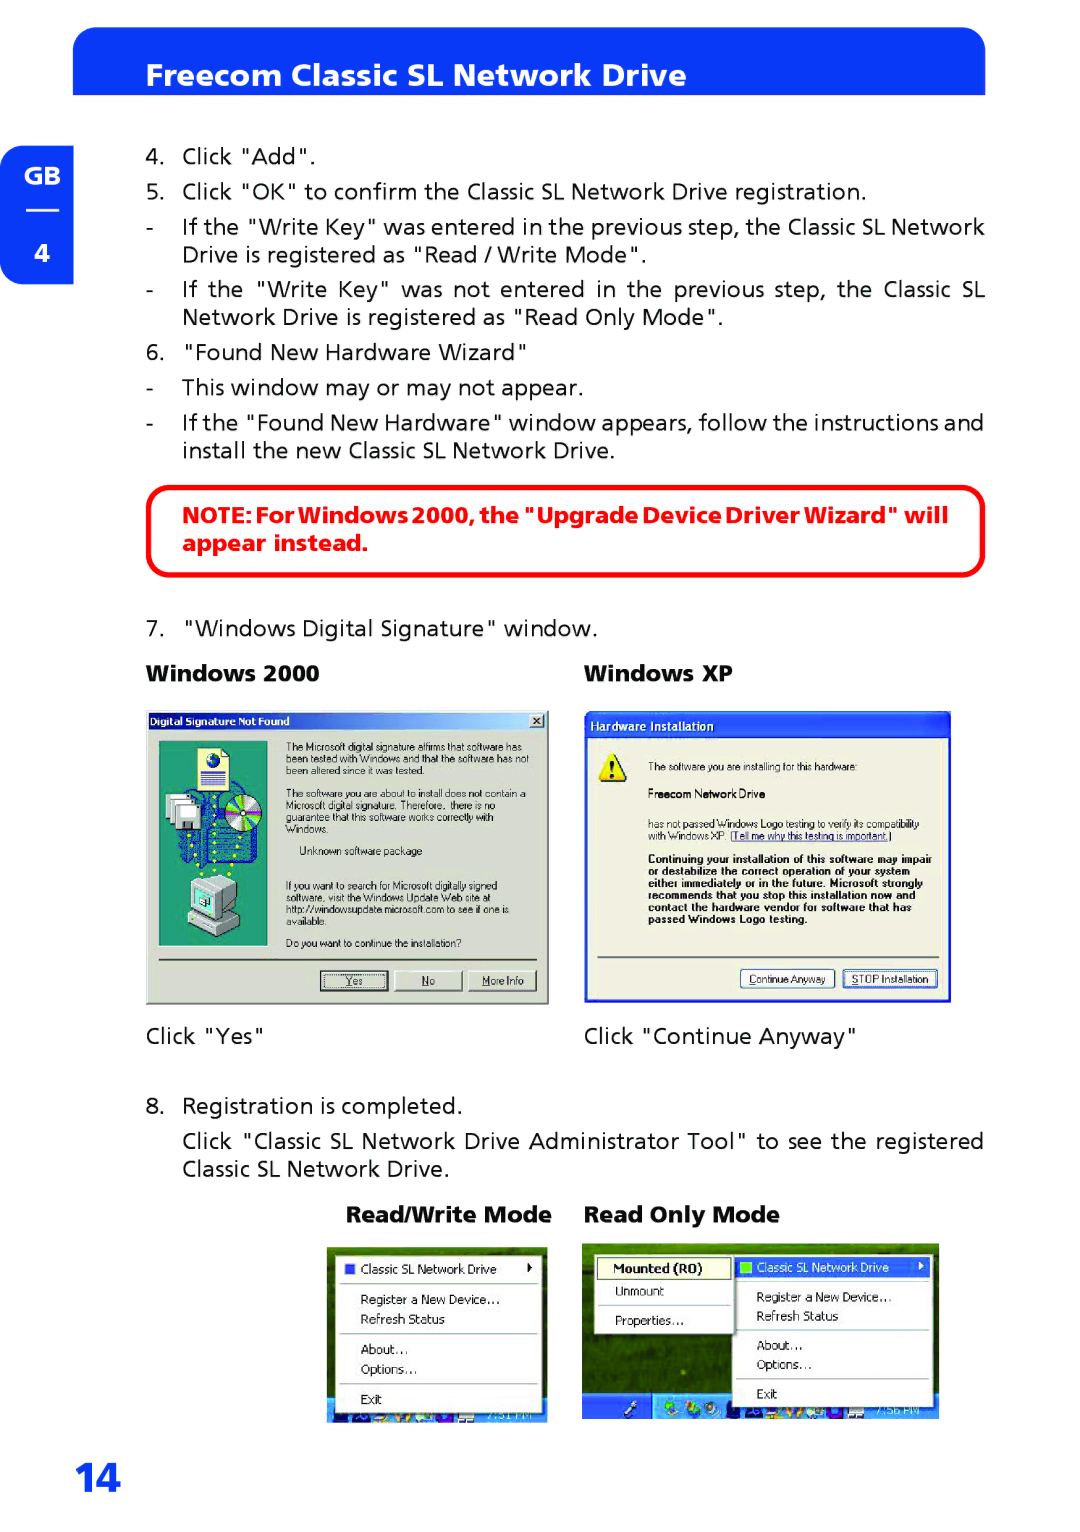
7. "Windows Digital Signature" window.
Windows 2000 | Windows XP |
Freecom Network Drive
Click "Yes" | Click "Continue Anyway" |
8.Registration is completed.
Click "Classic SL Network Drive Administrator Tool" to see the registered Classic SL Network Drive.
Read/Write Mode Read Only Mode
14
