Cold-swapping
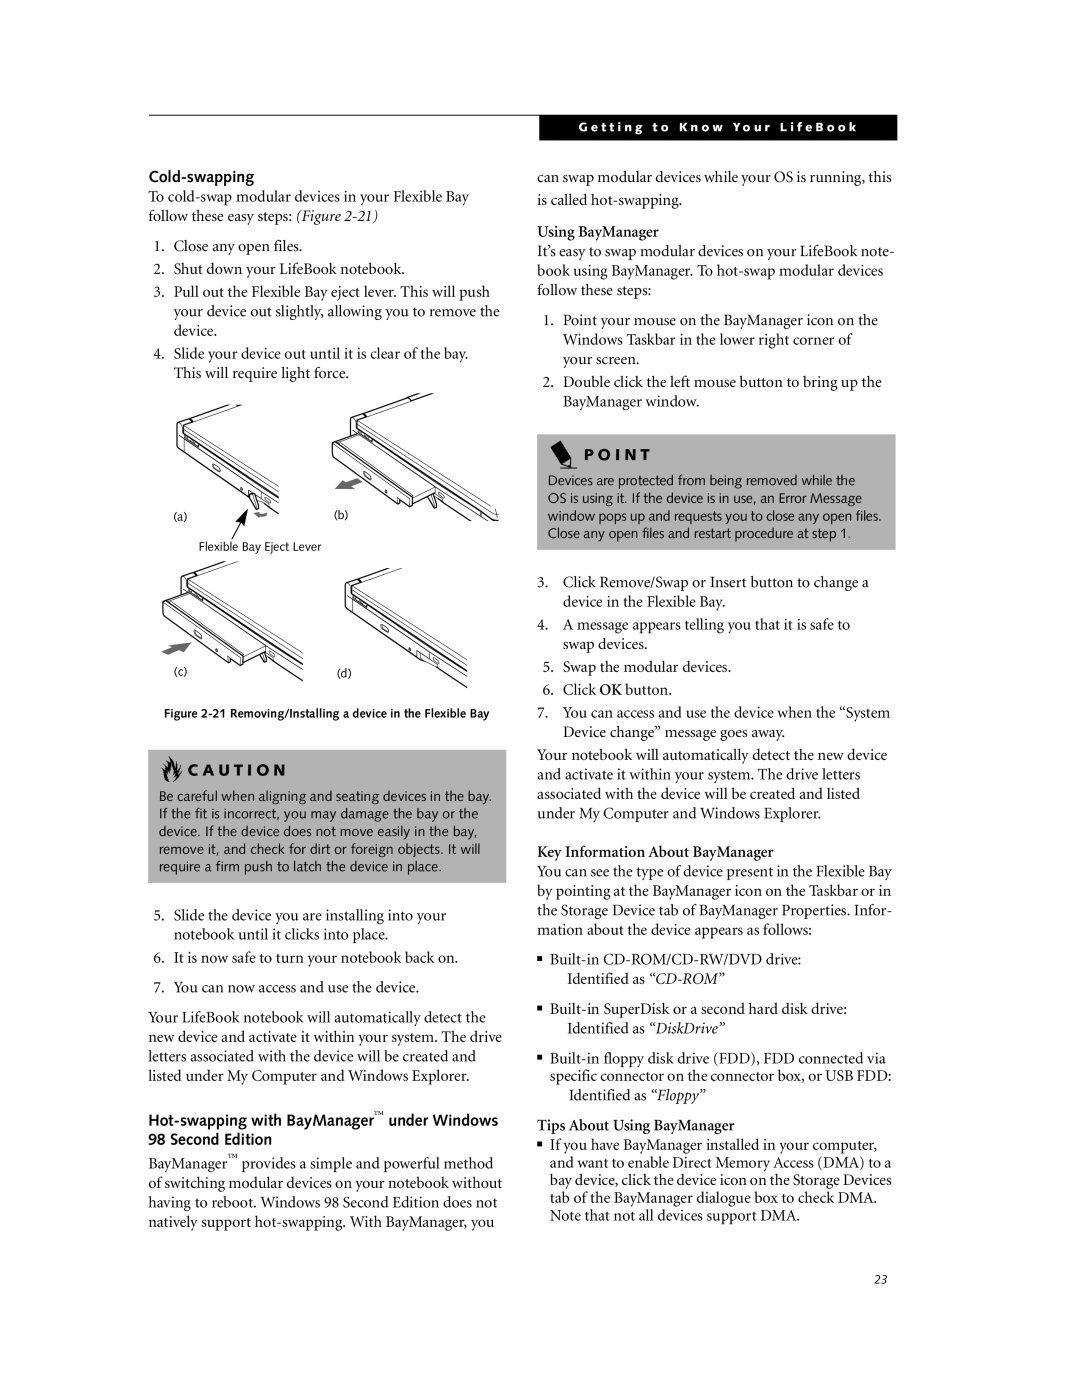
To
1.Close any open files.
2.Shut down your LifeBook notebook.
3.Pull out the Flexible Bay eject lever. This will push your device out slightly, allowing you to remove the device.
4.Slide your device out until it is clear of the bay. This will require light force.
(a)![]() (b)
(b)
Flexible Bay Eject Lever
G e t t i n g t o K n o w Y o u r L i f e B o o k
can swap modular devices while your OS is running, this
is called
Using BayManager
It’s easy to swap modular devices on your LifeBook note- book using BayManager. To
1.Point your mouse on the BayManager icon on the Windows Taskbar in the lower right corner of your screen.
2.Double click the left mouse button to bring up the BayManager window.
P O I N T
Devices are protected from being removed while the OS is using it. If the device is in use, an Error Message window pops up and requests you to close any open files. Close any open files and restart procedure at step 1.
(c) | (d) |
Figure 2-21 Removing/Installing a device in the Flexible Bay
 C A U T I O N
Be careful when aligning and seating devices in the bay. If the fit is incorrect, you may damage the bay or the device. If the device does not move easily in the bay, remove it, and check for dirt or foreign objects. It will require a firm push to latch the device in place.
5.Slide the device you are installing into your notebook until it clicks into place.
6.It is now safe to turn your notebook back on.
7.You can now access and use the device.
Your LifeBook notebook will automatically detect the new device and activate it within your system. The drive letters associated with the device will be created and listed under My Computer and Windows Explorer.
BayManager™ provides a simple and powerful method of switching modular devices on your notebook without having to reboot. Windows 98 Second Edition does not natively support
3.Click Remove/Swap or Insert button to change a device in the Flexible Bay.
4.A message appears telling you that it is safe to swap devices.
5.Swap the modular devices.
6.Click OK button.
7.You can access and use the device when the “System Device change” message goes away.
Your notebook will automatically detect the new device and activate it within your system. The drive letters associated with the device will be created and listed under My Computer and Windows Explorer.
Key Information About BayManager
You can see the type of device present in the Flexible Bay by pointing at the BayManager icon on the Taskbar or in the Storage Device tab of BayManager Properties. Infor- mation about the device appears as follows:
■
■
■
Identified as “Floppy”
Tips About Using BayManager
■If you have BayManager installed in your computer, and want to enable Direct Memory Access (DMA) to a bay device, click the device icon on the Storage Devices tab of the BayManager dialogue box to check DMA. Note that not all devices support DMA.
23
