Setting Up a BX600 Digital KVM Switch in Tiers | Installation |
To display the BX600 Digital KVM Switch Main dialog box by slot order:
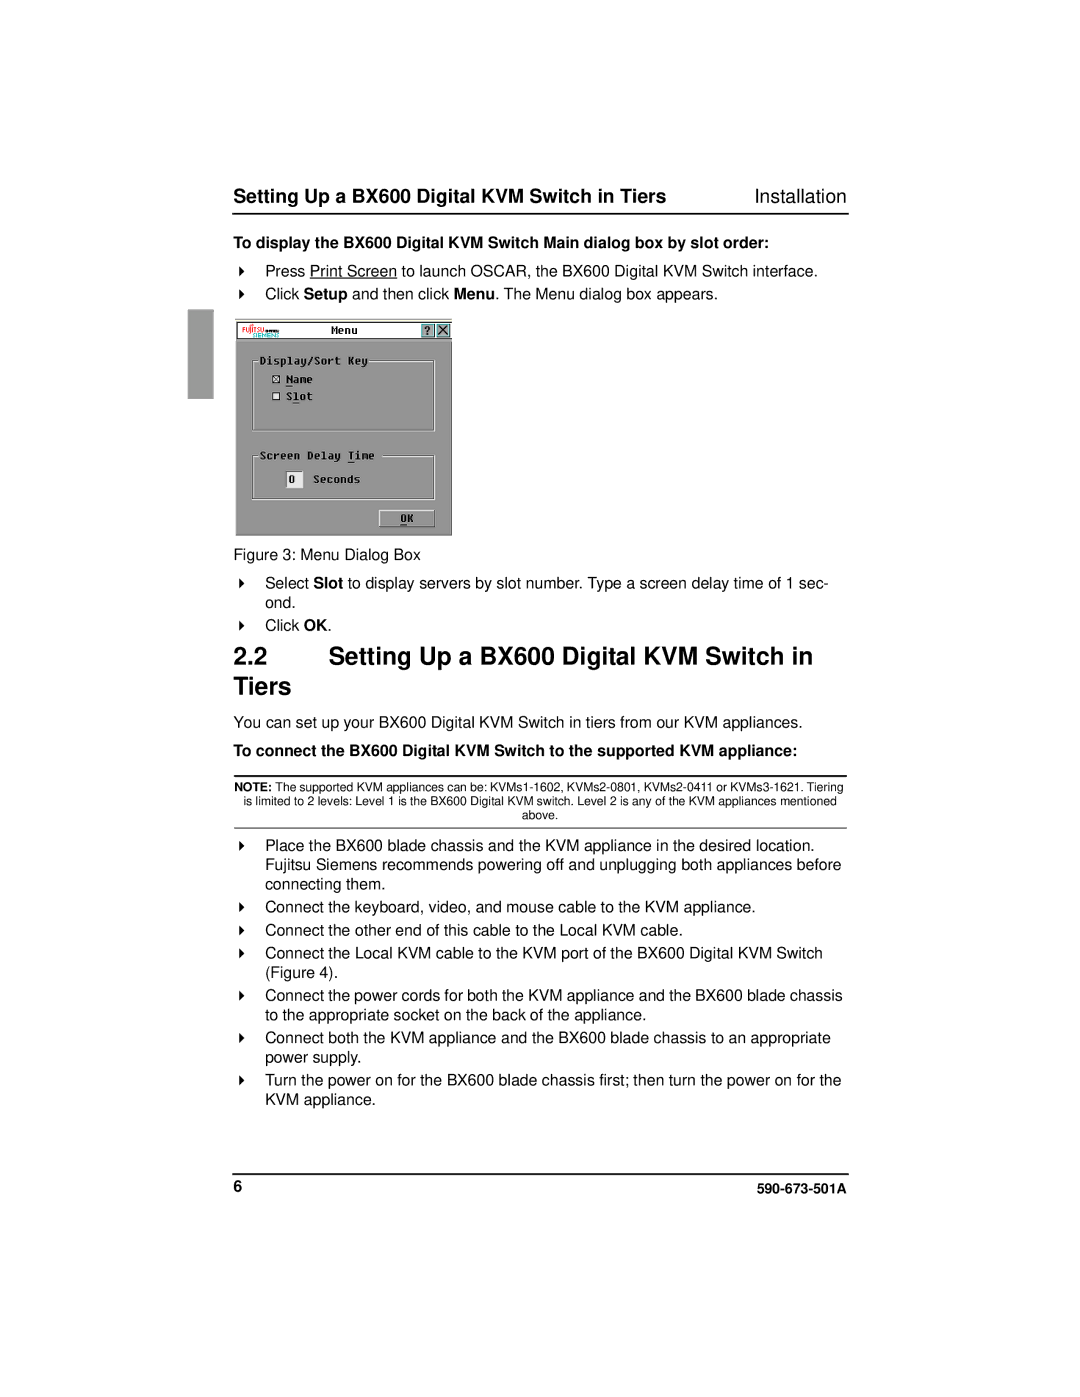
Press Print Screen to launch OSCAR, the BX600 Digital KVM Switch interface. Click Setup and then click Menu. The Menu dialog box appears.
Figure 3: Menu Dialog Box
Select Slot to display servers by slot number. Type a screen delay time of 1 sec- ond.
Click OK.
2.2Setting Up a BX600 Digital KVM Switch in
Tiers
You can set up your BX600 Digital KVM Switch in tiers from our KVM appliances.
To connect the BX600 Digital KVM Switch to the supported KVM appliance:
NOTE: The supported KVM appliances can be:
Place the BX600 blade chassis and the KVM appliance in the desired location. Fujitsu Siemens recommends powering off and unplugging both appliances before connecting them.
Connect the keyboard, video, and mouse cable to the KVM appliance. Connect the other end of this cable to the Local KVM cable.
Connect the Local KVM cable to the KVM port of the BX600 Digital KVM Switch (Figure 4).
Connect the power cords for both the KVM appliance and the BX600 blade chassis to the appropriate socket on the back of the appliance.
Connect both the KVM appliance and the BX600 blade chassis to an appropriate power supply.
Turn the power on for the BX600 blade chassis first; then turn the power on for the KVM appliance.
6 |