Installation | Setting Up a BX600 Digital KVM Switch in Tiers |
NOTE: If the KVM appliance is powered on before the BX600 blade chassis, it may result in only 1 blade sever
displaying in the KVM appliance interface instead of 10.
NOTE: In addition to the steps outlined above, some KVM appliances may require you to perform additional steps to ensure that the BX600 Digital KVM Switch blade servers appear in the KVM appliance interface. Please read your KVM appliance documentation for additional information.
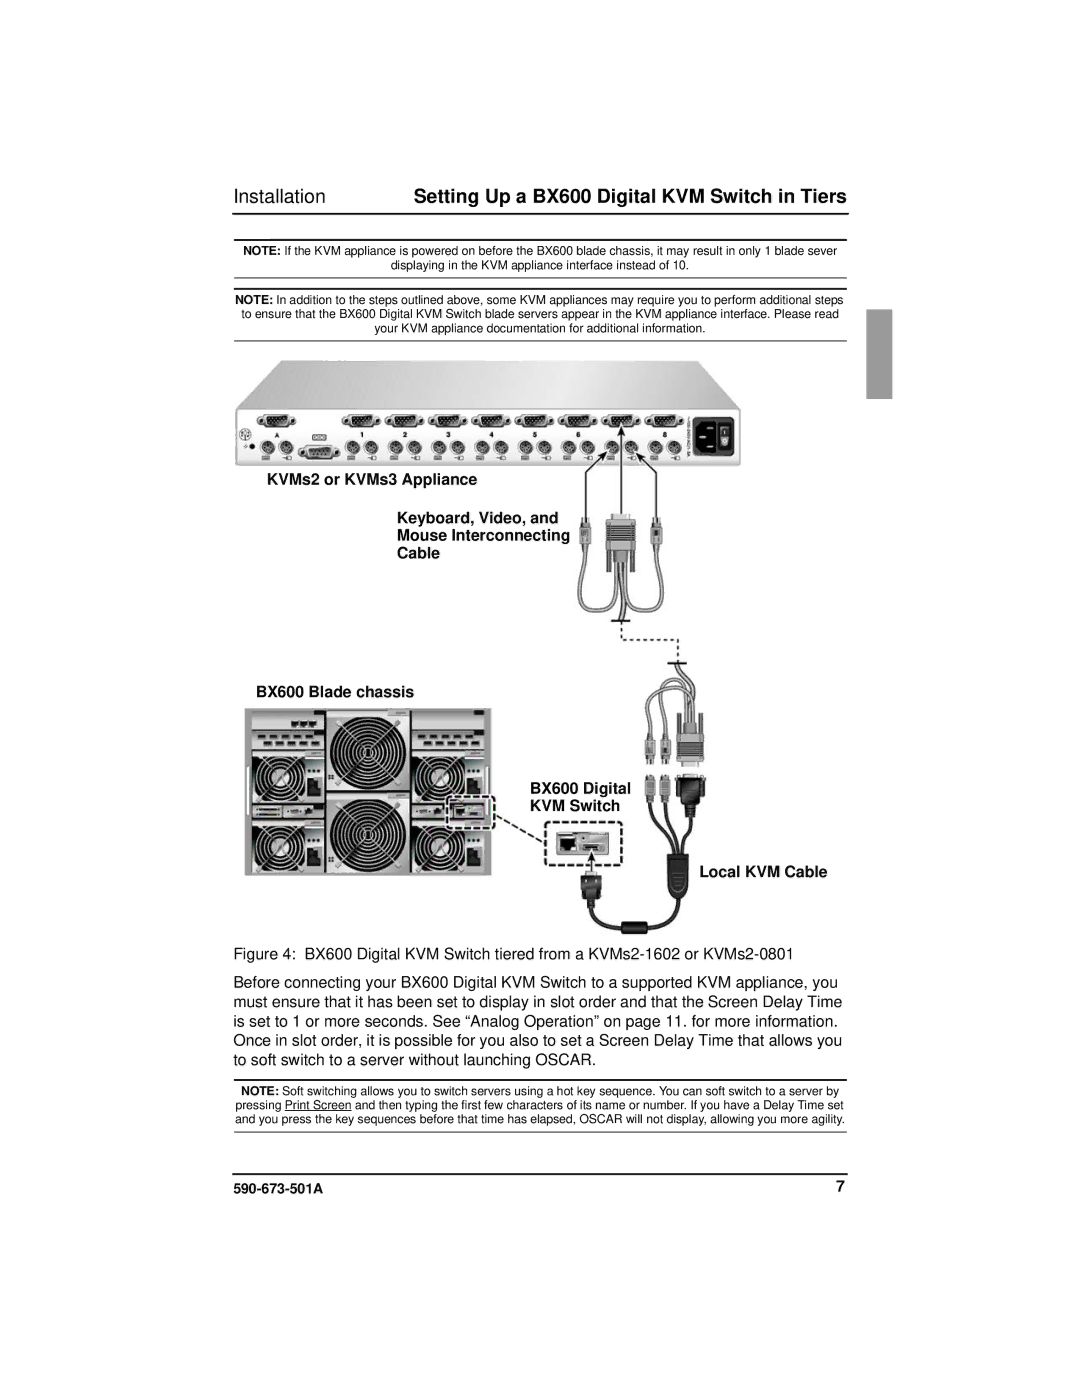
KVMs2 or KVMs3 Appliance
Keyboard, Video, and
Mouse Interconnecting
Cable
BX600 Blade chassis
BX600 Digital
KVM Switch
Local KVM Cable
Figure 4: BX600 Digital KVM Switch tiered from a KVMs2-1602 or KVMs2-0801
Before connecting your BX600 Digital KVM Switch to a supported KVM appliance, you must ensure that it has been set to display in slot order and that the Screen Delay Time is set to 1 or more seconds. See “Analog Operation” on page 11. for more information. Once in slot order, it is possible for you also to set a Screen Delay Time that allows you to soft switch to a server without launching OSCAR.
NOTE: Soft switching allows you to switch servers using a hot key sequence. You can soft switch to a server by pressing Print Screen and then typing the first few characters of its name or number. If you have a Delay Time set and you press the key sequences before that time has elapsed, OSCAR will not display, allowing you more agility.
7 |