1. MOUNTING
To mount the control unit separate from the monitor unit, the optional control unit separate kit is required. Mount the control unit same as the above procedure. See the outline drawing at the back of this manual to mount.
Type: | Code no.: | ||||
Type: | Code no.: | ||||
Name | Type |
| Code no. | Qty | Remarks |
|
|
|
|
| |
Cable | 1 | For 1.5 m cable | |||
|
|
|
|
| |
| For 5 m cable | ||||
|
| ||||
|
|
|
|
|
|
Bracket |
| 1 |
| ||
|
|
|
|
|
|
Mounting Plate |
| 1 |
| ||
|
|
|
|
|
|
5x20 |
| 2 |
| ||
|
|
|
|
|
|
Cosmetic Cap |
| 2 |
| ||
|
|
|
|
|
|
Hex. bolt | M4x12 |
| 4 |
| |
|
|
|
|
|
|
Flush mounting for control unit
Type:
Type:
Name | Type | Code No. | Qty |
| Remarks | |
|
|
|
|
|
|
|
Fixing metal | 1 |
|
|
| ||
|
|
|
|
|
|
|
5x20 | 4 |
|
|
| ||
|
|
|
|
|
|
|
Hex. bolt | M4x12 | 2 |
|
|
| |
|
|
|
|
|
| |
Cable assembly | 1 | 1.5 m | Select | |||
|
|
|
|
| one. | |
1 | 5 m |
| ||||
|
| |||||
|
|
| ||||
|
|
|
|
|
|
|
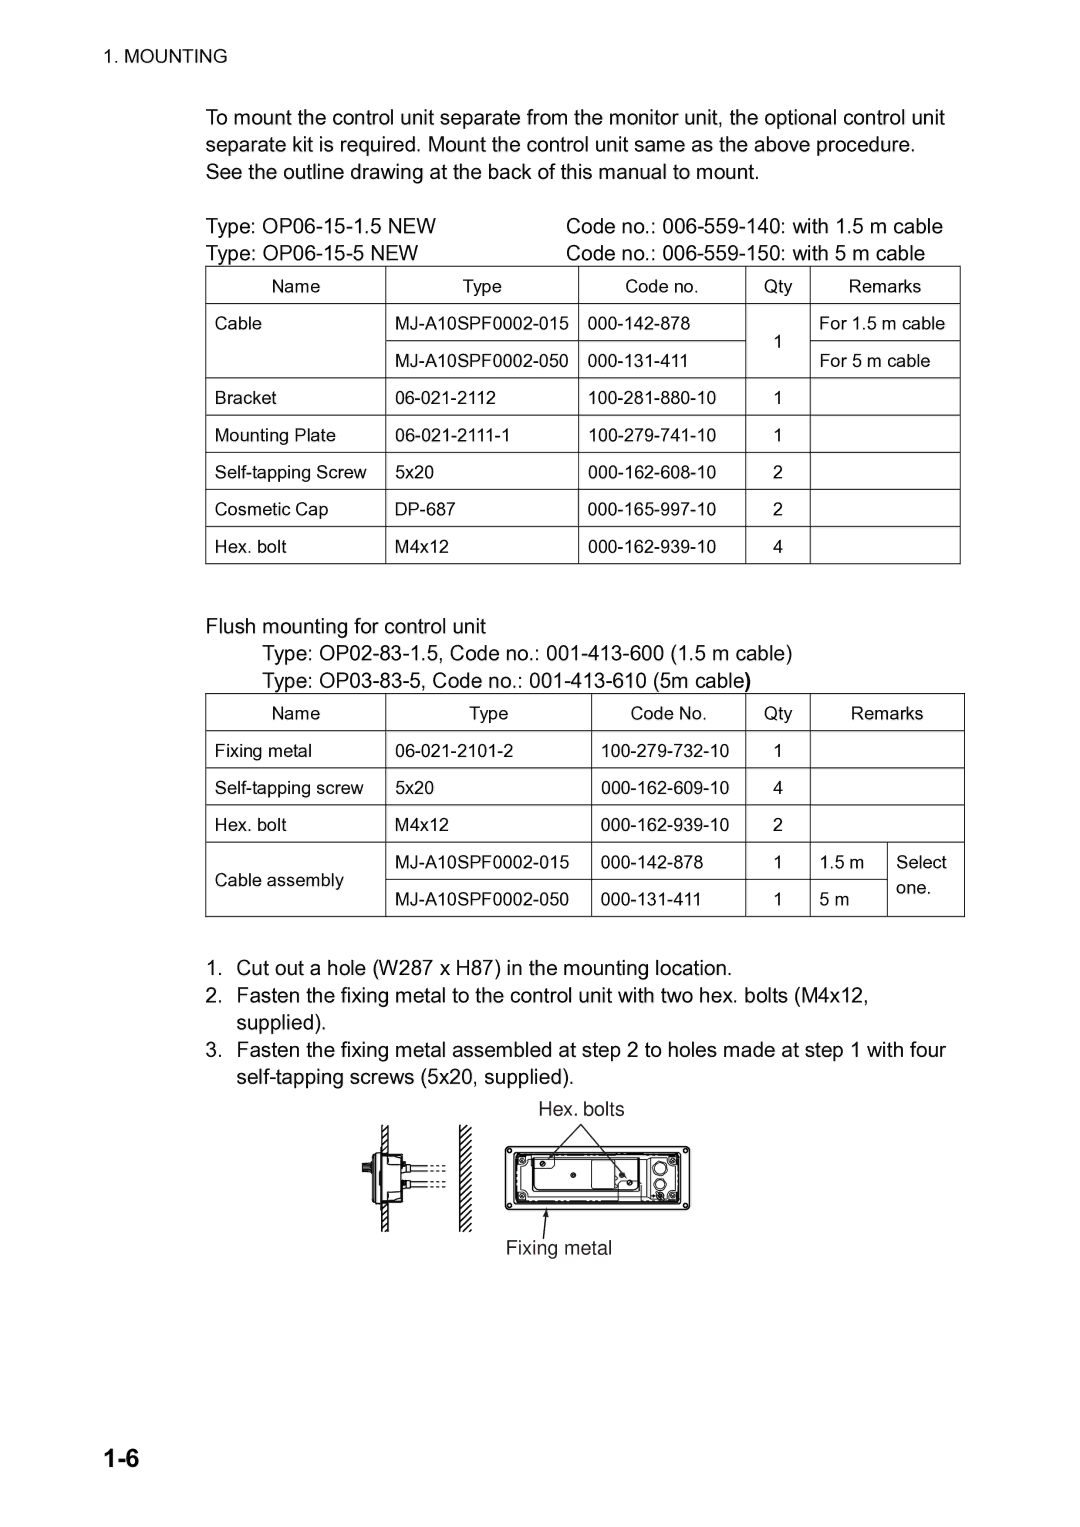
1.Cut out a hole (W287 x H87) in the mounting location.
2.Fasten the fixing metal to the control unit with two hex. bolts (M4x12, supplied).
3.Fasten the fixing metal assembled at step 2 to holes made at step 1 with four