Using the Power menu
The Power menu is a part of the BIOS Setup Utility that contains the power management settings and system timeouts. These settings are stored and saved even when the power is off. Use the Power menu to make changes to the system to improve the
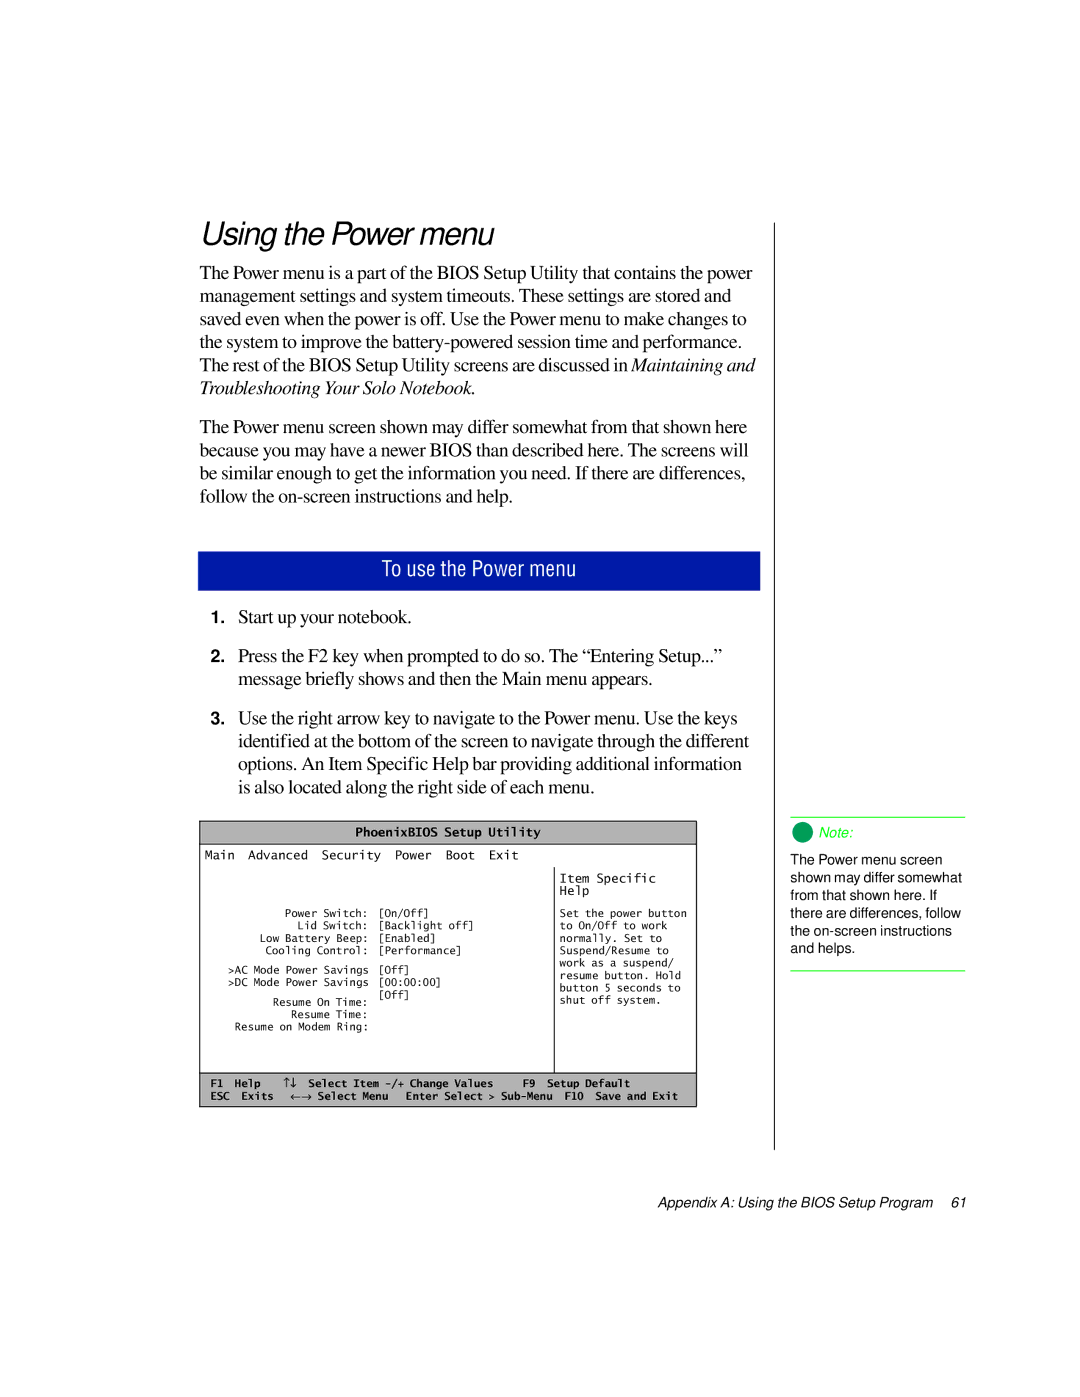
The Power menu screen shown may differ somewhat from that shown here because you may have a newer BIOS than described here. The screens will be similar enough to get the information you need. If there are differences, follow the
To use the Power menu
1.Start up your notebook.
2.Press the F2 key when prompted to do so. The “Entering Setup...” message briefly shows and then the Main menu appears.
3.Use the right arrow key to navigate to the Power menu. Use the keys identified at the bottom of the screen to navigate through the different options. An Item Specific Help bar providing additional information is also located along the right side of each menu.
PhoenixBIOS Setup Utility
![]() Note:
Note:
Main Advanced Security Power Boot Exit
Power Switch: | [On/Off] |
Lid Switch: | [Backlight off] |
Low Battery Beep: | [Enabled] |
Cooling Control: | [Performance] |
>AC Mode Power Savings | [Off] |
>DC Mode Power Savings | [00:00:00] |
Resume On Time: | [Off] |
Resume Time: |
|
Resume on Modem Ring: |
|
Item Specific Help
Set the power button to On/Off to work normally. Set to Suspend/Resume to work as a suspend/ resume button. Hold button 5 seconds to shut off system.
The Power menu screen shown may differ somewhat from that shown here. If there are differences, follow the
F1 | Help | −↓ Select Item | F9 Setup Default |
ESC | Exits | ←→ Select Menu Enter Select > | |
|
|
|
|
