PhoenixBIOS Setup Utility
Main Advanced Security Power Boot Exit
![]() Note:
Note:
The Setup menu screen
System Time: | [HH:MM:SS] |
System Date: | [MM/DD/YYYY] |
Floppy Disk Drive A: | [1.44MB/1.25 MB, 3 1/2”] |
Floppy Disk Drive B: | [Disabled] |
Primary Master | (NNN MB) |
Secondary Master | |
Memory Cache: | Enabled |
System Memory: | NNN MB |
System Information |
|
Num lock: | [Off] |
Display Device: | [Simultaneous] |
Text Mode Expnasion: | [Enabled] |
Graphics Mode Expansion: | [Enabled] |
QuickBoot Mode: | [Enabled] |
[Disabled] |
Item Specific Help
shown may differ somewhat from that shown here. If there are differences, follow the
F1 | Help | −↓ Select Item | F9 Setup Default |
ESC | Exits | ←→ Select Menu Enter Select > | |
|
|
|
|
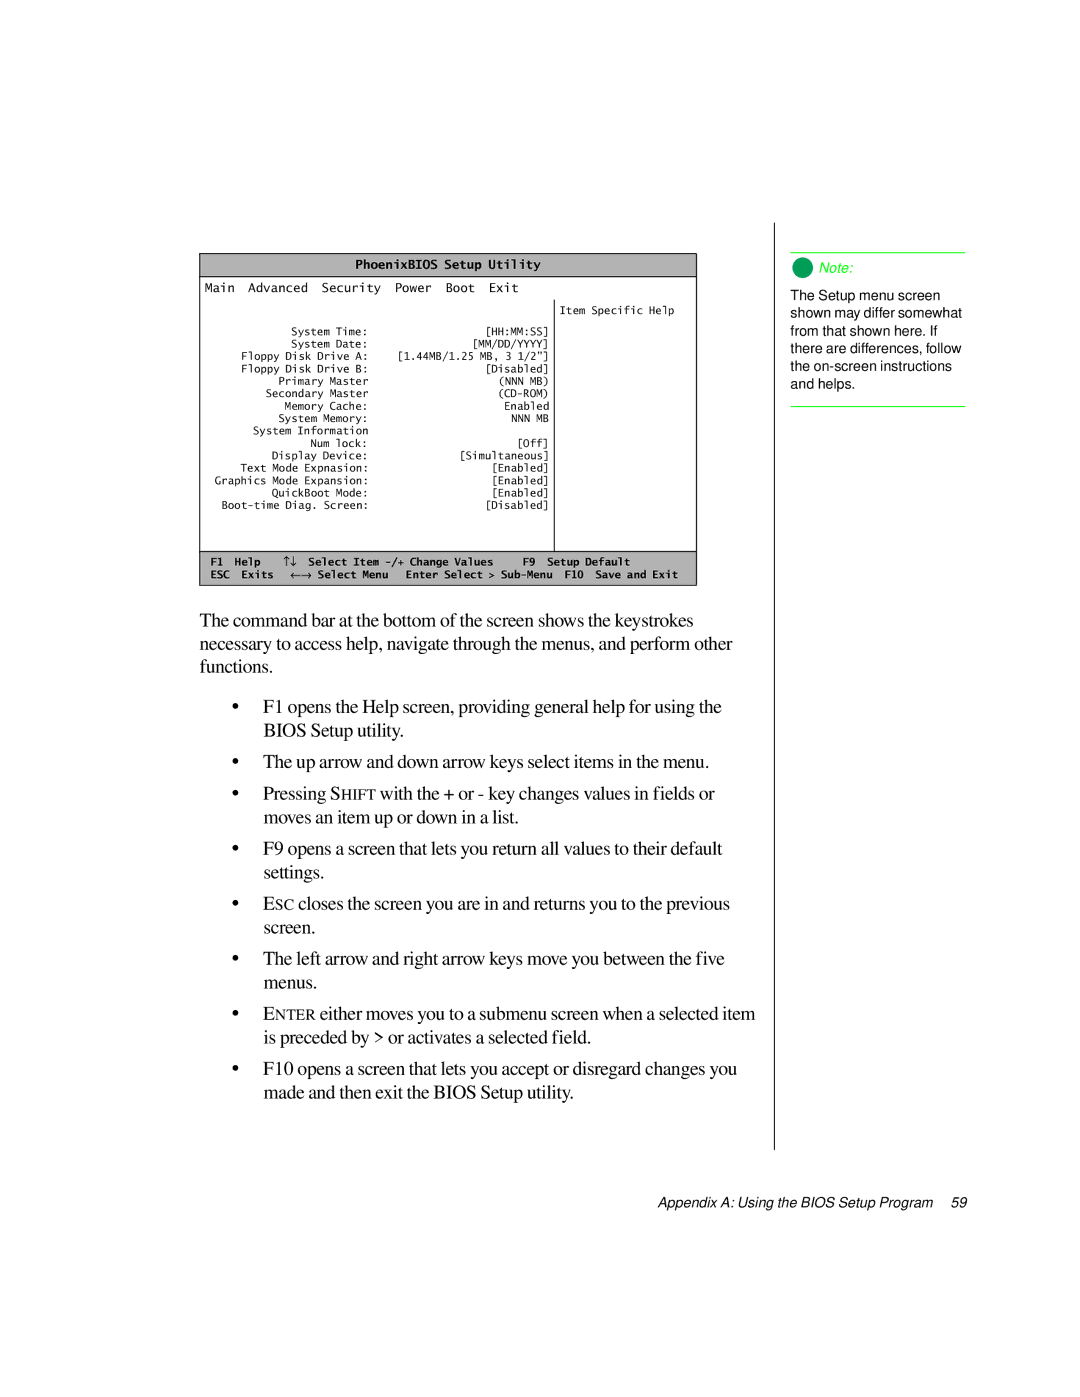
The command bar at the bottom of the screen shows the keystrokes necessary to access help, navigate through the menus, and perform other functions.
•F1 opens the Help screen, providing general help for using the BIOS Setup utility.
•The up arrow and down arrow keys select items in the menu.
•Pressing SHIFT with the + or - key changes values in fields or moves an item up or down in a list.
•F9 opens a screen that lets you return all values to their default settings.
•ESC closes the screen you are in and returns you to the previous screen.
•The left arrow and right arrow keys move you between the five menus.
•ENTER either moves you to a submenu screen when a selected item is preceded by > or activates a selected field.
•F10 opens a screen that lets you accept or disregard changes you made and then exit the BIOS Setup utility.