5.1 Disk Analysis Screen
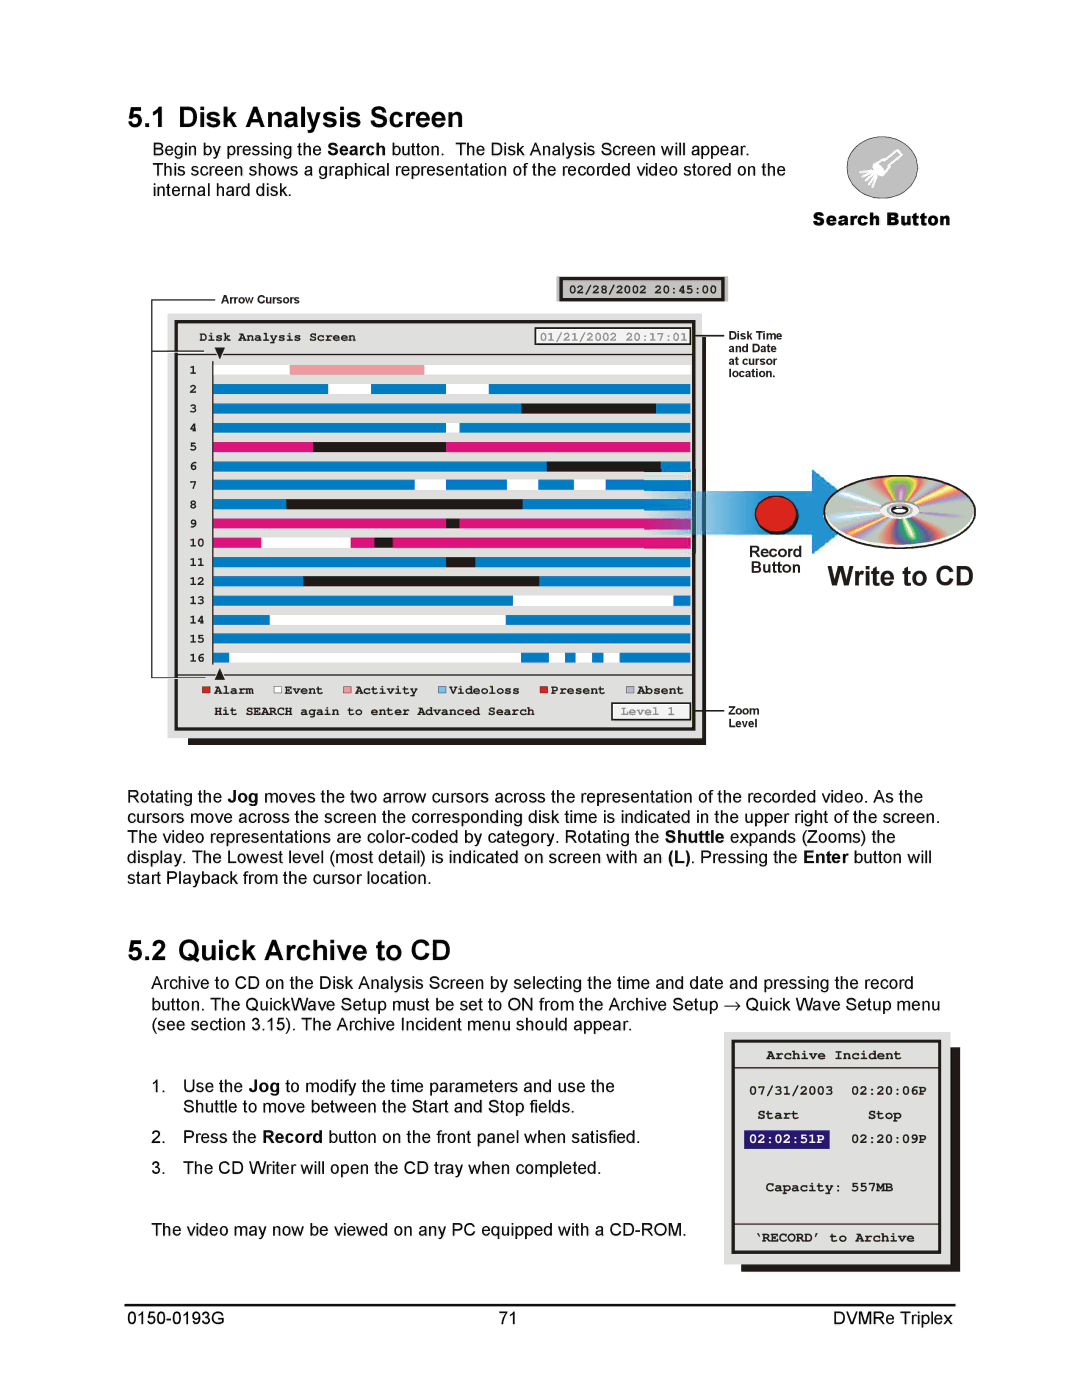
Begin by pressing the Search button. The Disk Analysis Screen will appear. This screen shows a graphical representation of the recorded video stored on the internal hard disk.
Search Button
02/28/2002 20:45:00
Arrow Cursors
| Disk Analysis Screen | 01/21/2002 20:17:01 |
|
| Disk Time | |
|
|
| ||||
|
|
|
|
|
| and Date |
|
|
|
|
|
| |
| 1 |
|
|
|
| at cursor |
|
|
|
|
| location. | |
2
3
4
5
6
7
8
9
10 | Record |
|
11 |
| |
Button | Write to CD | |
12 |
| |
13 |
|
|
14
15
16
Alarm | Event | Activity | Videoloss | Present | Absent |
|
|
Hit SEARCH again to enter Advanced Search |
| Level 1 |
| Zoom | |||
|
| ||||||
|
|
|
|
|
|
| Level |
Rotating the Jog moves the two arrow cursors across the representation of the recorded video. As the cursors move across the screen the corresponding disk time is indicated in the upper right of the screen. The video representations are
5.2 Quick Archive to CD
Archive to CD on the Disk Analysis Screen by selecting the time and date and pressing the record button. The QuickWave Setup must be set to ON from the Archive Setup → Quick Wave Setup menu (see section 3.15). The Archive Incident menu should appear.
1.Use the Jog to modify the time parameters and use the Shuttle to move between the Start and Stop fields.
2.Press the Record button on the front panel when satisfied.
3.The CD Writer will open the CD tray when completed.
The video may now be viewed on any PC equipped with a
Archive Incident
07/31/2003 02:20:06P
Start Stop 02:02:51P 02:20:09P
Capacity: 557MB
‘RECORD’ to Archive
71 | DVMRe Triplex |
