Instructions

Using the clock and timer.

Not all features are on all models.

Instructions Safety

Make sure the clock is set to the correct time of day.

To Set the Clock

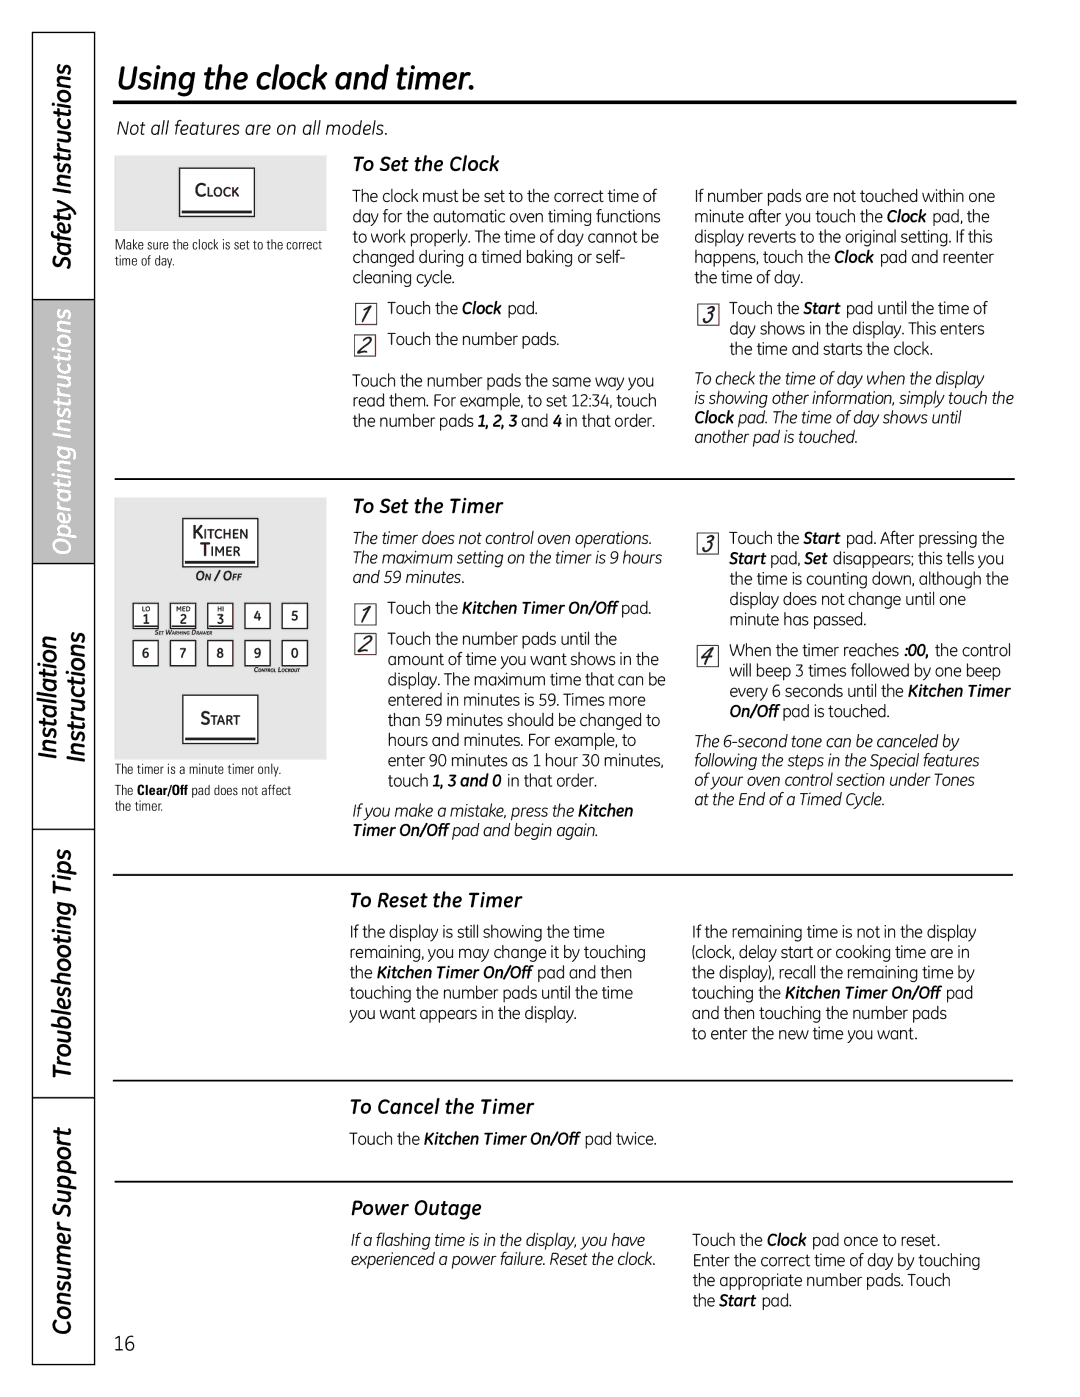
The clock must be set to the correct time of day for the automatic oven timing functions to work properly. The time of day cannot be changed during a timed baking or self- cleaning cycle.

Touch the Clock pad. Touch the number pads.

Touch the number pads the same way you read them. For example, to set 12:34, touch the number pads 1, 2, 3 and 4 in that order.

If number pads are not touched within one minute after you touch the Clock pad, the display reverts to the original setting. If this happens, touch the Clock pad and reenter the time of day.

Touch the Start pad until the time of day shows in the display. This enters the time and starts the clock.

To check the time of day when the display

is showing other information, simply touch the Clock pad. The time of day shows until another pad is touched.

Operating

Installation Instructions

The timer is a minute timer only.

The Clear/Off pad does not affect the timer.

To Set the Timer

The timer does not control oven operations. The maximum setting on the timer is 9 hours and 59 minutes.

Touch the Kitchen Timer On/Off pad.

Touch the number pads until the amount of time you want shows in the display. The maximum time that can be entered in minutes is 59. Times more than 59 minutes should be changed to hours and minutes. For example, to enter 90 minutes as 1 hour 30 minutes, touch 1, 3 and 0 in that order.

If you make a mistake, press the Kitchen Timer On/Off pad and begin again.

Touch the Start pad. After pressing the Start pad, Set disappears; this tells you the time is counting down, although the display does not change until one minute has passed.

When the timer reaches :00, the control will beep 3 times followed by one beep every 6 seconds until the Kitchen Timer On/Off pad is touched.

The 6-second tone can be canceled by following the steps in the Special features of your oven control section under Tones at the end of a Timed Cycle.

Troubleshooting Tips

To Reset the Timer

If the display is still showing the time remaining, you may change it by touching the Kitchen Timer On/Off pad and then touching the number pads until the time you want appears in the display.

If the remaining time is not in the display (clock, delay start or cooking time are in the display), recall the remaining time by touching the Kitchen Timer On/Off pad and then touching the number pads

to enter the new time you want.

Consumer Support

To Cancel the Timer

Touch the Kitchen Timer On/Off pad twice.

Power Outage

If a flashing time is in the display, you have

Touch the Clock pad once to reset.

experienced a power failure. Reset the clock.

Enter the correct time of day by touching


the appropriate number pads. Touch


the Start pad.

16

Page 16
Image 16
GE JGB820, JGB295SERSS, JGB805, JGB800, JGB810 manual Using the clock and timer, Consumer Support

JGB810, JGB820, JGB800, JGB805, JGB295SERSS specifications

The GE JGB295, JGB295SERSS, JGB805, JGB800, and JGB820 are notable models from General Electric’s line of home appliances, specifically designed to enhance the cooking experience in modern kitchens. Each model boasts distinct features and technologies that cater to varying culinary needs while maintaining efficiency and convenience.

The GE JGB295 is a versatile range that combines both gas cooking and electric baking functions. With its spacious oven capacity, it provides room for multitasking and preparing multiple dishes simultaneously. One of its main features is the powerful convection cooking system, which circulates heat for even cooking results, allowing food to bake uniformly.

The JGB295SERSS variant, an upgraded version of the JGB295, includes the same underlying features but is enhanced with a sleek stainless steel finish, giving it a more modern and professional look. This model also comes equipped with advanced safety features, including a gas shutoff valve and a child lock option to ensure peace of mind during cooking.

The GE JGB805 is another standout model focused on efficiency and performance. With its dual fuel configuration, it combines the advantages of gas burners and electric ovens. The JGB805 features edge-to-edge cooking surfaces, maximizing space and providing an easy-to-clean design. Its Wi-Fi connectivity enables remote control via smartphone, allowing users to monitor cooking progress without being tied to the kitchen.

Meanwhile, the JGB800 model emphasizes user-friendly design through its intuitive controls and smart settings. It features a programmable timer and various cooking modes tailored for different culinary styles. Additionally, its self-cleaning oven function minimizes maintenance efforts, making it a practical choice.

Lastly, the GE JGB820 integrates advanced technology with a focus on enhancing cooking precision. This model features a seamless cooktop for easy cleanup and a heavy-duty oven rack that glides smoothly, accommodating a variety of dish sizes. Its Air Fry mode allows for healthier cooking options, providing crispy results without compromising on flavor.

Together, these GE models represent a commitment to quality, innovation, and convenience, making them valuable additions to any kitchen. Whether it’s baking, roasting, or frying, these ranges are designed to meet diverse cooking needs while ensuring efficiency and ease of use.