5.To prevent the workpiece slipping off the dead center tip, center drill the tailstock end of the workpiece with a tapered hole that matches the tip of the dead center.
6.Seat the center into the quill, position the tailstock so that the tip of the center presses against the workpiece enough to hold it in place, then tighten the tailstock lock lever.
7.Rotate the tailstock handwheel clockwise to feed the center farther into the workpiece until it is snug, then tighten the quill lock lever.
Note: Do not overly force the center into the workpiece with the
8.To remove the center from the quill, hold onto it with one hand, then rotate the tailstock handwheel counterclockwise to draw the quill back into the casting until the center releas- es.
Offsetting Tailstock
The tailstock can be positioned offset from the spindle center line to cut a taper. When the tailstock is moved toward the operator from the center line, the machined end of the workpiece nearest the tailstock will be smaller in diameter. Conversely, position the tailstock away from the operator from the center line to machine a taper near the spindle.
Note: To return the tailstock to the center position, perform the Tailstock Alignment procedure on the next page.
Tools Needed | Qty |
Hex Wrench 6mm. | ............................................. 1 |
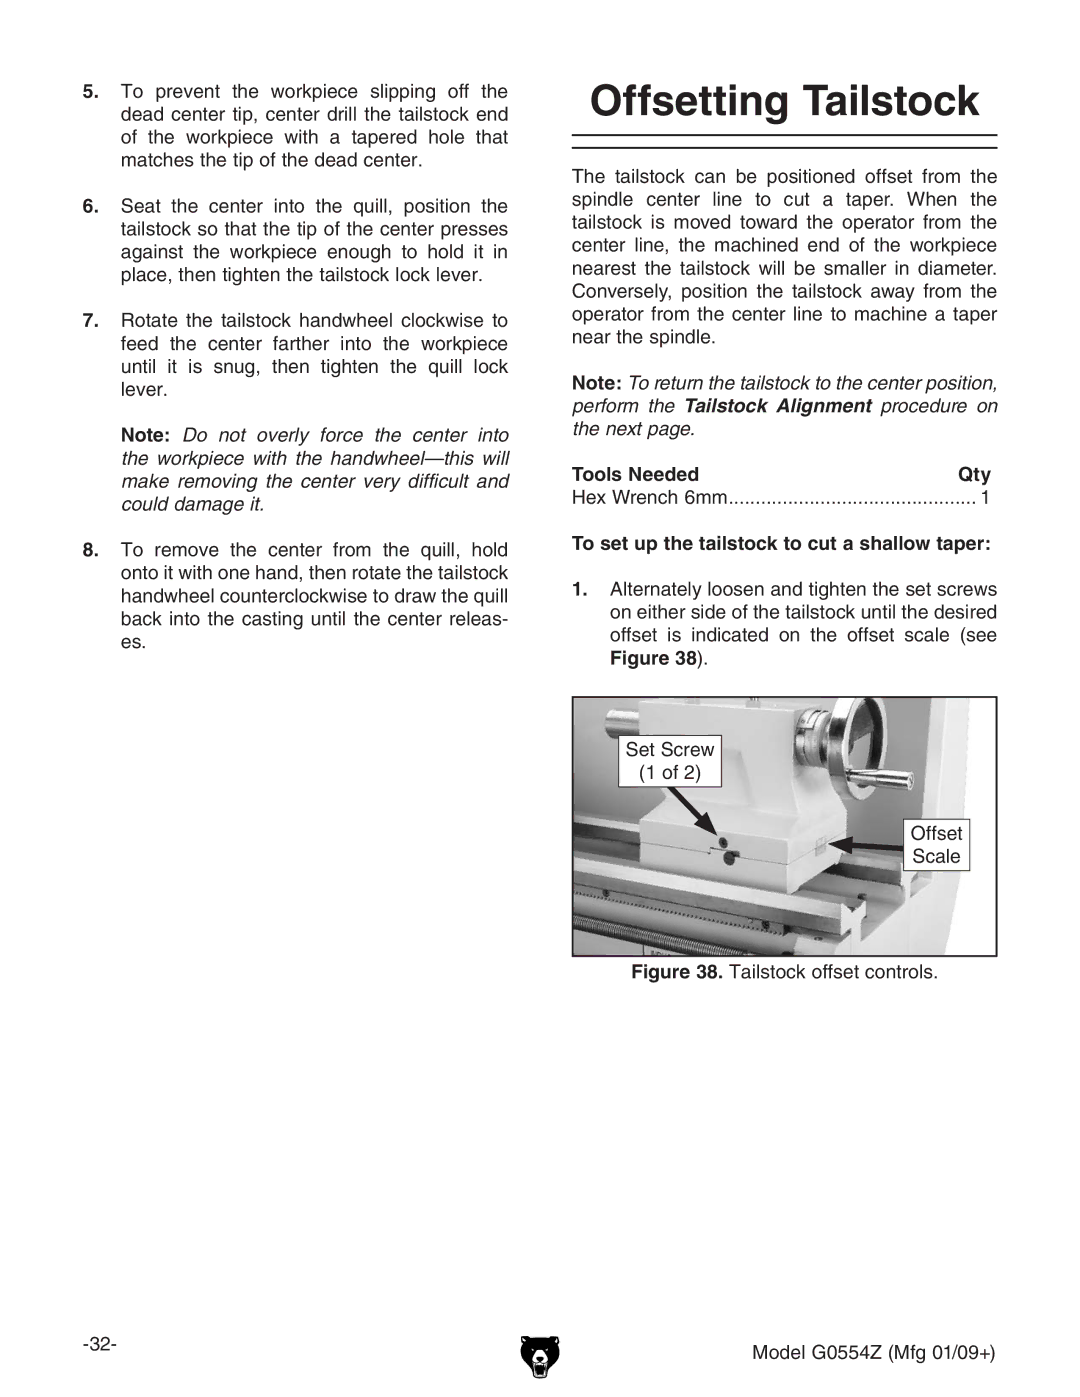
To set up the tailstock to cut a shallow taper:
1.Alternately loosen and tighten the set screws on either side of the tailstock until the desired offset is indicated on the offset scale (see
Figure 38).
Set Screw
(1 of 2)
Offset
![]() Scale
Scale
Figure 38. Tailstock offset controls.
Model G0554Z (Mfg 01/09+) | |
|
