Tensioning/

Replacing V-Belts

NOTICE

After the first 16 hours of use, the V-belts will stretch and seat into the pulley grooves. The V-belts must be properly re-tensioned after this period to avoid severely reducing their useful life.

To ensure efficient transfer of power to the spin- dle, make sure the V-belts are always properly tensioned and in good condition.

If a V-belt is worn, cracked, or damaged, replace both V-belts at the same time to ensure belt ten- sion is even between them, which reduces the risk of premature wear on either belt.

Tools Needed

Qty

Phillips Screwdriver #2

1

Hex Wrench 5mm

1

Wrench or Deep Socket 24mm

1

Tensioning V-Belts

1.DISCONNECT LATHE FROM POWER!

2.Open the left side door, then remove the left and rear lower access panels.

3.Refer to Figure 81 to help identify the loca- tions of the three motor adjustment hex nuts and bolts.

Adjustment

Hex Nuts & Bolts

Motor Mounting Plate

Figure 81. Motor adjustment hex nuts and bolts.

Model G0554Z (Mfg 01/09+)

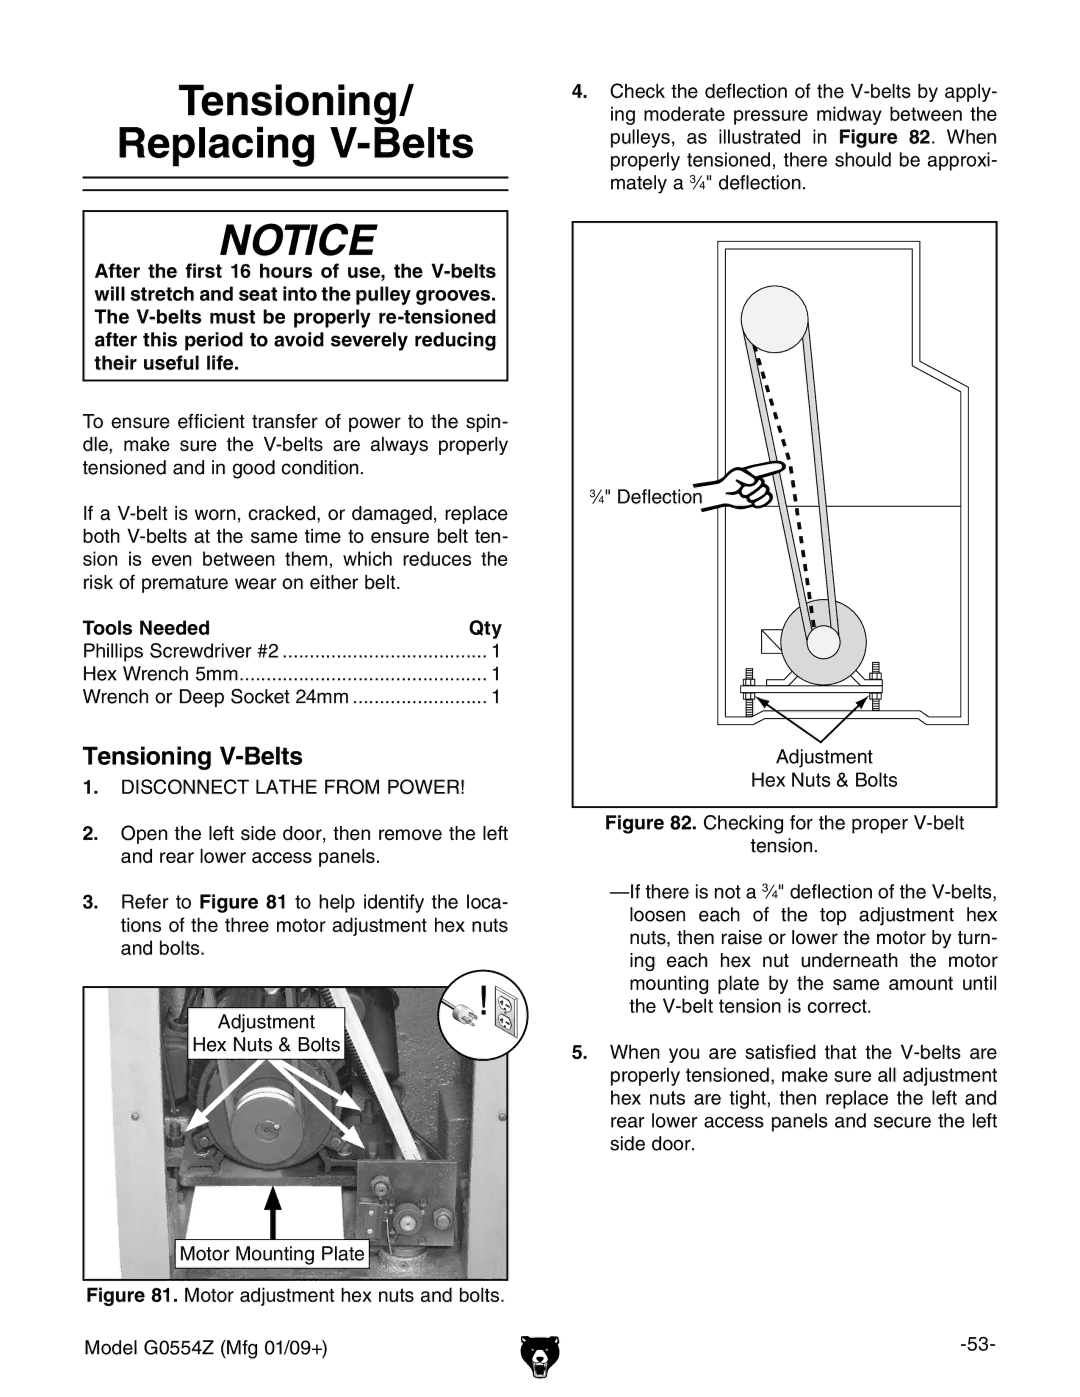
4.Check the deflection of the V-belts by apply- ing moderate pressure midway between the pulleys, as illustrated in Figure 82. When properly tensioned, there should be approxi- mately a 34" deflection.

34" Deflection

Adjustment

Hex Nuts & Bolts

Figure 82. Checking for the proper V-belt

tension.

—If there is not a 34" deflection of the V-belts, loosen each of the top adjustment hex nuts, then raise or lower the motor by turn- ing each hex nut underneath the motor mounting plate by the same amount until the V-belt tension is correct.

5.When you are satisfied that the V-belts are properly tensioned, make sure all adjustment hex nuts are tight, then replace the left and rear lower access panels and secure the left side door.

-53-

Page 55
Image 55
Grizzly G0554Z owner manual Tensioning Replacing V-Belts, Tensioning V-Belts