7. Repeat for inlet manifold.
Reassembly
![]() Lubricate clamps, clamping surfaces, and gaskets with waterproof, sanitary lubricant.
Lubricate clamps, clamping surfaces, and gaskets with waterproof, sanitary lubricant.
1.Reassemble inlet and outlet fluid manifolds in reverse order. See step 6. Tighten clamps handtight.
2.Reassemble ball or flapper check assembly in reverse order. See step 5. Tighten clamps handtight.
![]() For flapper check, make sure flapper check (251) is placed properly in housing (248) groove and flapper retainer (253) is aligned with housing groove. Ensure that the flapper check moves freely.
For flapper check, make sure flapper check (251) is placed properly in housing (248) groove and flapper retainer (253) is aligned with housing groove. Ensure that the flapper check moves freely.
Service
Diaphragm Repair
Tools Required
•Torque wrench
•5/8 in. wrench
•19 mm open end wrench
•
•
•Spanner wrench
Disassembly
1.Relieve the pressure.
2.Remove the manifolds and disassemble the ball check valves as explained on page 19.
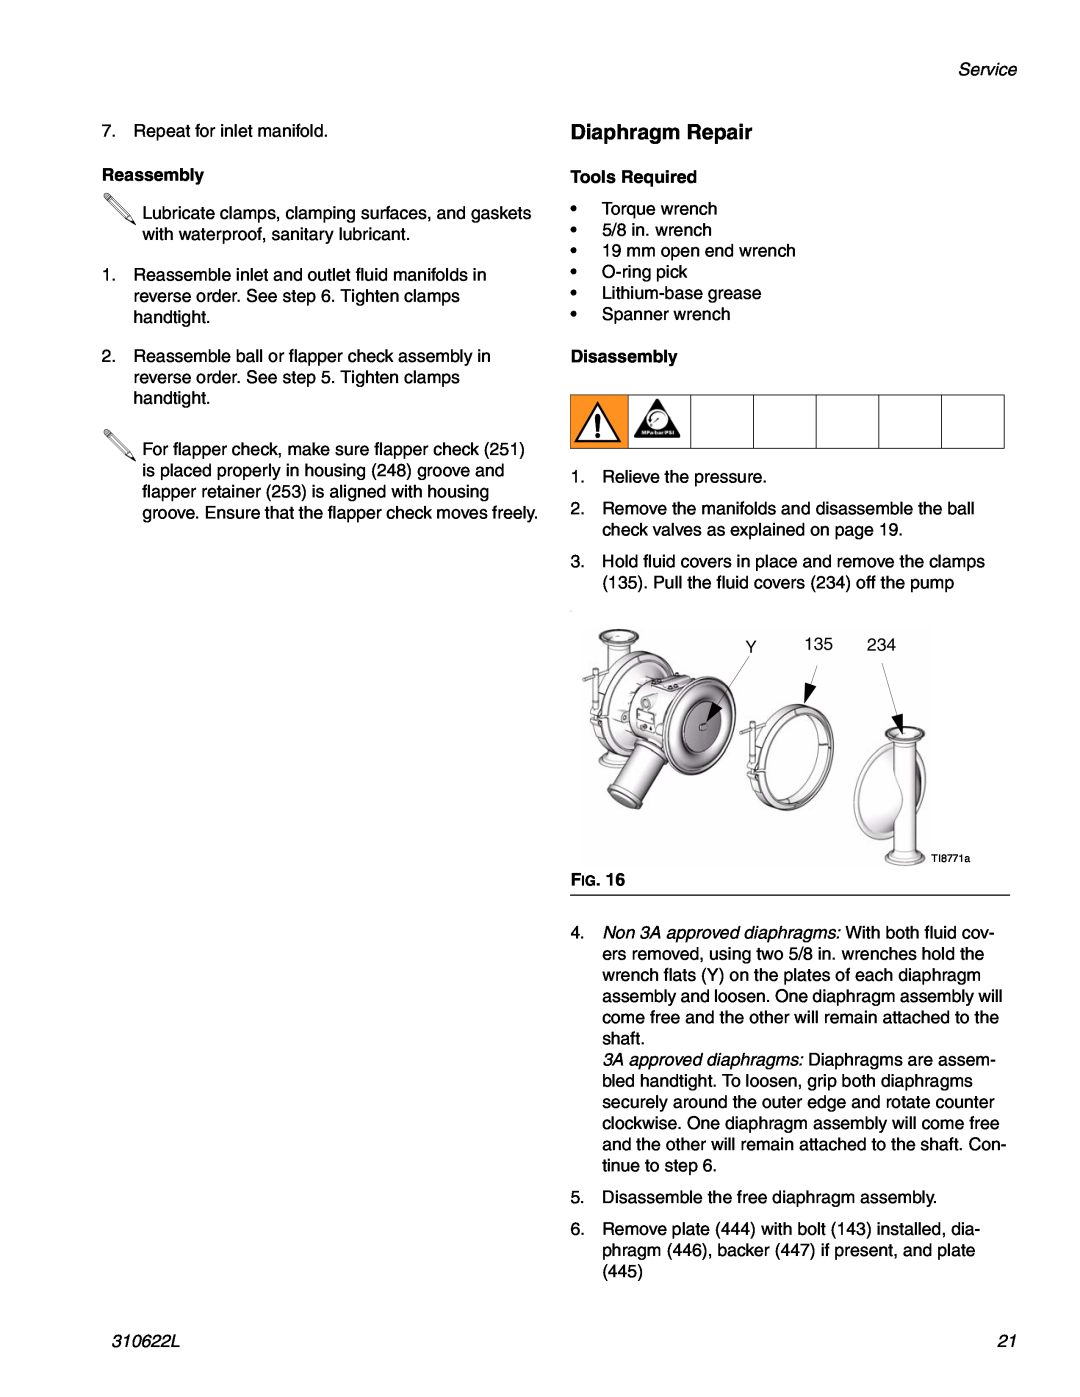
3.Hold fluid covers in place and remove the clamps (135). Pull the fluid covers (234) off the pump
.
Y 135 234
TI8771a
FIG. 16
4.Non 3A approved diaphragms: With both fluid cov- ers removed, using two 5/8 in. wrenches hold the wrench flats (Y) on the plates of each diaphragm assembly and loosen. One diaphragm assembly will come free and the other will remain attached to the shaft.
3A approved diaphragms: Diaphragms are assem- bled handtight. To loosen, grip both diaphragms securely around the outer edge and rotate counter clockwise. One diaphragm assembly will come free and the other will remain attached to the shaft. Con- tinue to step 6.
5.Disassemble the free diaphragm assembly.
6.Remove plate (444) with bolt (143) installed, dia- phragm (446), backer (447) if present, and plate (445)
310622L | 21 |