15 Appliance Setup
WARNING! Risk of Fire and Electric Shock! Use ONLY Hearth & Home
A. Remove Glass Assembly
WARNING! Risk of Asphyxiation! Handle fixed glass assembly with care. Inspect the gasket to ensure it is undamaged and inspect the glass for cracks, chips or scratches.
•DO NOT strike, slam or scratch glass.
•DO NOT operate fireplace with glass removed, cracked, broken or scratched.
•Replace as a complete assembly.
The glass assembly can be removed from the unit by pulling and releasing the glass latches. There are three across the top, three across the bottom, and one in the center of each side.
The glass assembly is heavy. Use caution when remov- ing.
Glass |
Latches |
Figure 15.1 Glass Assembly Removal
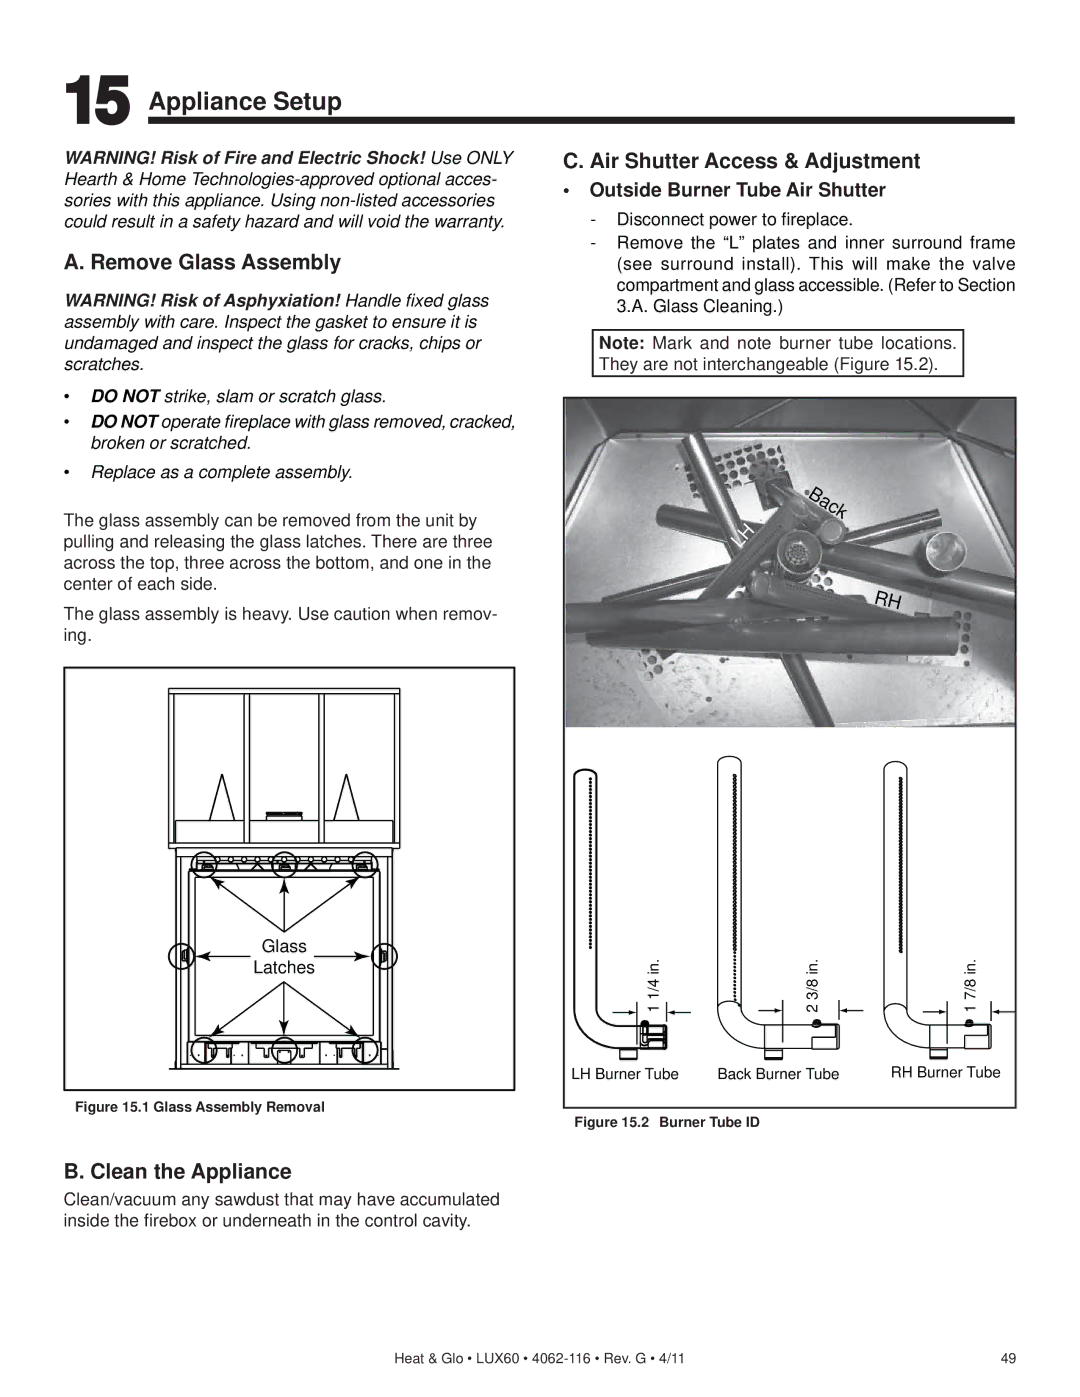
C. Air Shutter Access & Adjustment
•Outside Burner Tube Air Shutter
-Disconnect power to fireplace.
-Remove the “L” plates and inner surround frame (see surround install). This will make the valve compartment and glass accessible. (Refer to Section 3.A. Glass Cleaning.)
Note: Mark and note burner tube locations. They are not interchangeable (Figure 15.2).
| Back |
|
| LH |
|
|
| RH |
1 1/4 in. | 2 3/8 in. | 1 7/8 in. |
LH Burner Tube | Back Burner Tube | RH Burner Tube |
Figure 15.2 Burner Tube ID
B. Clean the Appliance
Clean/vacuum any sawdust that may have accumulated inside the firebox or underneath in the control cavity.
Heat & Glo • LUX60 • | 49 |