8Installing Vent Pipe
A. Assemble Vent Sections
This
![]() WARNING
WARNING
Fire Risk
Exhaust Fumes Risk
Impaired Performance of Appliance.
•Assemble pipe sections per
•Use support tabs for screws.
•Pipe may separate if not properly joined.
C. Securing Vent Sections
Secure vent sections with vent supports following
![]() WARNING
WARNING
Fire Risk
Explosion Risk
Asphyxiation Risk
Use vent run supports per vent manufacturer’s installation instructions.
Connect vent sections per vent manufacturer’s installation instructions.
•Maintain all clearances to combustibles.
•Maintain specifi ed slope (if required). Improper support may allow vent to sag or separate.
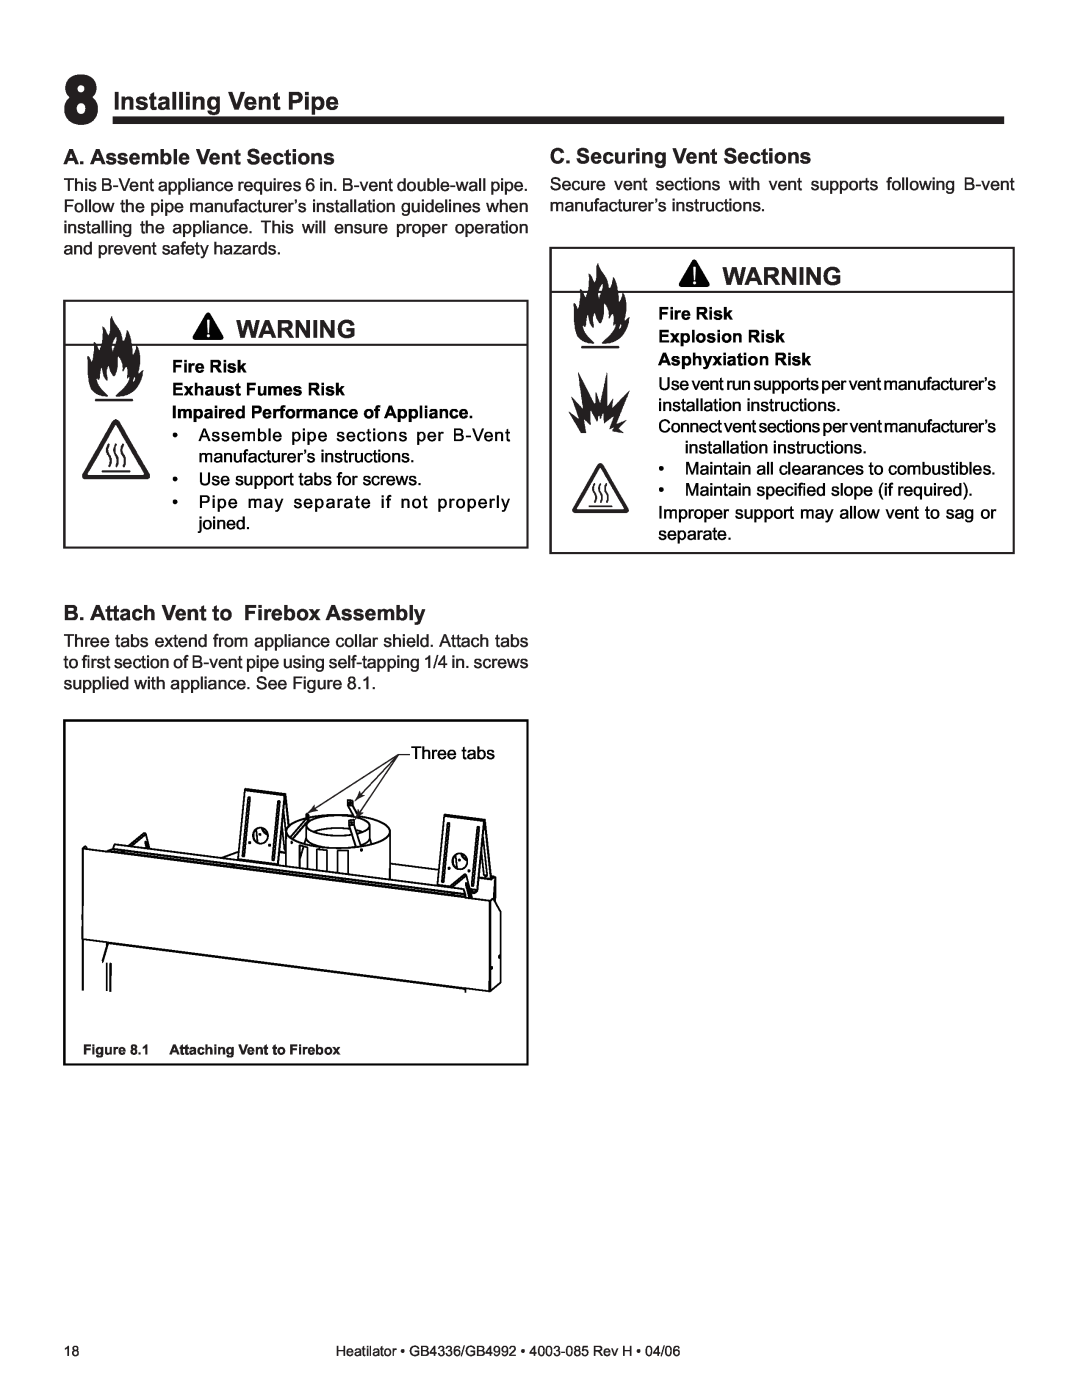
B. Attach Vent to Firebox Assembly
Three tabs extend from appliance collar shield. Attach tabs to fi rst section of
Three tabs
Figure 8.1 Attaching Vent to Firebox
18 | Heatilator • GB4336/GB4992 • |