7 | Appliance Preparation |
|
|
|
|
|
|
|
|
| |
|
|
|
|
| |
| CAUTION |
|
| CAUTION | |
|
|
| Risk of Smoke Spillage | ||
| Sharp Edges |
| |||
|
| Outside air inlet must be located to prevent blockage | |||
| • Wear protective gloves |
| |||
| and safety glasses during |
| from: |
|
|
| installation. |
| • | Leaves | |
|
|
| • | Snow/ice | |
A. Installing Outside Air Kit Damper Assembly |
| • | Other debris | ||
| Blockage may cause combustion air starvation. | ||||
|
|
| |||
|
|
|
|
|
|
![]() WARNING
WARNING
Fire Risk
Asphyxiation Risk
Maintain vent clearance to combustibles as specifi ed.
•Do not pack air space with insulation or other materials.
•National building codes recommend using attic shield to keep loose materials/ insulation from contacting vent.
Failure to keep insulation or other materials away from vent pipe may cause fi re.
This appliance will operate correctly only if adequate ventia- tion is provided to allow proper draft to the system.
An outside air kit is available as an optional feature with this appliance. An outside air kit helps to decrease the amount of room air taken by utilizing outside air for combustion. We strongly recommend that it be installed.
Note: The outside air kit inlet thimble should be positioned in a manner that will not allow snow, leaves, etc. to block the inlet. A 3 ft. (.91 m) minimum height difference must be maintained from the top of the uppemost chimney section to the outside combustion air inlet. Reference Section 2.
•The outside air kit can only be installed on the left side of the appliance.
•Refer to the installation instructions provided with the kit.
![]() WARNING
WARNING
Fire Risk
Asphyxiation Risk
Do not draw outside combustion air from:
•Wall, fl oor or ceiling cavity.
•Enclosed space such as an attic or garage.
•Close proximity to exhaust vents or chimneys.
Fumes or odor may result.
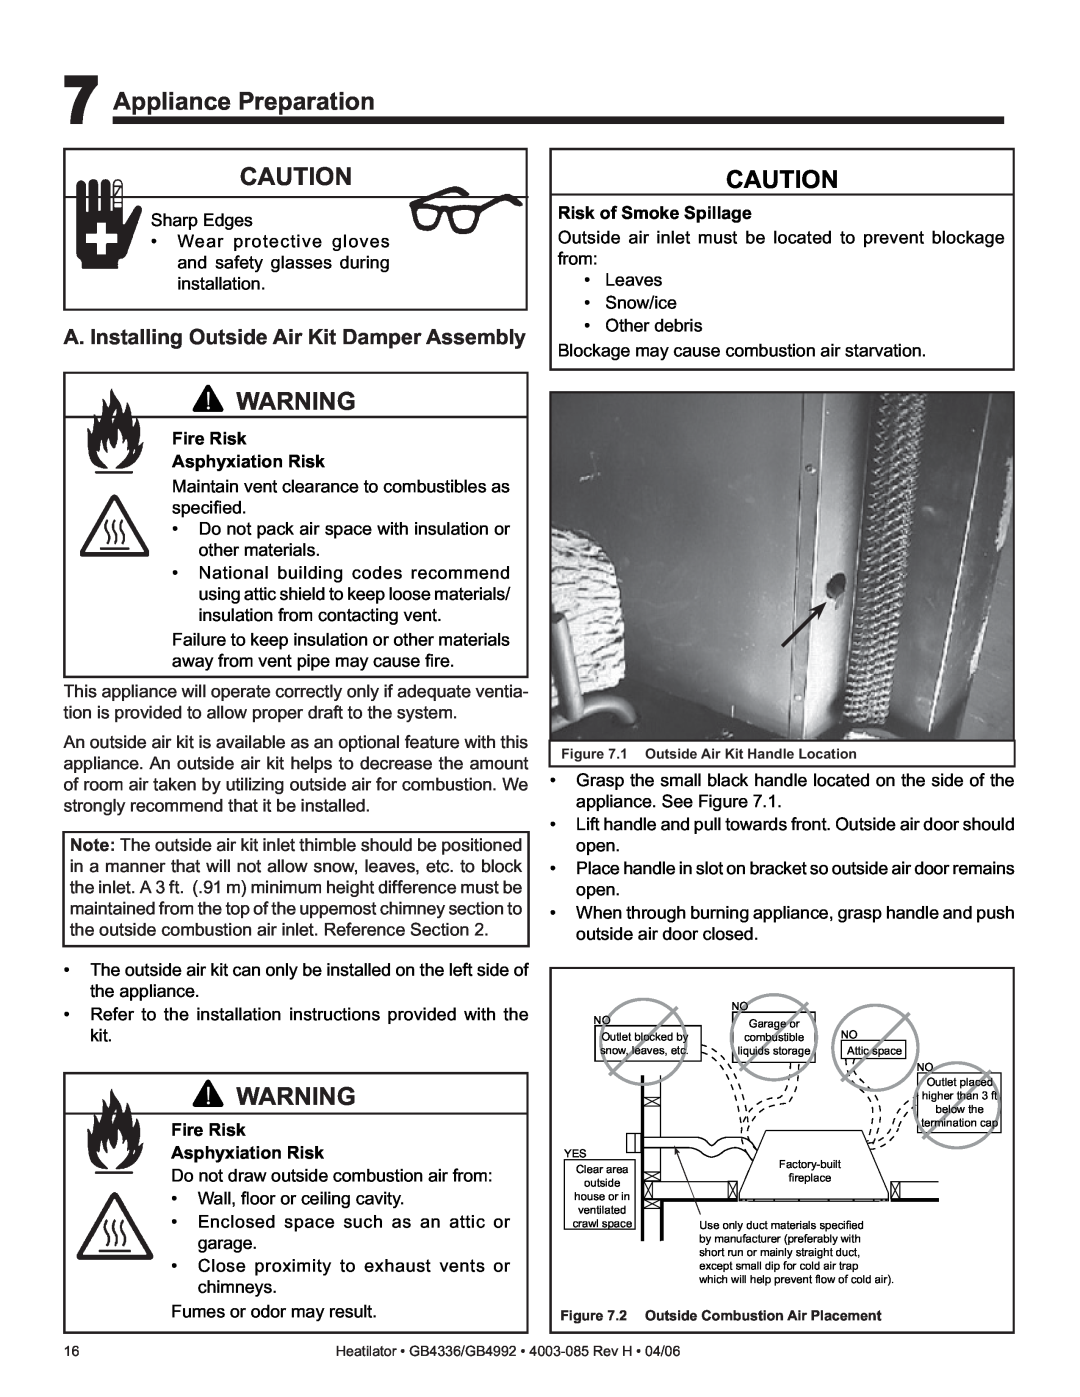
Figure 7.1 Outside Air Kit Handle Location
•Grasp the small black handle located on the side of the appliance. See Figure 7.1.
•Lift handle and pull towards front. Outside air door should open.
•Place handle in slot on bracket so outside air door remains open.
•When through burning appliance, grasp handle and push outside air door closed.
| NO |
|
NO | Garage or |
|
| NO | |
Outlet blocked by | combustible | |
snow, leaves, etc. | liquids storage | Attic space |
NO
Outlet placed
higher than 3 ft
below the
termination cap
YES | ||
Clear area | ||
fireplace | ||
outside | ||
| ||
house or in |
| |
ventilated |
| |
crawl space | Use only duct materials specified | |
| by manufacturer (preferably with | |
| short run or mainly straight duct, | |
| except small dip for cold air trap | |
| which will help prevent flow of cold air). |
Figure 7.2 Outside Combustion Air Placement
16 | Heatilator • GB4336/GB4992 • |
