HotBrick Network Solutions
Rear Panel Load Balancer LB-2
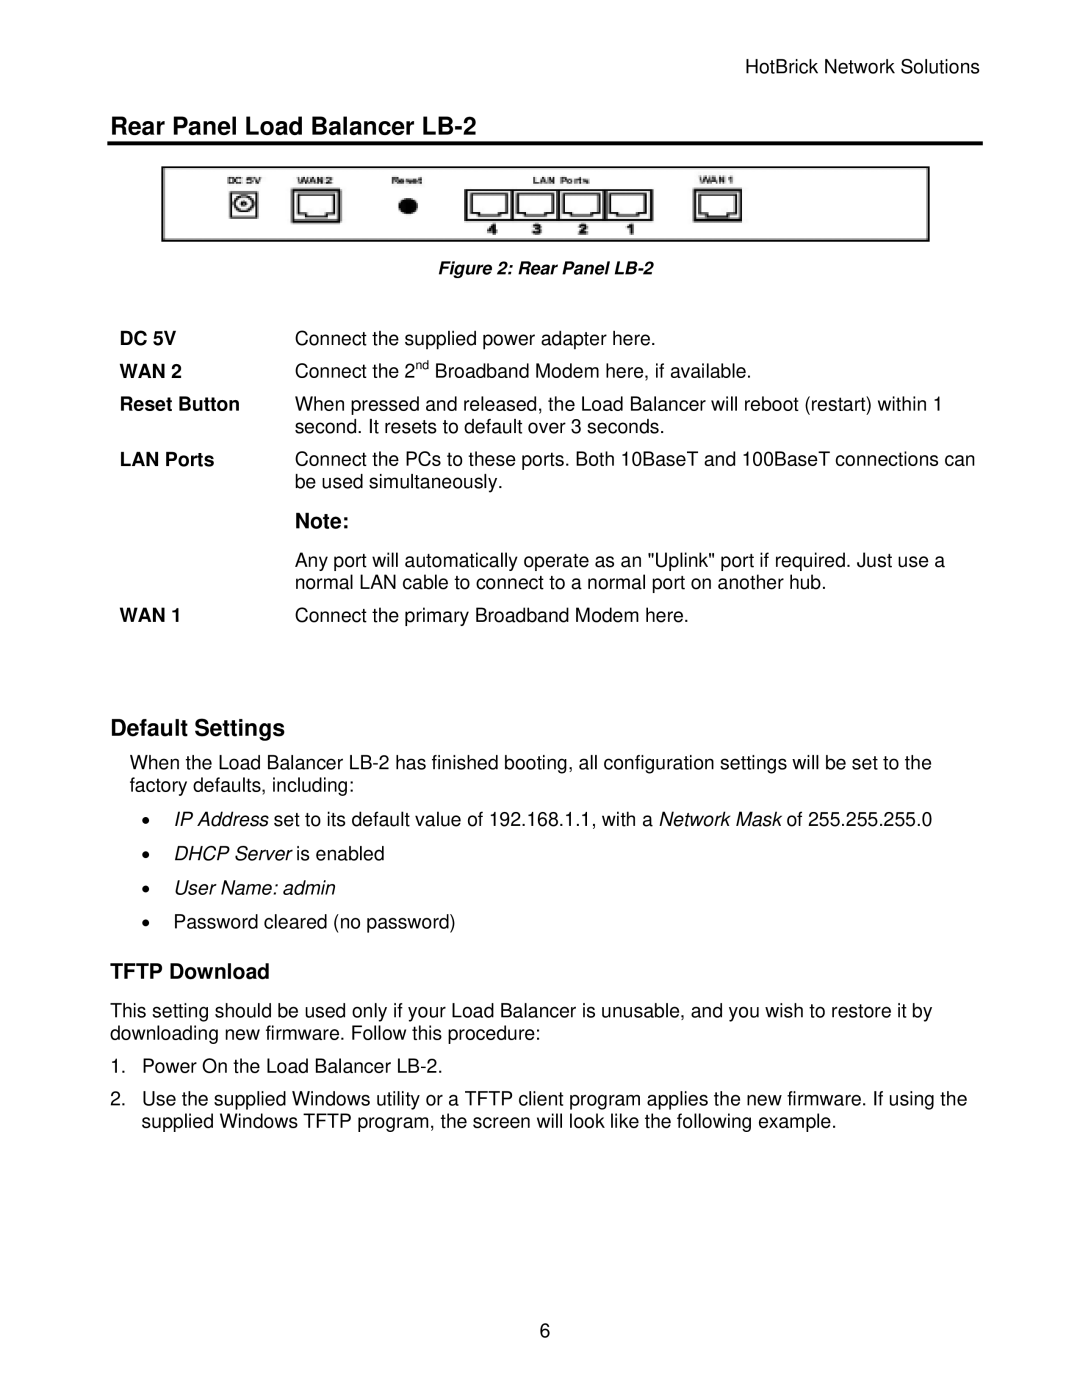
| Figure 2: Rear Panel |
DC 5V | Connect the supplied power adapter here. |
WAN 2 | Connect the 2nd Broadband Modem here, if available. |
Reset Button | When pressed and released, the Load Balancer will reboot (restart) within 1 |
| second. It resets to default over 3 seconds. |
LAN Ports | Connect the PCs to these ports. Both 10BaseT and 100BaseT connections can |
| be used simultaneously. |
| Note: |
| Any port will automatically operate as an "Uplink" port if required. Just use a |
| normal LAN cable to connect to a normal port on another hub. |
WAN 1 | Connect the primary Broadband Modem here. |
Default Settings
When the Load Balancer
•IP Address set to its default value of 192.168.1.1, with a Network Mask of 255.255.255.0
•DHCP Server is enabled
•User Name: admin
•Password cleared (no password)
TFTP Download
This setting should be used only if your Load Balancer is unusable, and you wish to restore it by downloading new firmware. Follow this procedure:
1.Power On the Load Balancer
2.Use the supplied Windows utility or a TFTP client program applies the new firmware. If using the supplied Windows TFTP program, the screen will look like the following example.
6