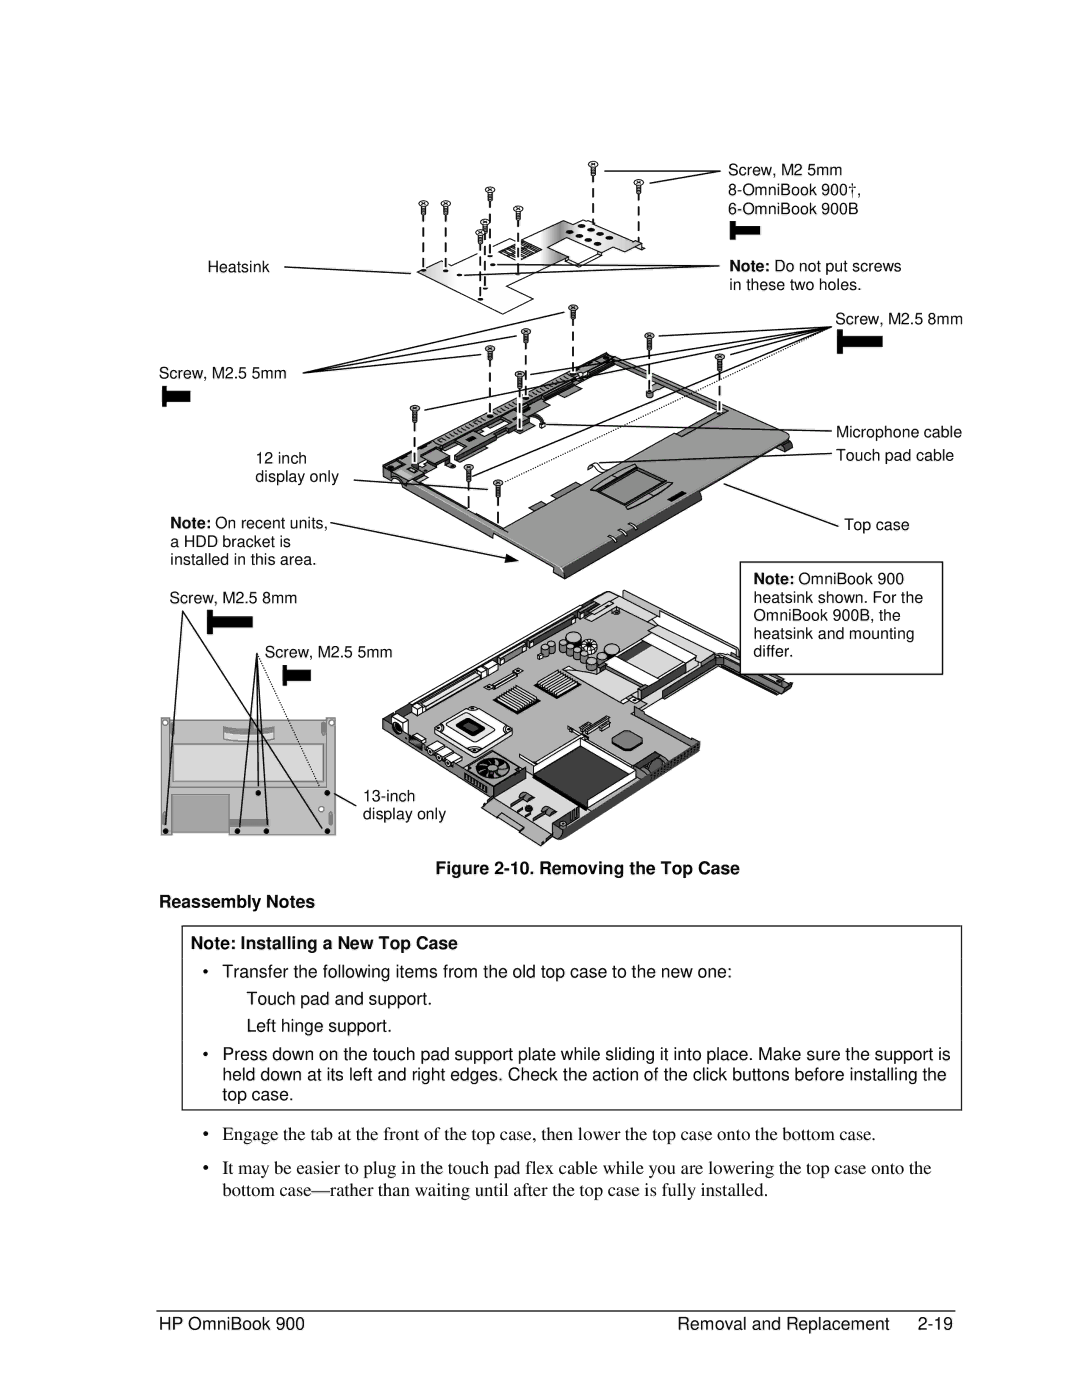
Heatsink
Screw, M2.5×5mm
12 inch display only
Note: On recent units, a HDD bracket is installed in this area.
Screw, M2.5×8mm
Screw, M2.5×5mm
Screw, M2×5mm
Note: Do not put screws in these two holes.
Screw, M2.5×8mm
Microphone cable
Touch pad cable
Top case
Note: OmniBook 900† heatsink shown. For the OmniBook 900B, the heatsink and mounting differ.
Figure 2-10. Removing the Top Case
Reassembly Notes
Note: Installing a New Top Case
∙Transfer the following items from the old top case to the new one: Touch pad and support.
Left hinge support.
∙Press down on the touch pad support plate while sliding it into place. Make sure the support is held down at its left and right edges. Check the action of the click buttons before installing the top case.
∙Engage the tab at the front of the top case, then lower the top case onto the bottom case.
∙It may be easier to plug in the touch pad flex cable while you are lowering the top case onto the bottom
HP OmniBook 900 | Removal and Replacement |