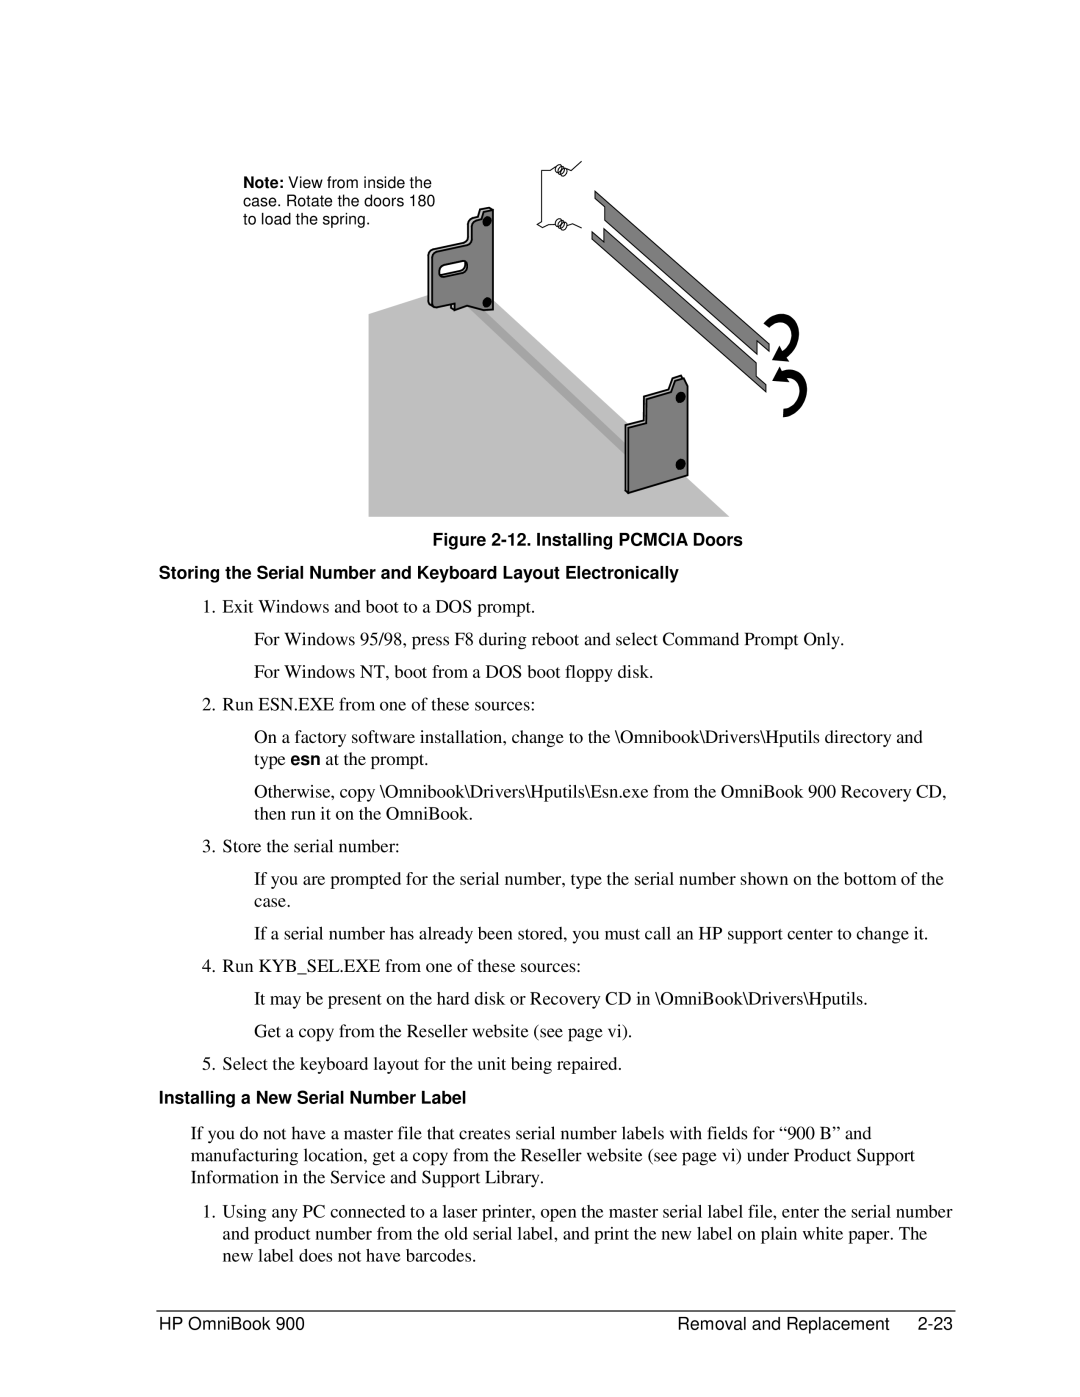
Note: View from inside the case. Rotate the doors 180° to load the spring.
Figure 2-12. Installing PCMCIA Doors
Storing the Serial Number and Keyboard Layout Electronically
1. Exit Windows and boot to a DOS prompt.
For Windows 95/98, press F8 during reboot and select Command Prompt Only.
For Windows NT, boot from a DOS boot floppy disk.
2. Run ESN.EXE from one of these sources:
On a factory software installation, change to the \Omnibook\Drivers\Hputils directory and type esn at the prompt.
çOtherwise, copy \Omnibook\Drivers\Hputils\Esn.exe from the OmniBook 900 Recovery CD, then run it on the OmniBook.
3.Store the serial number:
If you are prompted for the serial number, type the serial number shown on the bottom of the case.
If a serial number has already been stored, you must call an HP support center to change it.
4. Run KYB_SEL.EXE from one of these sources:
It may be present on the hard disk or Recovery CD in \OmniBook\Drivers\Hputils.
çGet a copy from the Reseller website (see page vi).
5.Select the keyboard layout for the unit being repaired.
Installing a New Serial Number Label
If you do not have a master file that creates serial number labels with fields for “900 B” and manufacturing location, get a copy from the Reseller website (see page vi) under Product Support Information in the Service and Support Library.
1.Using any PC connected to a laser printer, open the master serial label file, enter the serial number and product number from the old serial label, and print the new label on plain white paper. The new label does not have barcodes.
HP OmniBook 900 | Removal and Replacement |