Connecting Directly to a PictBridge Compatible Printer
You can connect the camera directly to a printer that supports PictBridge and print photos without going through a computer.
•To set up the camera before connecting to a printer
1.Turn on the camera. Next, press [SET] and then display the REC menu (page 52) or the PLAY menu (page 66).
2.On the “Set Up” tab, select “USB” and then press [ ![]() ].
].
3.Use [![]() ] and [
] and [ ![]() ] to select “PTP (PictBridge)”, and then press [SET].
] to select “PTP (PictBridge)”, and then press [SET].
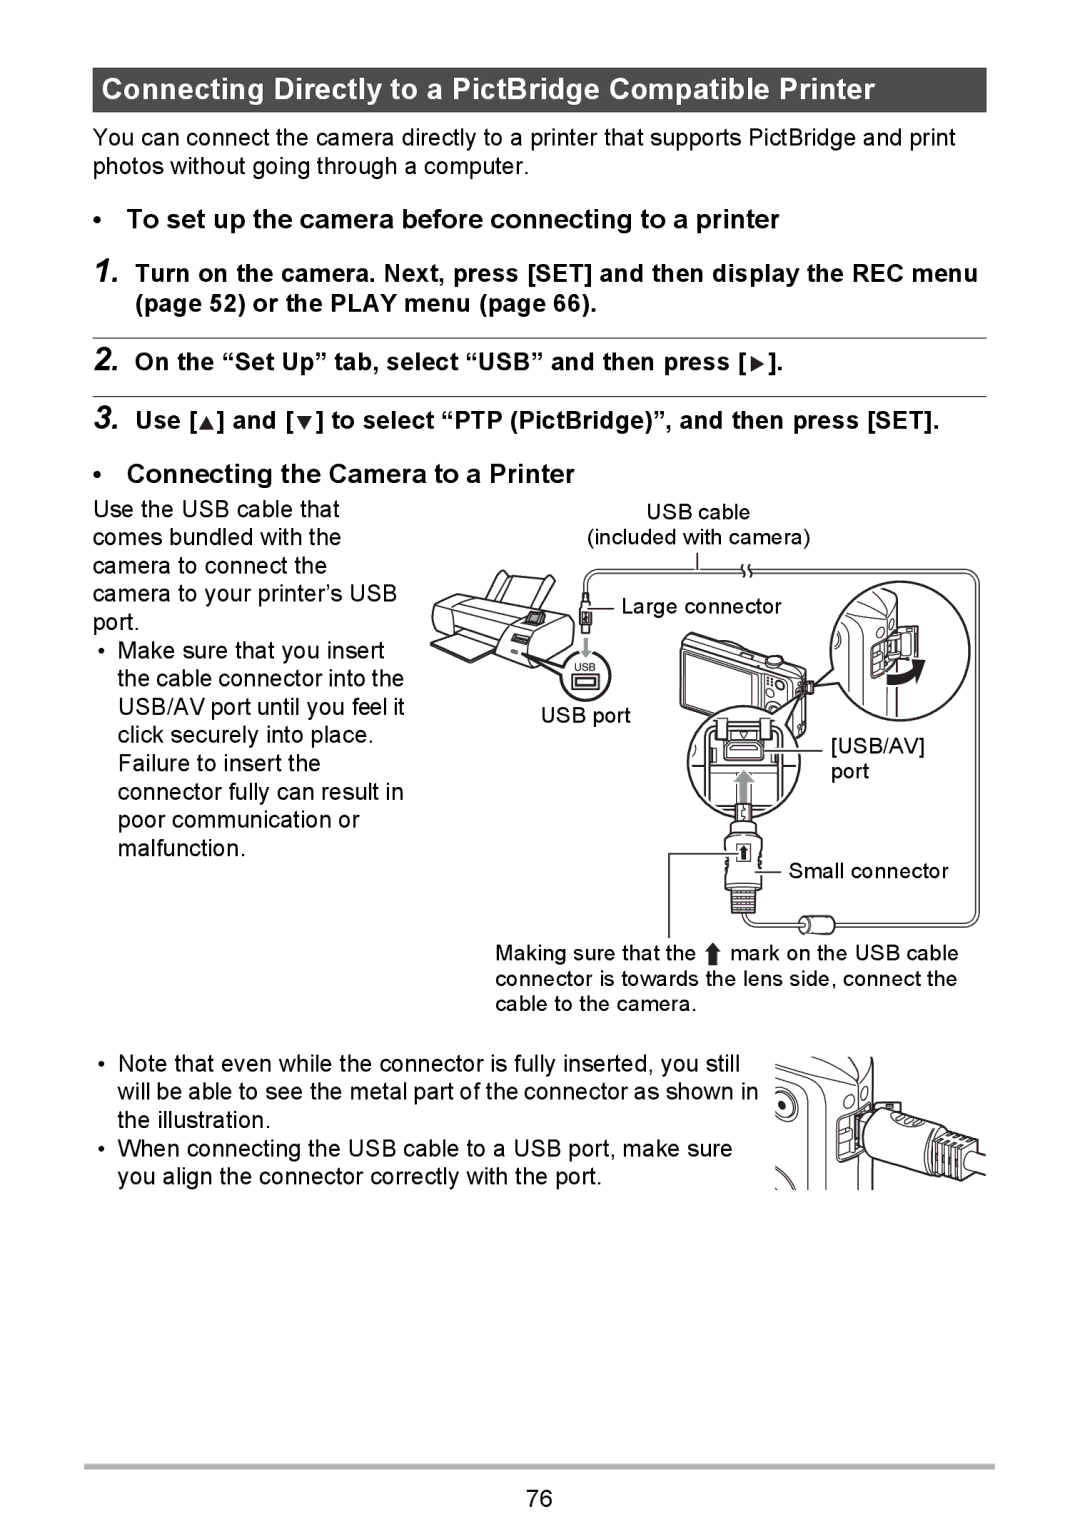
•Connecting the Camera to a Printer
Use the USB cable that comes bundled with the camera to connect the camera to your printer’s USB port.
•Make sure that you insert the cable connector into the USB/AV port until you feel it click securely into place. Failure to insert the connector fully can result in poor communication or malfunction.
USB cable
(included with camera) 
![]() Large connector
Large connector
USB port
![]() [USB/AV] port
[USB/AV] port
![]() Small connector
Small connector
Making sure that the mark on the USB cable connector is towards the lens side, connect the cable to the camera.
•Note that even while the connector is fully inserted, you still will be able to see the metal part of the connector as shown in the illustration.
•When connecting the USB cable to a USB port, make sure you align the connector correctly with the port.
76