3.Disconnect the power from the computer by first unplugging the power cord from the AC outlet and then unplugging the AC adapter from the computer.
4.Remove the battery (see Battery on page 46).
5.Remove the service door (see Service door on page 48).
6.Remove the optical drive (see Optical drive on page 57) or upgrade bay hard drive (see Upgrade bay hard drive on page 59).
7.Remove the keyboard (see Keyboard on page 63).
8.Remove the top cover (see Top cover on page 72).
9.Remove the graphics board fan/heat sink assembly (see Graphics board fan/heat sink assembly on page 100).
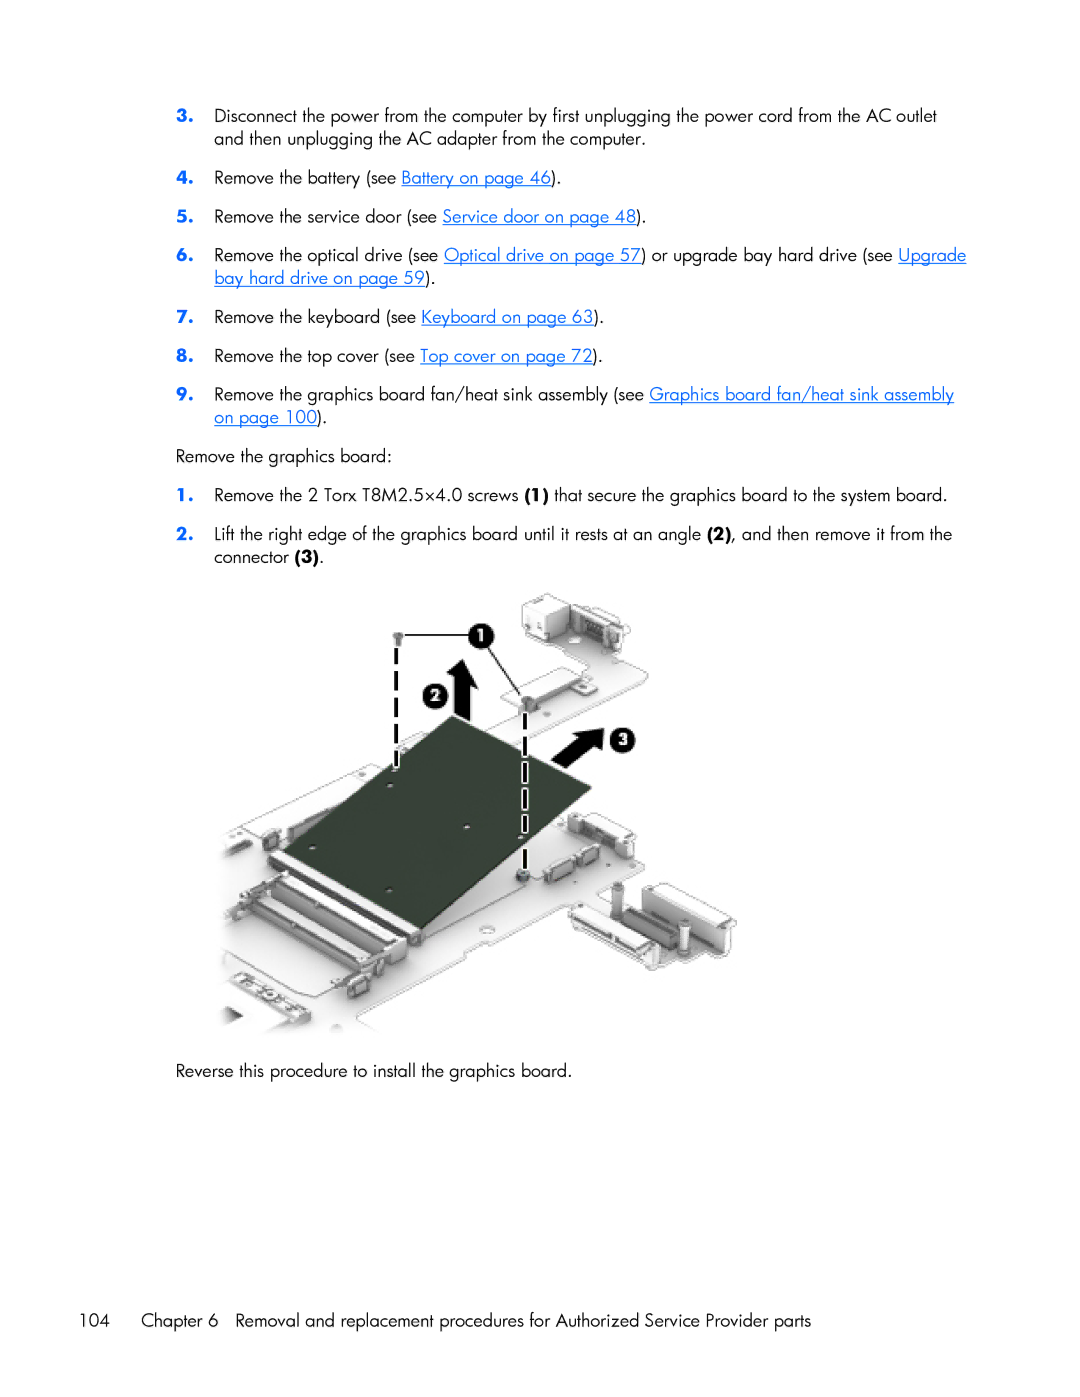
Remove the graphics board:
1.Remove the 2 Torx T8M2.5×4.0 screws (1) that secure the graphics board to the system board.
2.Lift the right edge of the graphics board until it rests at an angle (2), and then remove it from the connector (3).
Reverse this procedure to install the graphics board.
104 | Chapter 6 Removal and replacement procedures for Authorized Service Provider parts |