SECTION 10—REAR SHROUD
SECTION 10—REAR SHROUD
WARNING
After ANY adjustments, repair or service and BEFORE use, make sure that all attaching hardware is tightened securely - otherwise injury or damage may result.
Before performing any maintenance, adjustment or service, turn power OFF and remove key from ignition.
REMOVING/INSTALLING THE REAR SHROUD
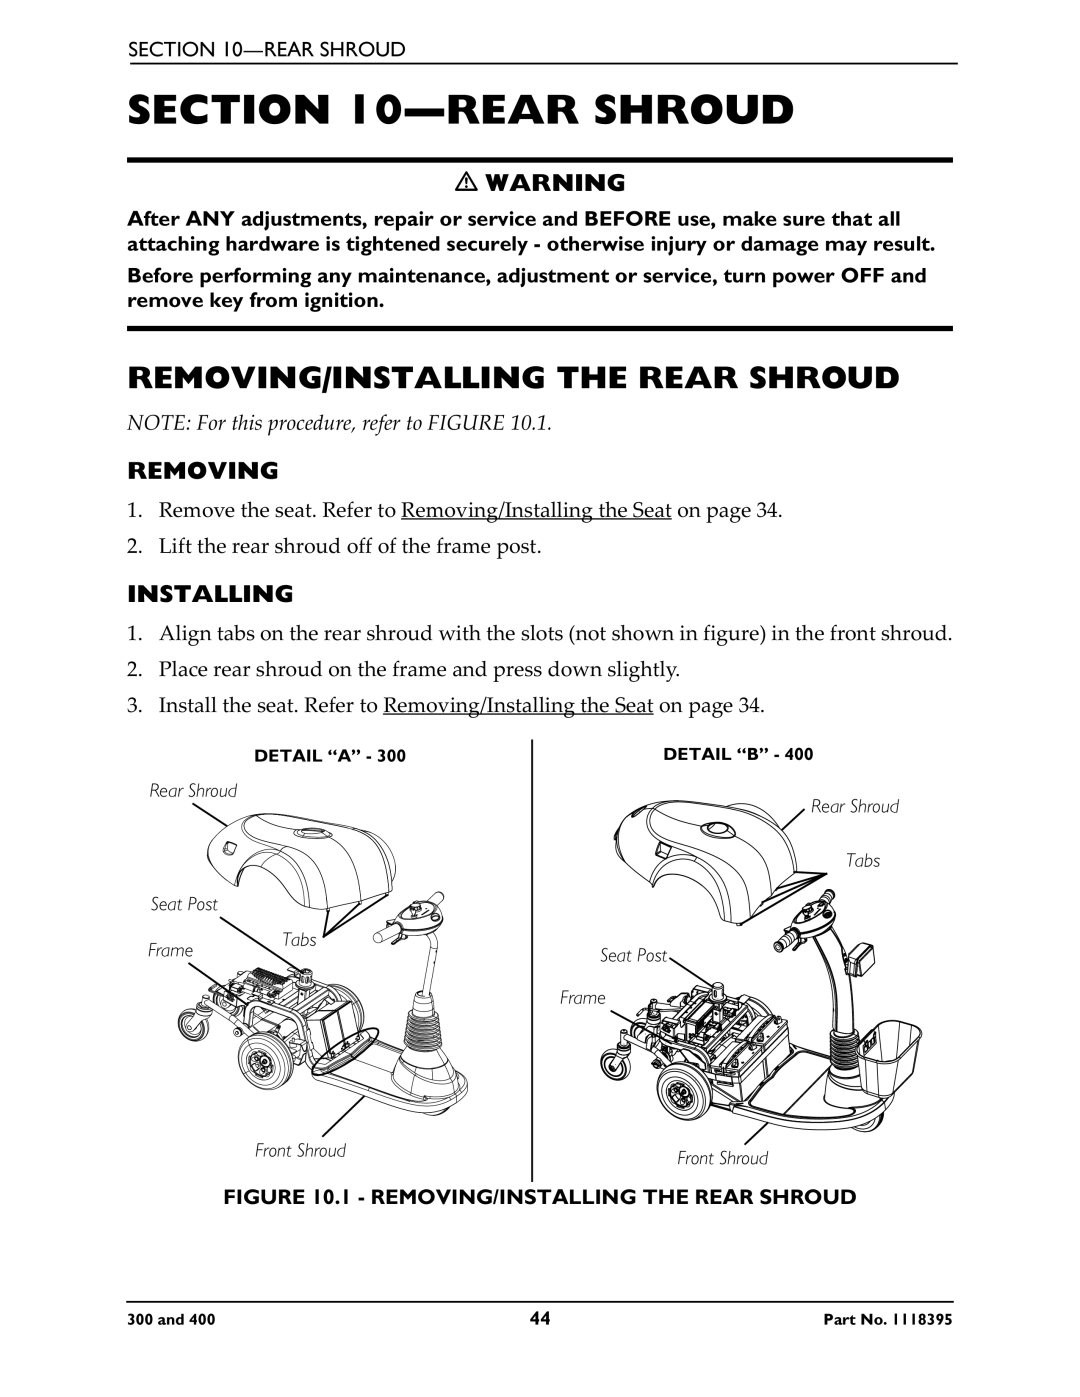
NOTE: For this procedure, refer to FIGURE 10.1.
REMOVING
1.Remove the seat. Refer to Removing/Installing the Seat on page 34.
2.Lift the rear shroud off of the frame post.
INSTALLING
1.Align tabs on the rear shroud with the slots (not shown in figure) in the front shroud.
2.Place rear shroud on the frame and press down slightly.
3.Install the seat. Refer to Removing/Installing the Seat on page 34.
DETAIL “A” - 300
Rear Shroud
Seat Post
DETAIL “B” - 400
Rear Shroud
Tabs
Frame
Tabs
Seat Post
Frame
Front Shroud
Front Shroud
FIGURE 10.1 - REMOVING/INSTALLING THE REAR SHROUD
300 and 400 | 44 | Part No. 1118395 |
