4 FIXED DUAL MOUNT
4.4Installing the Angle Adjustable Brackets onto the Back Shell
1.Remove any existing wheelchair back, back upholstery or back cane hardware.
2.Remove the four hex screws A and washers (not shown) securing the two backing plates B to the angle adjustable bracket C.
3.Align the angle adjustable bracket with the slots D on one side of the back shell E.
The angle adjustable bracket should be oriented with the four slots F against the back shell.
4.Place the four washers onto the hex screws.
5.Loosely attach the angle adjustable bracket to the back shell using the two backing plates, four hex screws and four washers. Do not tighten the hex screws at this time.
6.Repeat STEPS
4.5Clamp Body Adjustment
The clamp body is
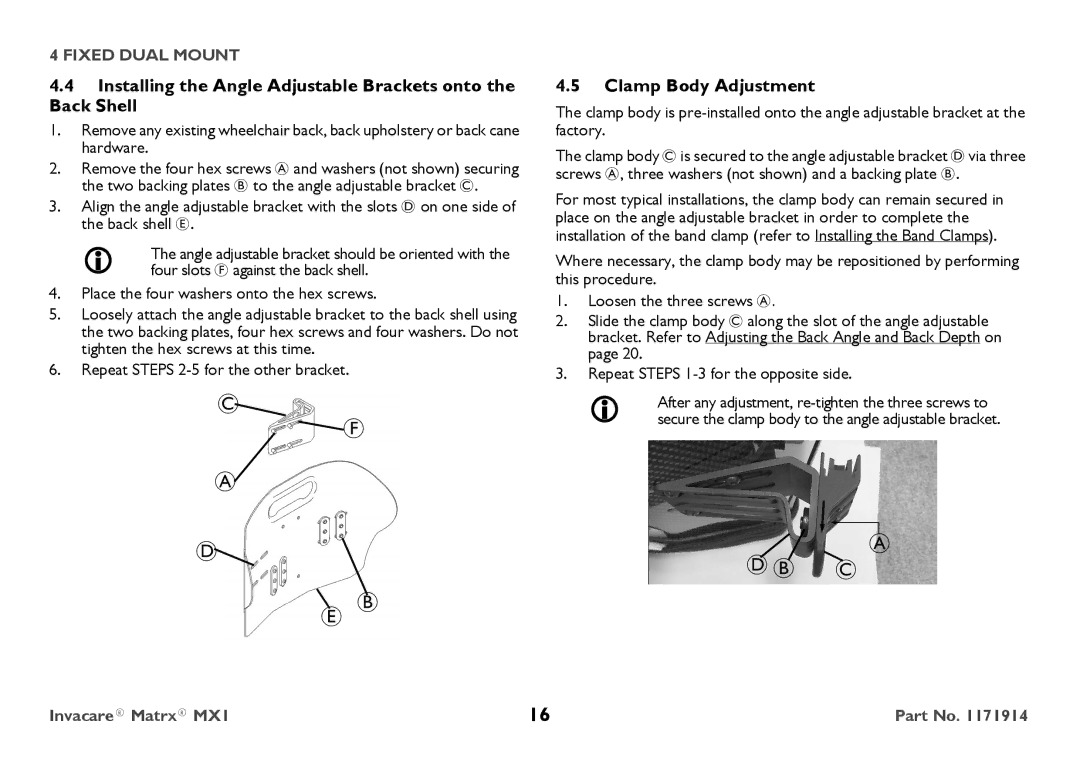
The clamp body C is secured to the angle adjustable bracket D via three screws A, three washers (not shown) and a backing plate B.
For most typical installations, the clamp body can remain secured in place on the angle adjustable bracket in order to complete the installation of the band clamp (refer to Installing the Band Clamps).
Where necessary, the clamp body may be repositioned by performing this procedure.
1. | Loosen the three screws A. |
2. | Slide the clamp body C along the slot of the angle adjustable |
| bracket. Refer to Adjusting the Back Angle and Back Depth on |
| page 20. |
3. | Repeat STEPS |
C
A![]()
![]()
![]()
![]() F
F
| After any adjustment, |
secure the clamp body to the angle adjustable bracket. |
D![]()
E B
D B C
A
Invacare® Matrx® MX1 | 16 | Part No. 1171914 |