BACK
SECTION 3 | BACK |
|
|
Replacing Top End Back Upholstery.
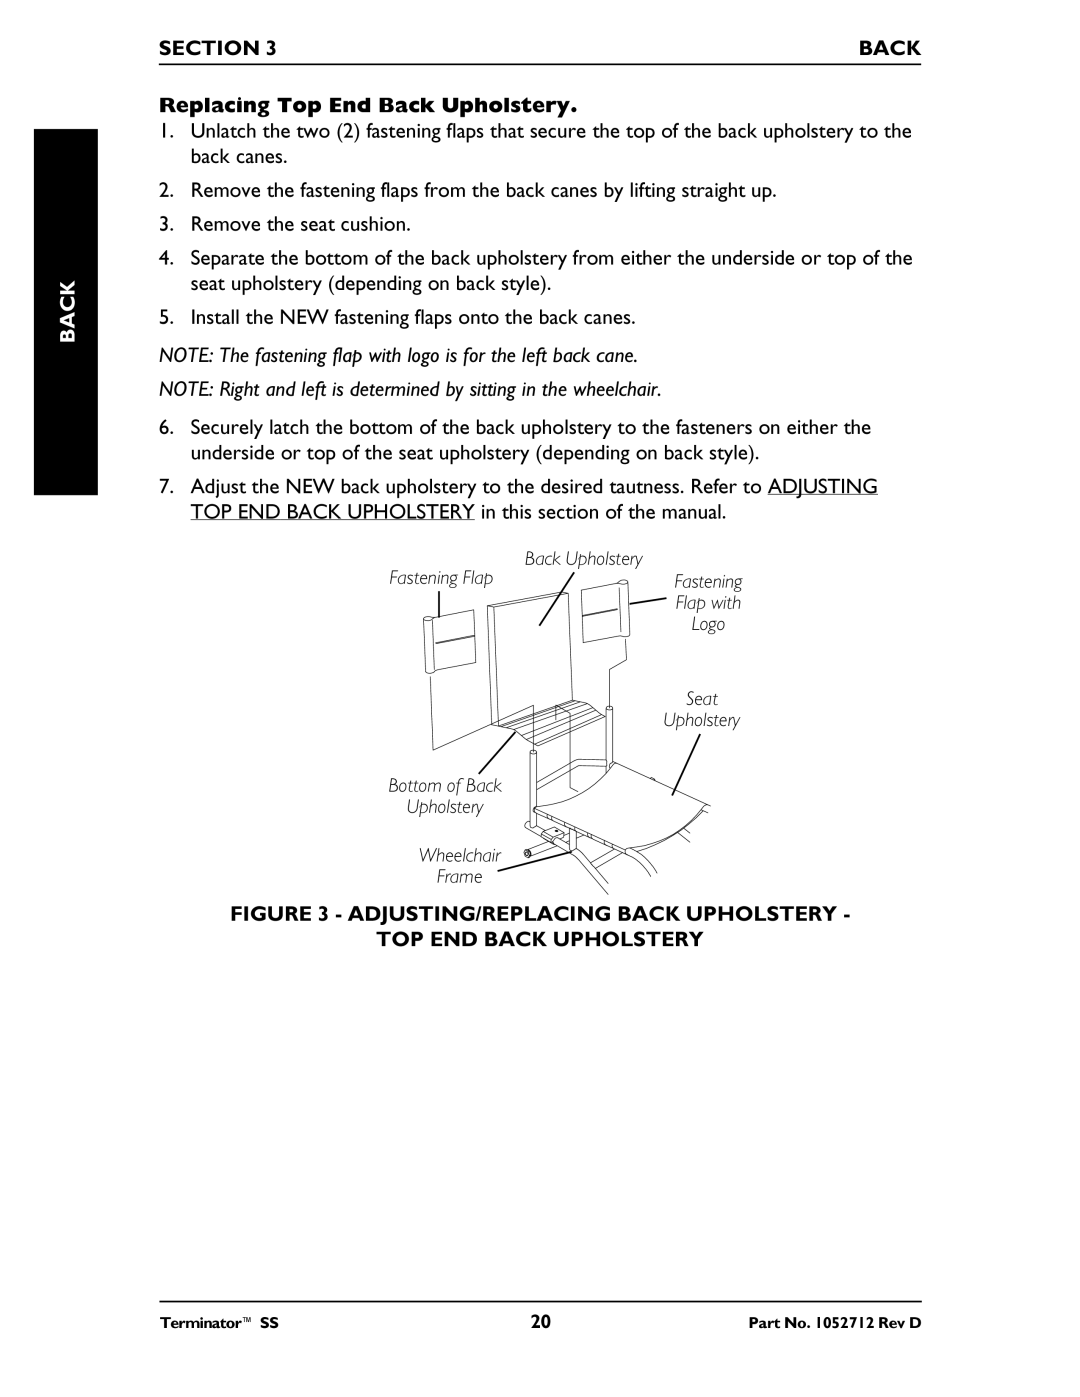
1.Unlatch the two (2) fastening flaps that secure the top of the back upholstery to the back canes.
2.Remove the fastening flaps from the back canes by lifting straight up.
3.Remove the seat cushion.
4.Separate the bottom of the back upholstery from either the underside or top of the seat upholstery (depending on back style).
5.Install the NEW fastening flaps onto the back canes.
NOTE: The fastening flap with logo is for the left back cane.
NOTE: Right and left is determined by sitting in the wheelchair.
6.Securely latch the bottom of the back upholstery to the fasteners on either the underside or top of the seat upholstery (depending on back style).
7.Adjust the NEW back upholstery to the desired tautness. Refer to ADJUSTING TOP END BACK UPHOLSTERY in this section of the manual.
Fastening Flap | Back Upholstery |
Fastening | |
| Flap with |
| Logo |
| Seat |
| Upholstery |
Bottom of Back
Upholstery
Wheelchair
Frame
FIGURE 3 - ADJUSTING/REPLACING BACK UPHOLSTERY -
TOP END BACK UPHOLSTERY
Terminator™ SS | 20 | Part No. 1052712 Rev D |
